Setup Account Groups : In order to define the party or account groups follow the under mentioned steps :-
1.
|
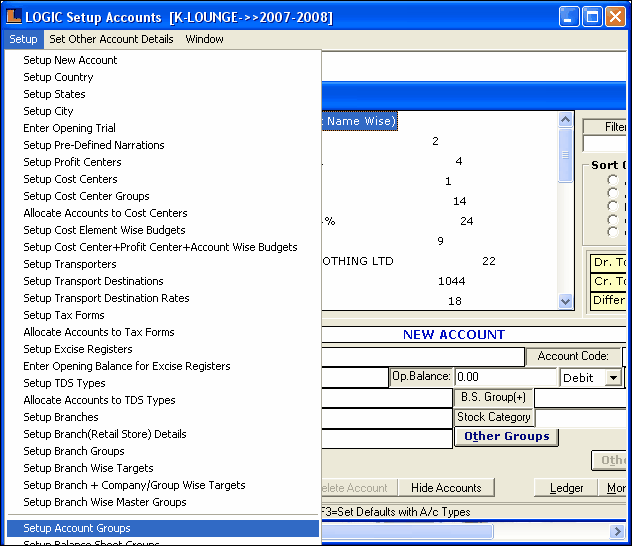
Click the Setup Option.
|
2.
|
Select the Setup Account Groups option from the list.
|
|
3. Tree View of Accounts Groups New window appears.
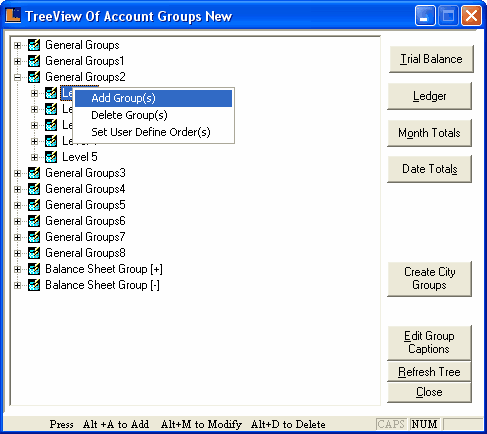
4. This form allows you to group the accounts master according to your needs.
A tree view of account groups consist of nine horizontal groups of different levels and two balance sheet groups. All the horizontal groups are independent and are not related each other. Each horizontal group further consists of five subgroups. These subgroups are known as vertical groups. These vertical groups are related to each other and depend upon each other. We create a vertical group and customers are allocated to it. The customers allocated to one vertical group can't be allocated to another vertical group within the same level. The customers allocated to a vertical group in first level can be allocated to the other vertical group in second level. Similarly customers allocated in second level can be allocated to the third level and so on.
?
|
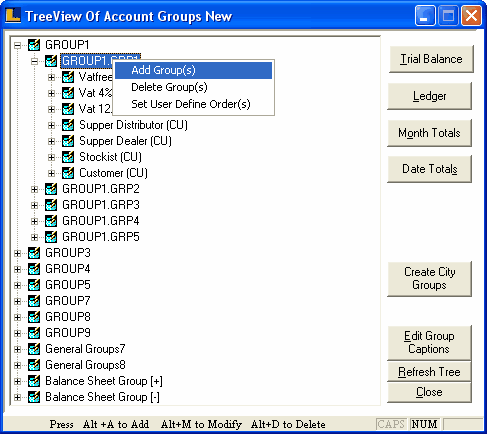
How to add a new group : Right click on a group > select Add Group(s) from the popup menu.
|
New Group dialog box appears > enter the details > click on save.
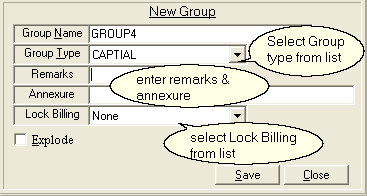
New Group Dialog Box
?
|
How to delete a group : Right click on a group > select Delete Group(s) from the popup menu > Remove Groups dialog box appears > select the required groups > click ok .
|
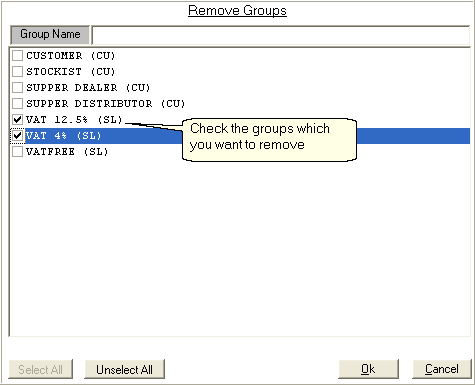
Remove Groups Dialog Box
?
|
How to set user define order(s) : Right click on a group > select set user define order(s) from the popup menu > set user define order dialog appears > select the required groups > click ok.
|
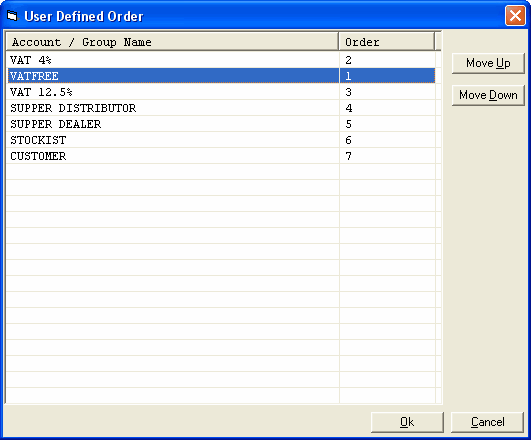
User Define Dialog Box
|
?
|
How to add Sub Groups : Right click on a Sub Group > select Add Sub Group(s) from the popup menu > Allocate Accounts dialog box > select the required accounts > click ok.
|
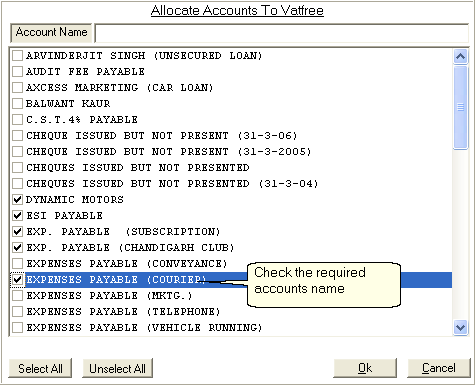
Allocates Accounts dialog Box
?
|
How To Delete Sub Group : Right click on a Sub Group > select delete sub group(s) from the popup menu > De-Allocate dialog box appears > select the required accounts > click ok .
|
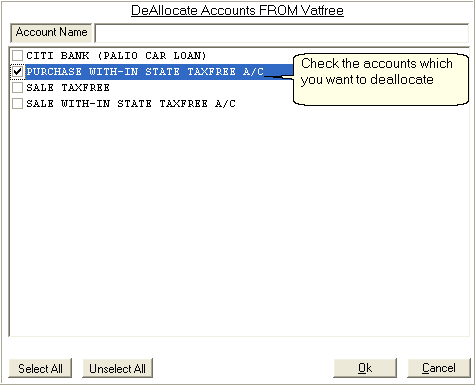
De-Allocate Accounts Dialog Box
?
|
How to modify groups : Right click on a Sub Group > select Modify Sub Group(s) from the popup menu > Modify Group dialog box > enter the details > to save modification click save .
|
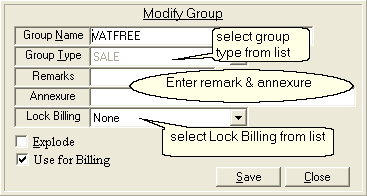
Modify Group Dialog Box
?
|
How to set user define order(s) : Right click on a Sub Group > select set user define order(s) from the popup menu > Set User Define Dialog Box > select the required groups > click ok.
|
|
?
|
Edit Group Captions : Click on Edit Group Caption button > Edit Account Group Captions dialog box > right click on the group which you want to edit > select the Rename from popup menu > edit the required group > click save.
|
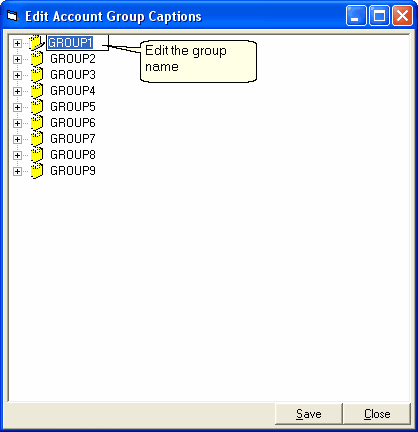
Edit Account Group Captions Dialog Box
?
|
Refresh Button : Click to refresh the tree.
|
?
|
Close Button : Click to exit.
|
?
|
Trial Balance : Click on Trial Balance button > Trial Balance dialog box appears showing the trial balance related to specific party.
|

Trial Balance Dialog Box
?
|
Ledger : Click on Ledger button > Ledger dialog box appears showing the Ledger related to specific party.
|
?
|
Months Total : Click on Months Total button > Months Wise Totals dialog box appears showing the Months wise Totals related to specific party.
|
?
|
Date Totals : Click on Date Total button > Date Wise Details dialog box appears showing the Date wise Details related to specific party.
|
?
|
Create City Groups : The city groups are created at second level of horizontal groups and allocated with customers.
|
|
|