1. Select the Sale Bill –> Configuration/Setup -> Sale Multiple Printing Configuration.
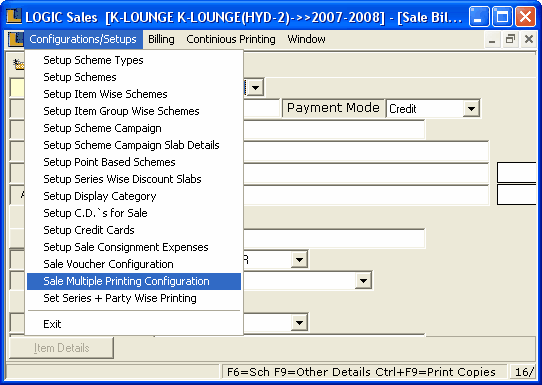
2. Sale Multiple Printing Configuration Window appears.
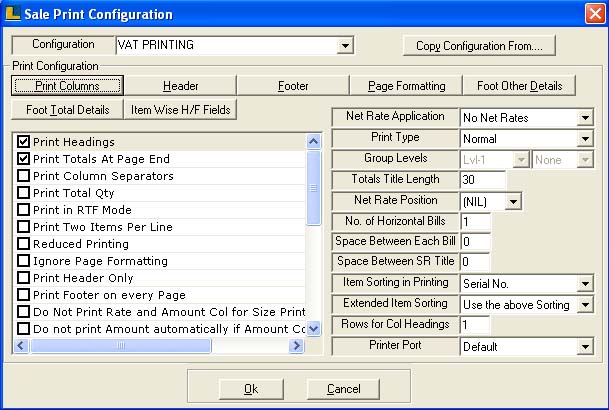
3. Enter the name of the configuration according to the requirements.
4. Now define the header by clicking Header button or press Alt+H.
5. Sale Bill Header window appears.
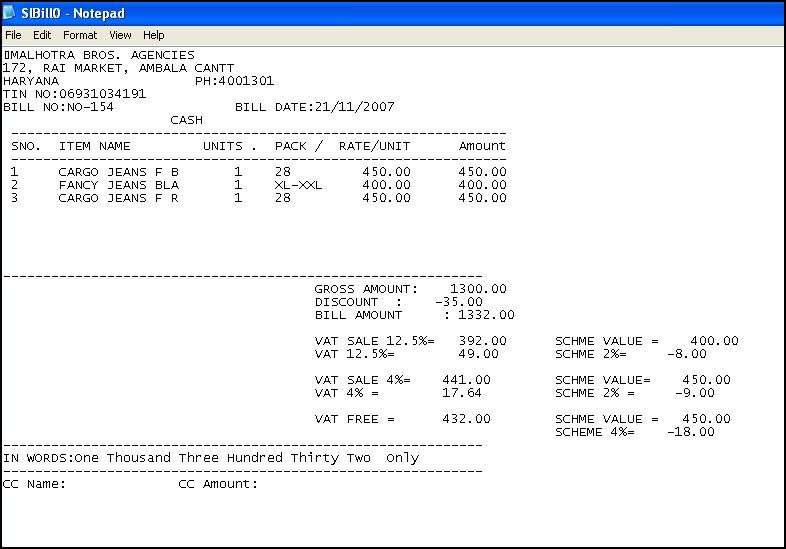
In header we select the option which we want to print on the top or header part of sale bill.Which included Name of company, Address, Tin No, Bill No & Date. Payment Mode etc.

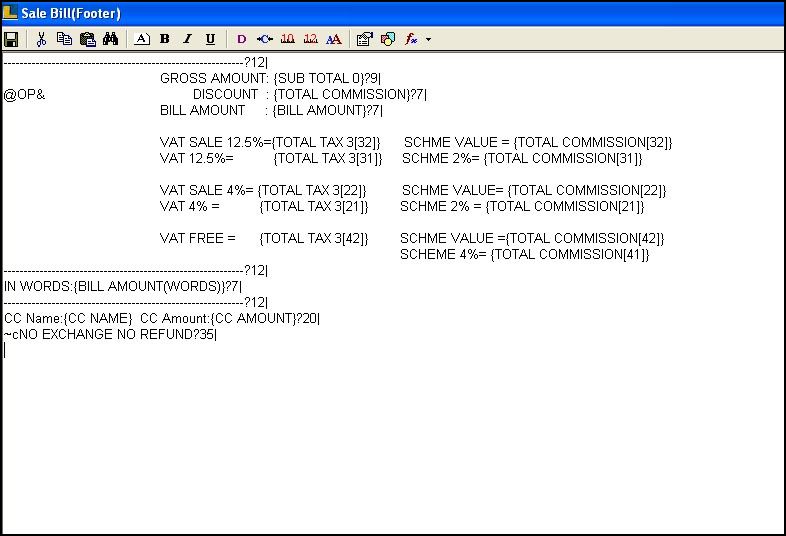
6. Next To Define The Footer :
In footer will enter those option which we want to enter in end or footer part of sale bill.like – Gross Amount, any Discount or any VAT Amount if included.
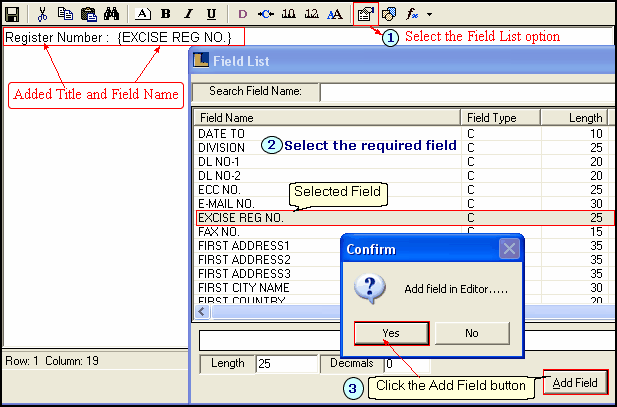
Following steps to enter the Arrays :
1.
|
Click the Add Field option.
|
2.
|
Add Field List window appears,select the TOTAL TAX 3 from the list.
|
3.
|
Click Add Field button and enter the Array Number as 21.
|
4.
|
VAT 4% : {TOTAL TAX 3[21]} field added in the Footer.Where this Array Number 21 links with Account Group.
|
5.
|
Here Array Number 21 is only the Order Define under Groups.
|
6.
|
VAT 4% represents only the VAT Value.Which is on VAT Sale Value.
|

1.
|
Click the Add Field option.
|
2.
|
Add Field List window appears,select the TOTAL TAX 3 from the list.
|
3.
|
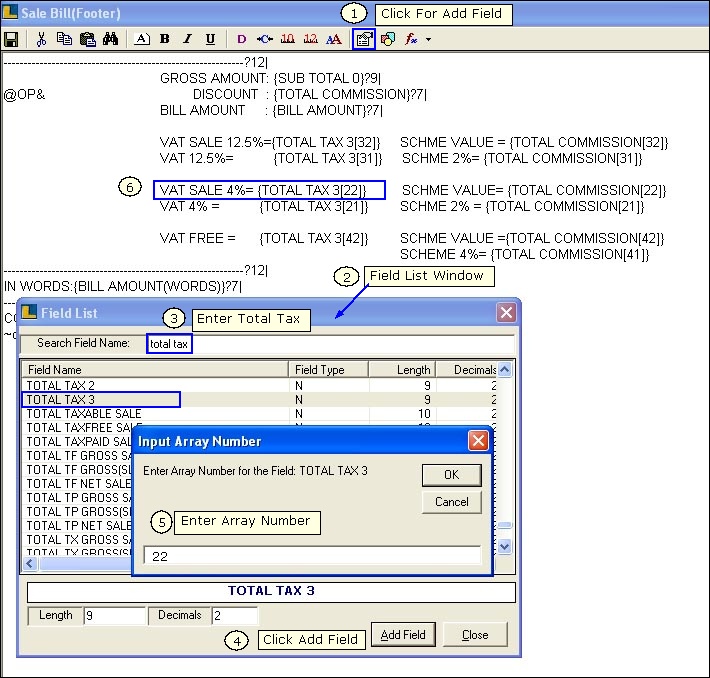
Click Add Field button and enter the Array Number as 22.
|
4.
|
VAT SALE 4 % : {TOTAL TAX 3[22]} field added in the Footer.Where this Array Number 22 links with Account Group.
|
5.
|
Here Array Number 22 is only the Order Define under Groups.
|
6.
|
VAT SALE 4% represents the Sale Value after deduction of discount.
|
1.
|
Click the Add Field option.
|
2.
|
Add Field List window appears,select the TOTAL TAX 3 from the list.
|
3.
|
Click Add Field button and enter the Array Number as 31.
|
4.
|
VAT 12.5% : {TOTAL TAX 3[31]} field added in the Footer.Where this Array Number 31 links with Account Group.
|
5.
|
Here Array Number 31 is only the Order Define under Groups.
|
6.
|
VAT 12.5% represents only the VAT Value.Which is on VAT Sale Value.
|

1.
|
Click the Add Field option.
|
2.
|
Add Field List window appears,select the TOTAL TAX 3 from the list.
|
3.
|
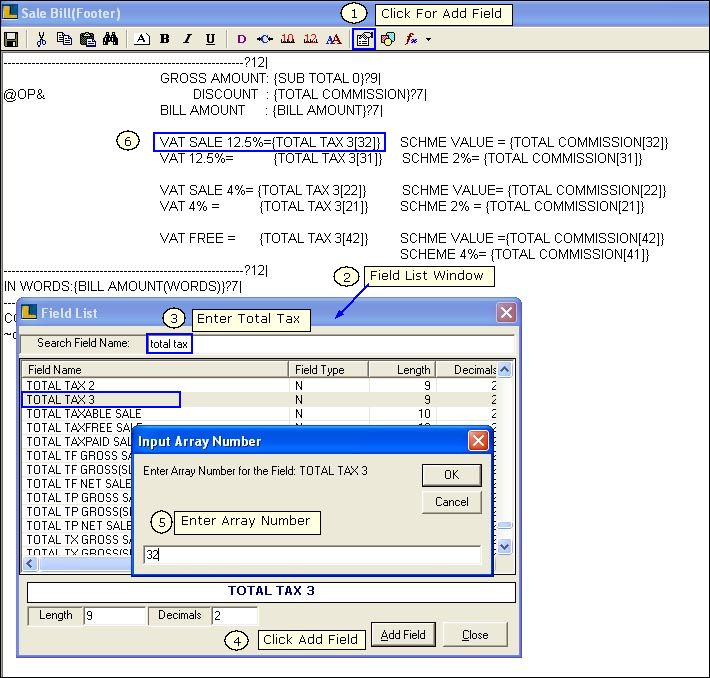
Click Add Field button and enter the Array Number as 32.
|
4.
|
VAT SALE 12.5% : {TOTAL TAX 3[32]} field added in the Footer.Where this Array Number 32 links with Account Group.
|
5.
|
Here Array Number 32 is only the Order Define under Groups.
|
6.
|
VAT SALE 12.5% represents the Sale Value after deduction of discount.
|
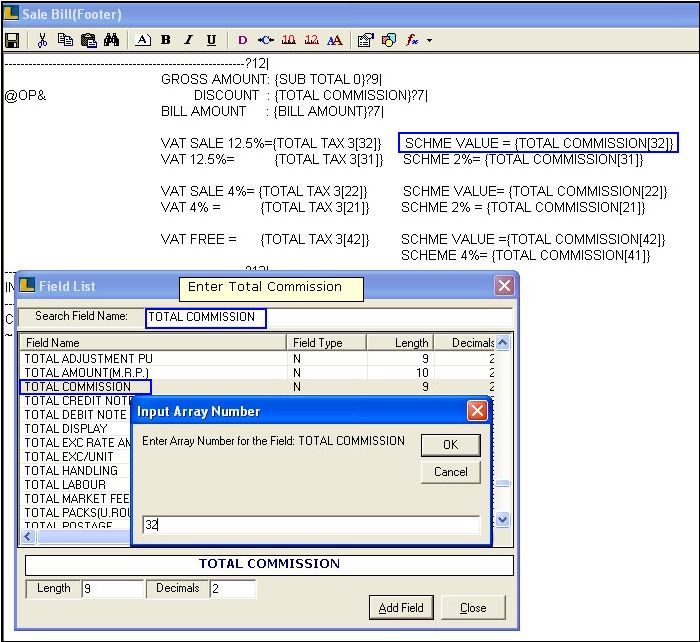
If there is a discount applicable on the bill select TOTAL COMMISSION from the Field List.Where SCHEME VALUE or GROSS VALUE represents the Gross Value and SCHEME 2% represents the amount deducted on Gross Value or Scheme Value.
7. These Arrays allocates to the following Account Groups.
•
|
Sale VAT 4% having Array Number 21 represents the Sale Value after deducting the discount % (if any).
|
•
|
VAT 4% having Array Number 22 represents the VAT Value.
|
•
|
When a new group added in same Level the Array Number increases by 10 numbers.
|
•
|
Sale VAT 12.5 % having Array Number 31 represents the Sale Value after deducting the discount % (if any).
|
•
|
VAT 12.5% having Array Number 32 represents the VAT Value.
|
•
|
Similarly,VAT Free Sale having Array Number 41 represents the VAT Free Value.
|
•
|
Heads carrying Array Number as 21,31,41 the amount value.
|
•
|
Array Number as 22,32,42 are the amount of VAT going to applied on the amount.
|
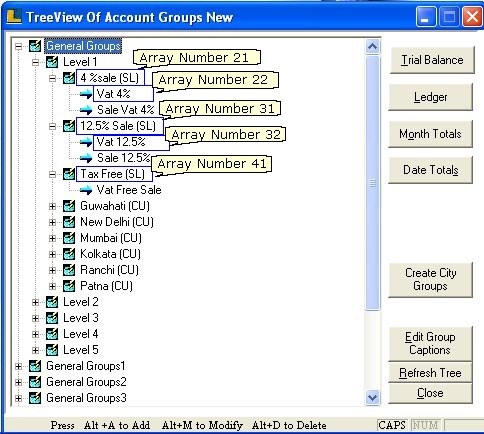
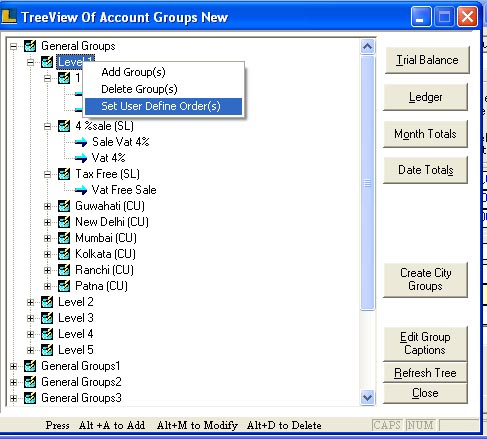
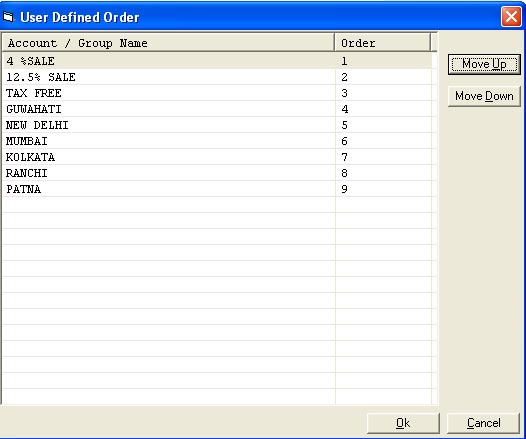
How To Set The Order Of Account Groups : User can define the order of groups by selecting the Set User Define Option as shown in the figure.
In the way the order is defined under levels similarly Arrays Number will be allocated.
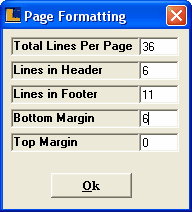
8. Define Page Formatting Under Multiple Printing Configuration :
9. After doing setting in sale multiple printing configuration we link this window with sale configuration for final printing.
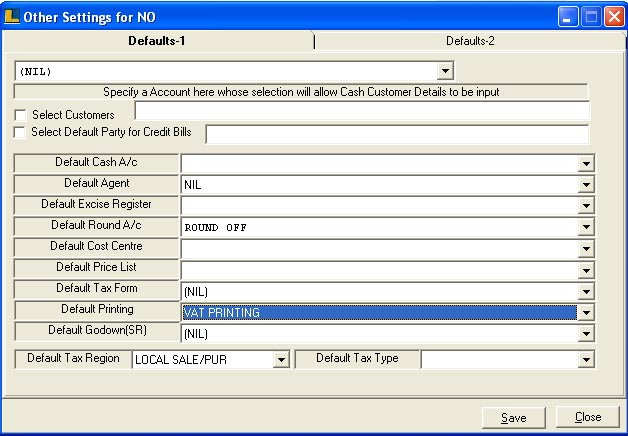
10. Follow the under mentioned steps for linking : - Sale Configuration > Other Settings > Default Printer As VAT Printing.

11.Select the option Other Settings > Other Settings window appears choose the default printing as VAT Printing (Configuration Name).
Print Pre-View :
|
