1) Column Properties and Bound Column
|
|
|
|
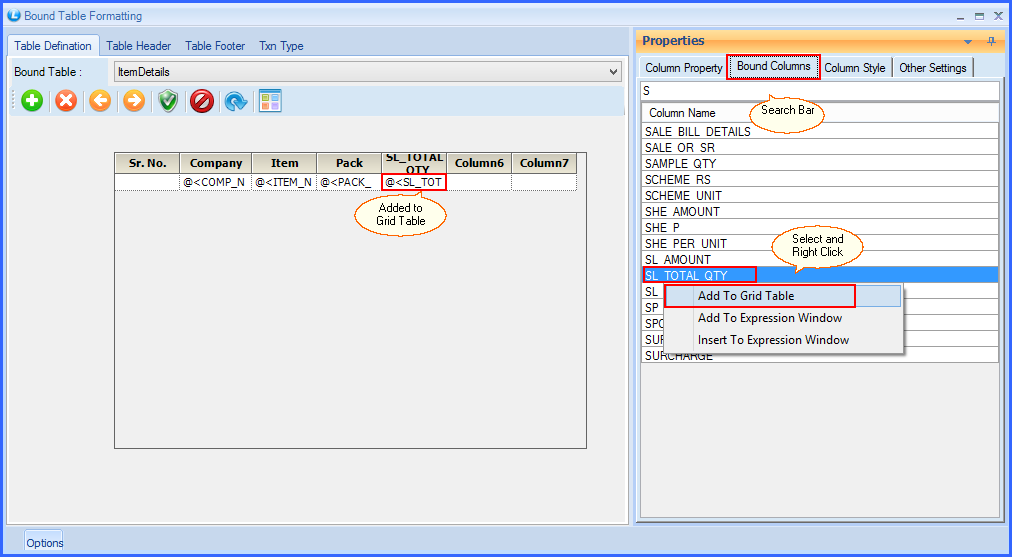
If you want to include a column for Qty in your bill, you have to follow the steps written below:
Step 1:
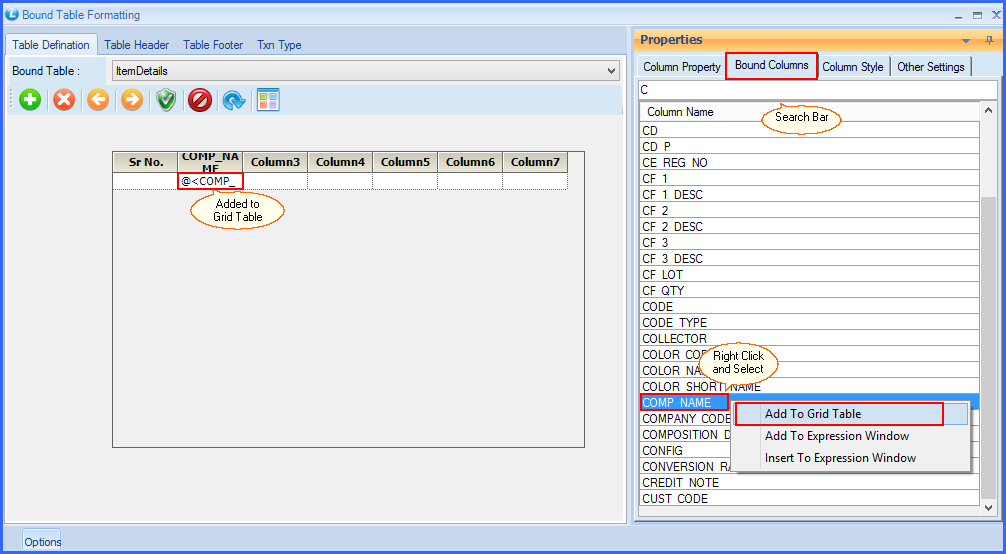
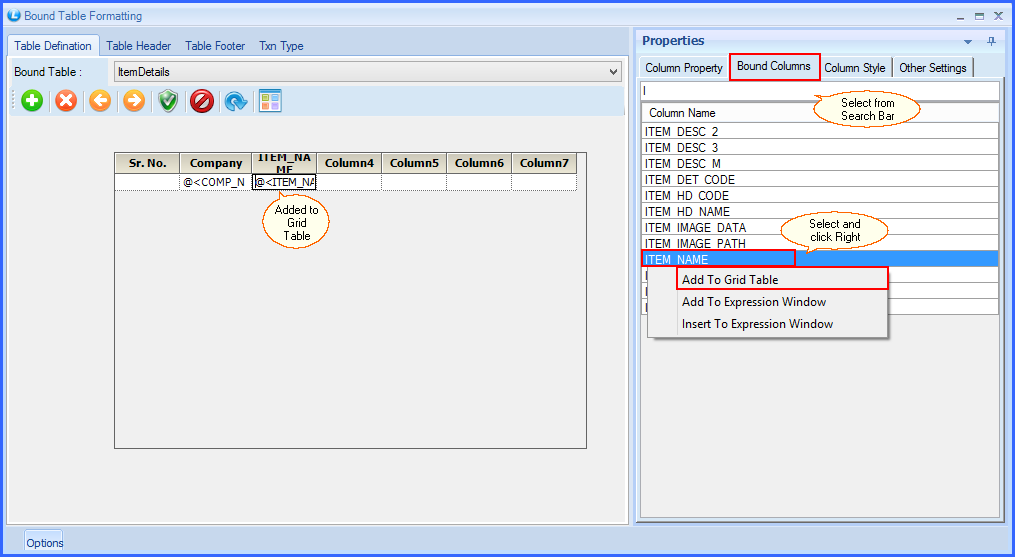
Click on Bound Column Tab. Find the bound column and right click on the column name to add it in the Grid Table. The query of Column will be added in your Grid Table. See the window:
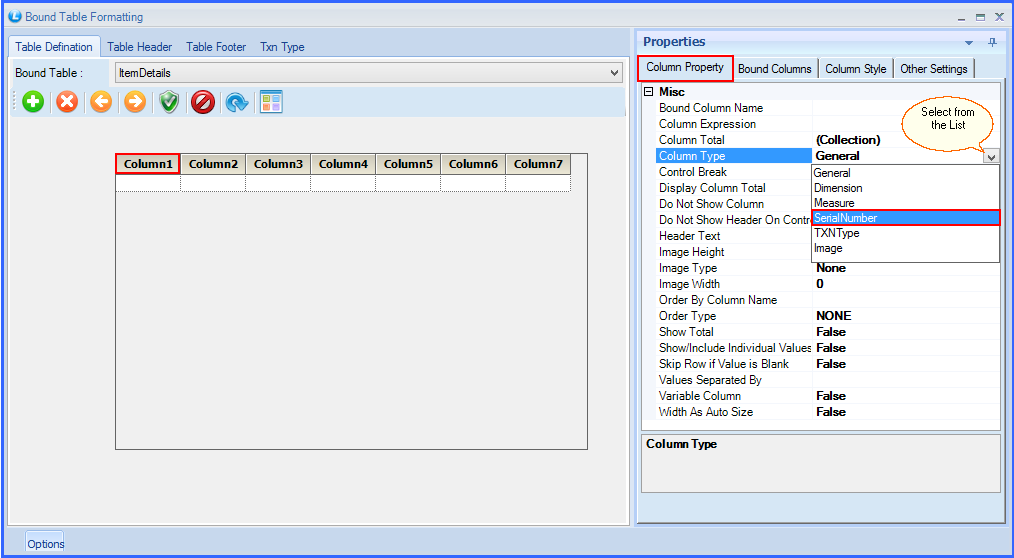
Fig 13. Column Type
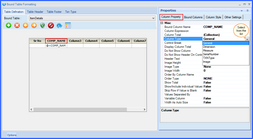
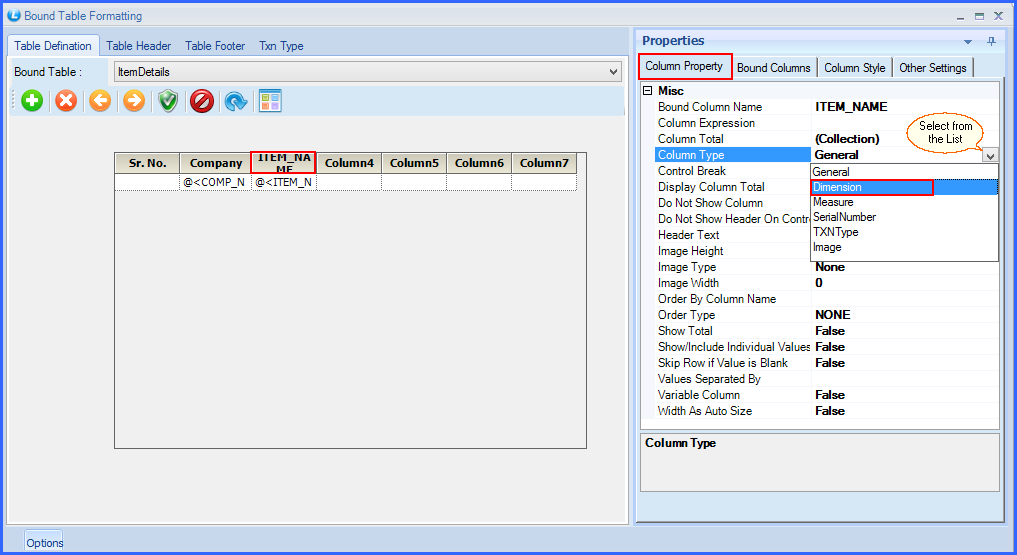
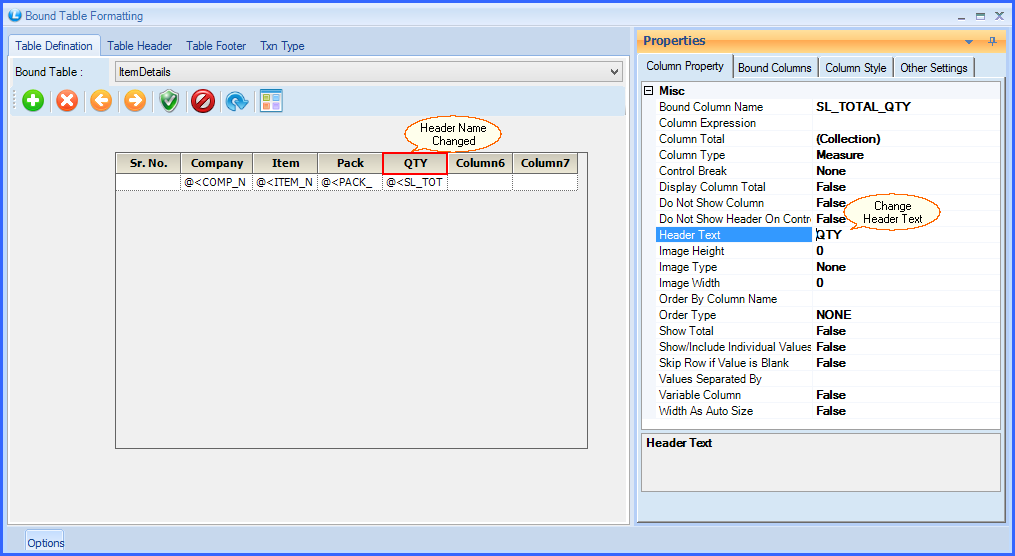
Click on Column Property, Select the Column Type to Measure. Check the window:
Fig 14. Column Type
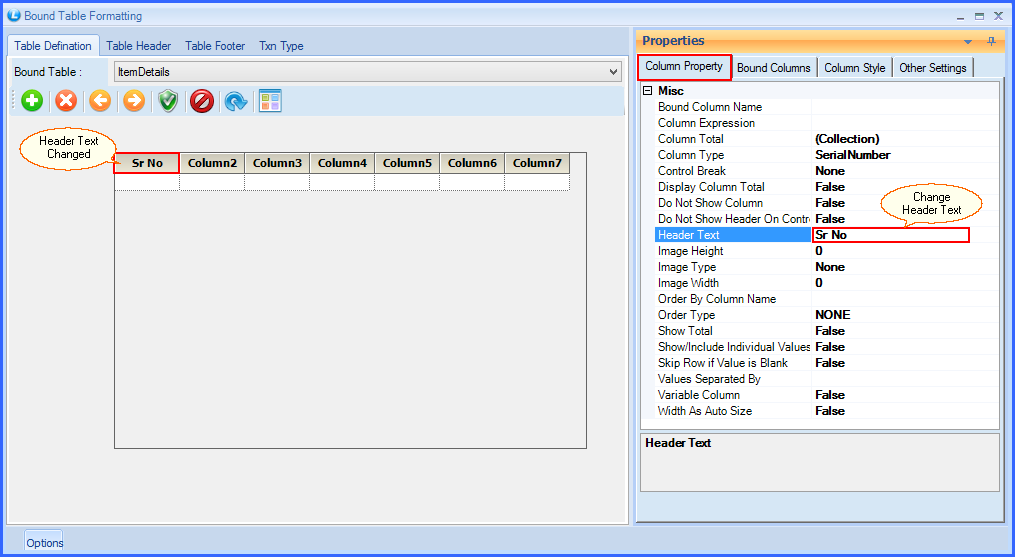
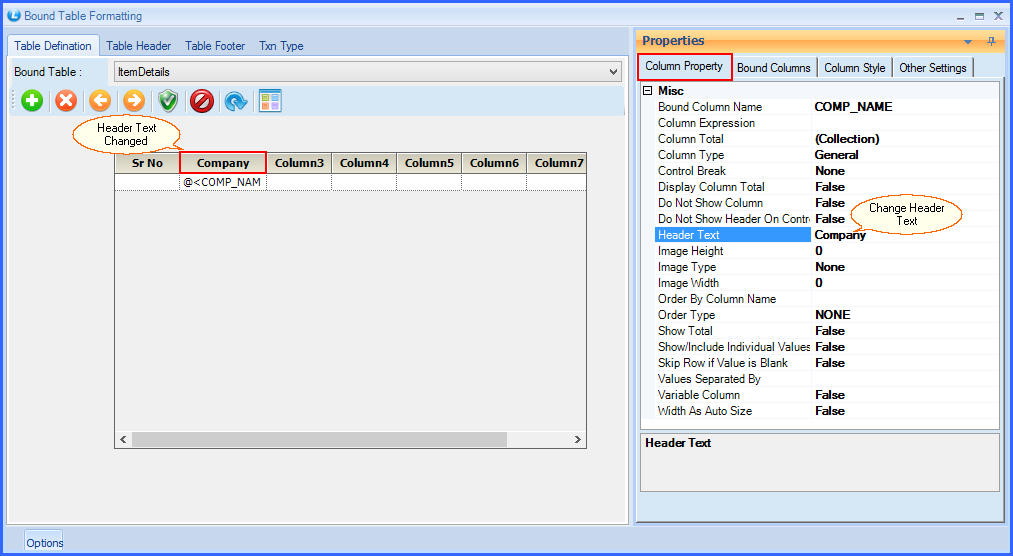
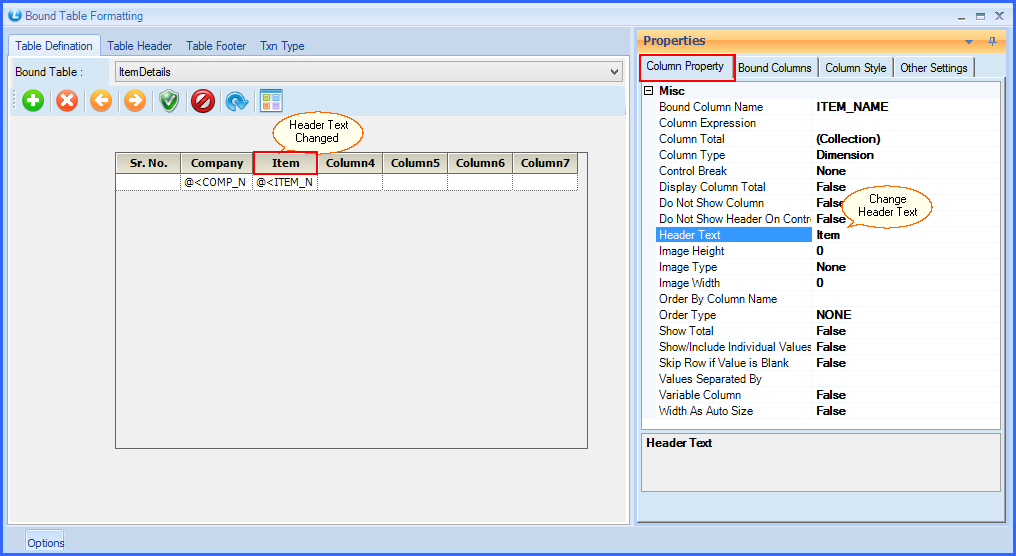
Change the header Text to give your Header a name according to your Bill Design. See the window below how to change a header text.
Fig 15. Column Type
|

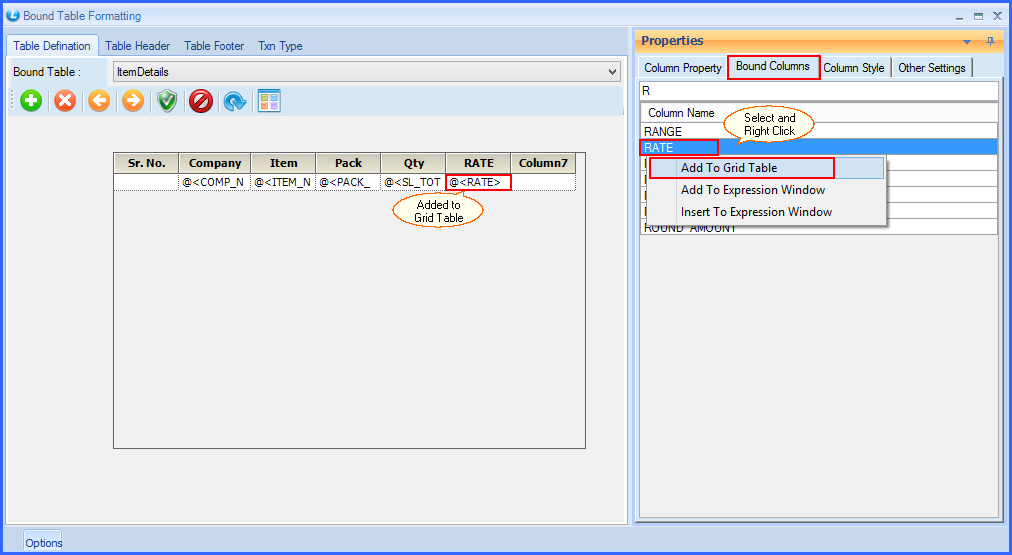
To Mention the Rate or Price of every item, you need to enter a column for Rate. Follow the steps written below:
Step 1:
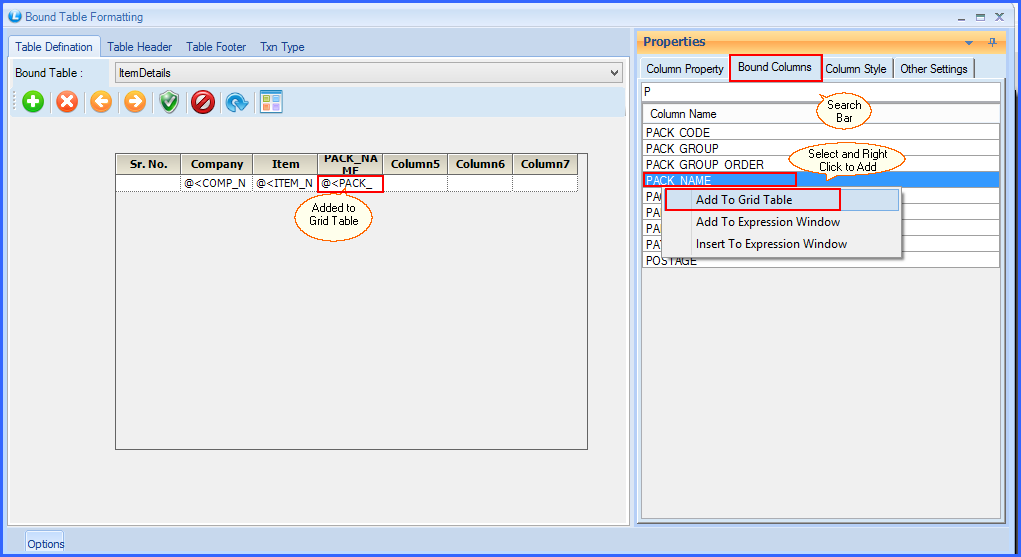
Click on Bound Column Tab. Find the bound column and right click on the column name to add it in the Grid Table. The query of Column will be added in your Grid Table. See the window:
Fig 16. Bound Column
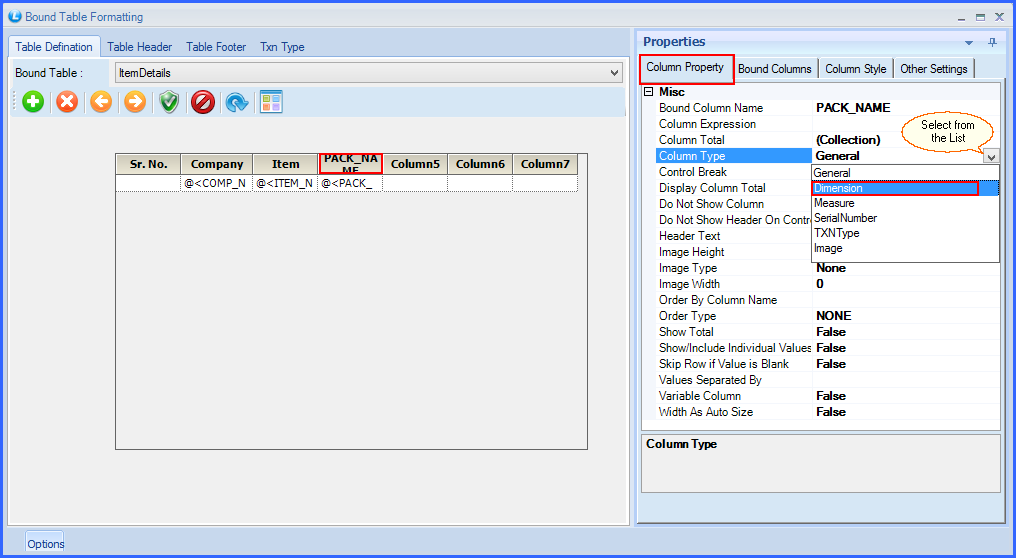
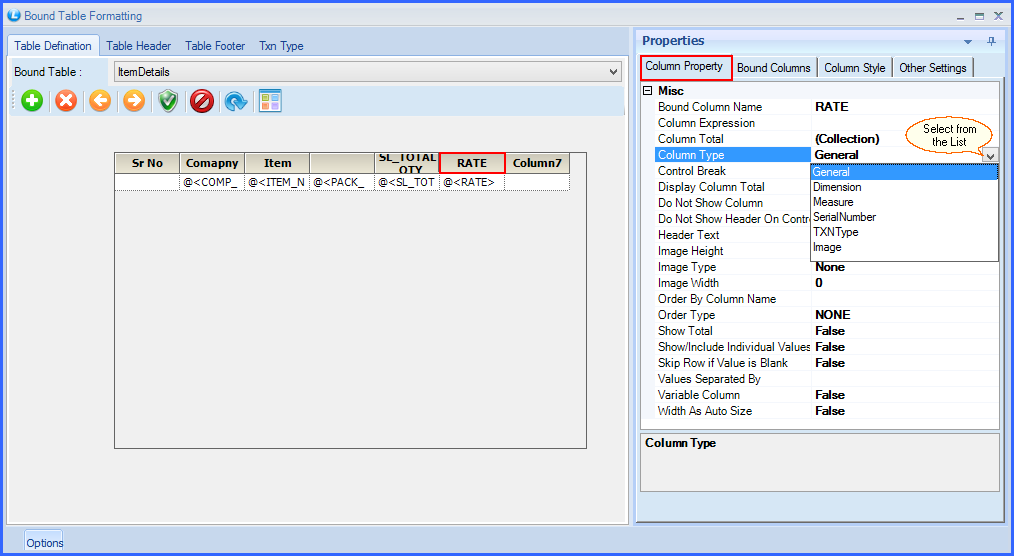
Click on Column Property, Select the Column Type to General. Check the window:
Fig 17. Column Type
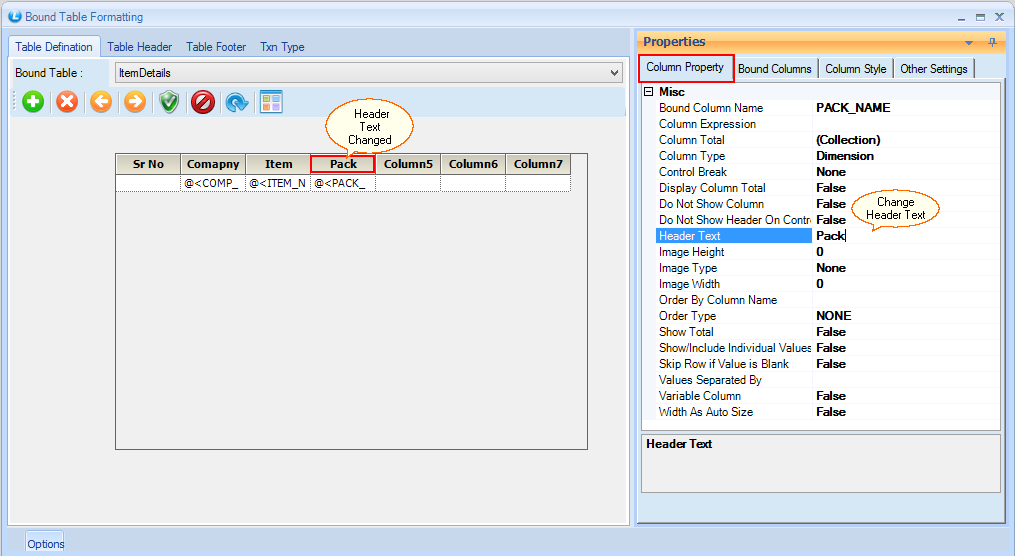
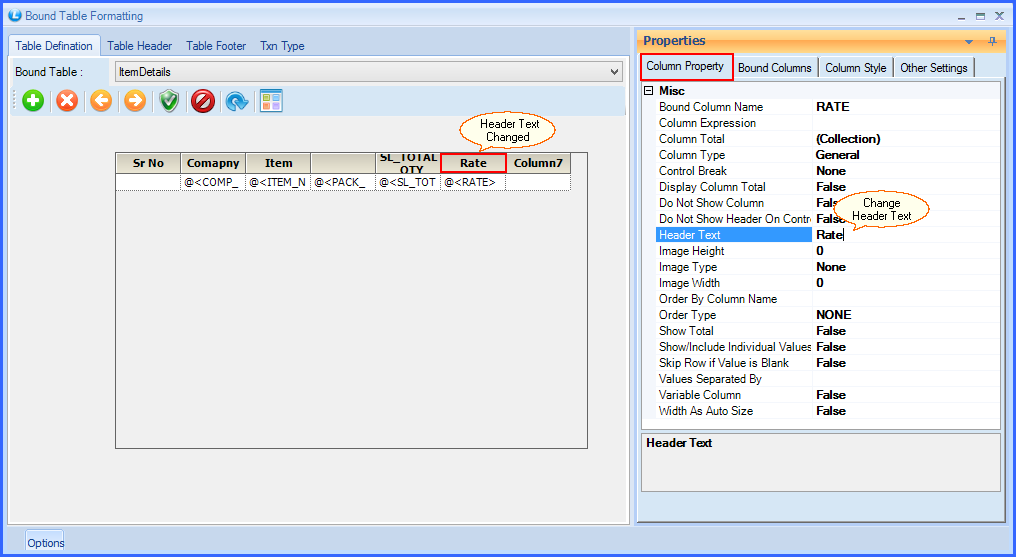
Change the header Text to give your Header a name according to your Bill Design. See the window below how to change a header text.
Fig 18. Column Type
|
Amount Column is reserved to mention the total amount of Every Item. Follow the steps below to add Amount:
Step 1:
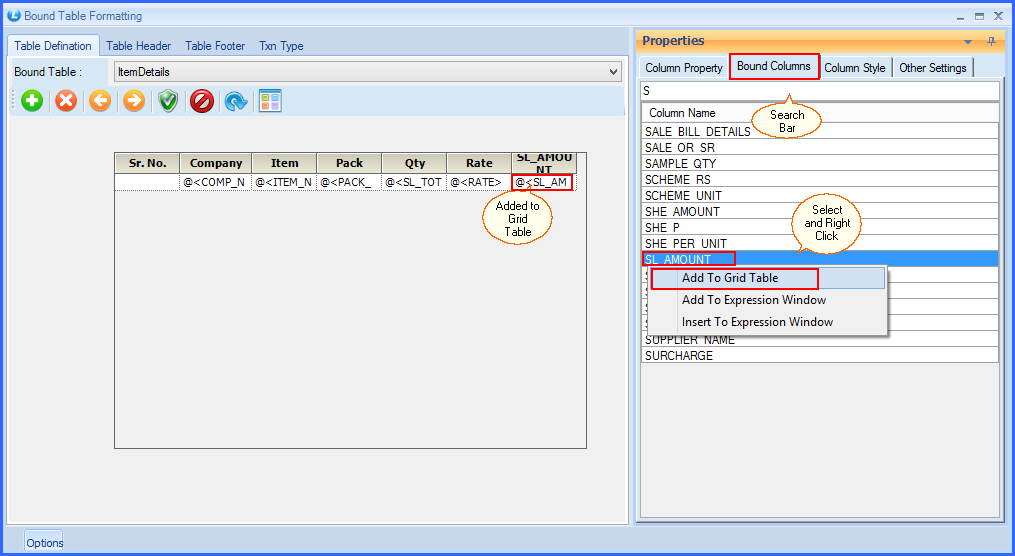
Click on Bound Column Tab. Find the bound column and right click on the column name to add it in the Grid Table. See the window:
Fig 19. Bound Column
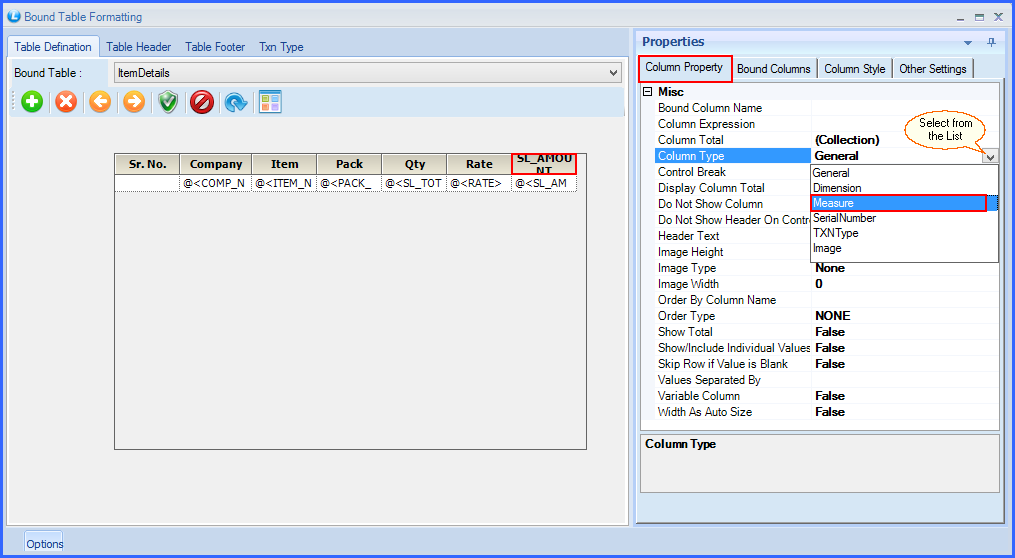
Click on Column Property, Select the Column Type to Measure. Check the window:
Fig 20. Column Type
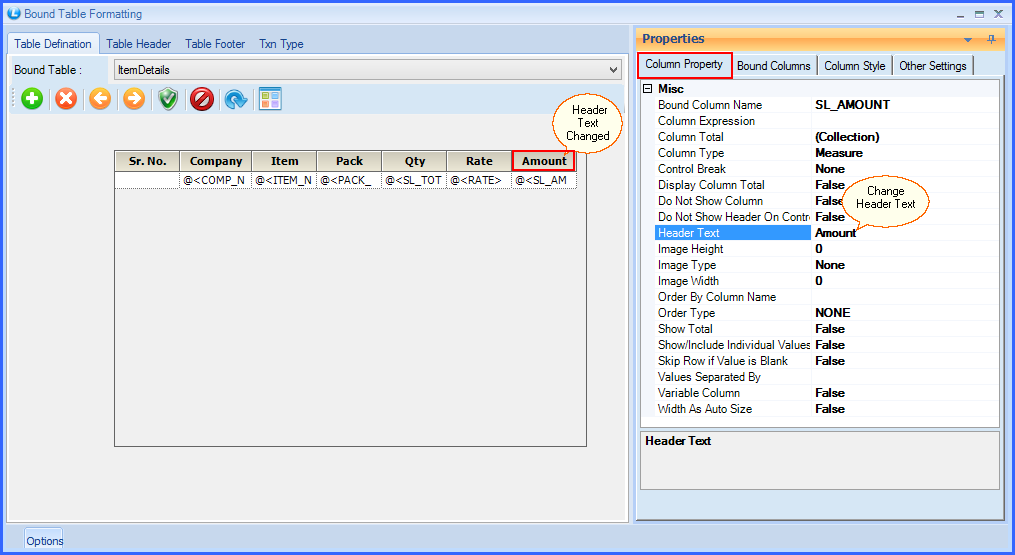
Change the header Text to give your Header a name according to your Bill Design. See the window below how to change a header text.
Fig 21. Column Type
|
How to Add a Column for Grand Total?
Adding a Column for Grand Total is necessary to get a Total of attributes. Follow the steps below to add a column for Grand Total in your Bound Table:
|
Grand Total could be calculated only for the Columns that are set Measure in the Column Property> Column Type. |
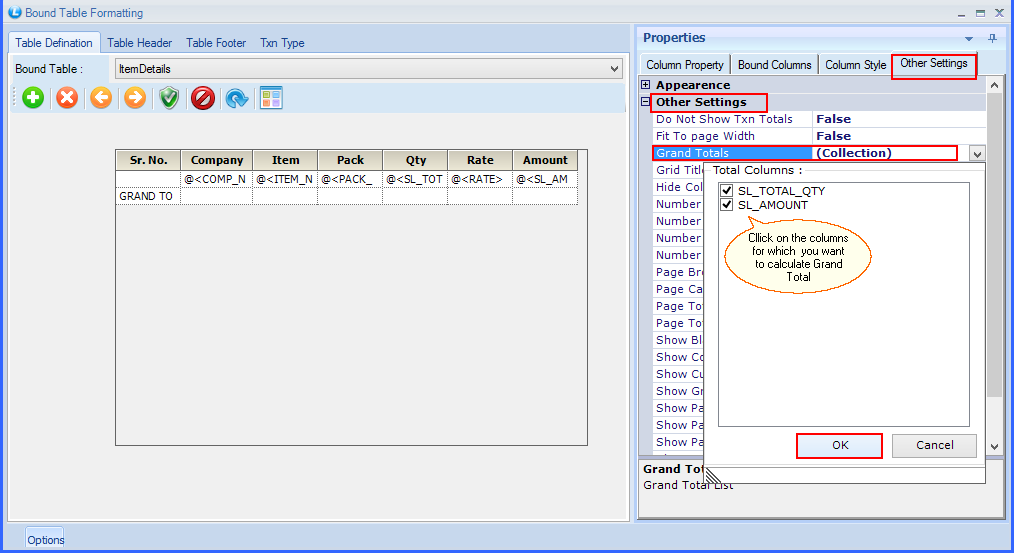
Step 1: Click on Other Settings Tab. Select Other Settings Option and set Show Grand Total to True to add a column for Grand Total in your sale bill design. See the widow below:
Fig 22. Bound Column
Step 2: Click on the Grand Total and then, Collection. A list of columns will appear, select the columns for which you want to calculate Grand Total.
Fig 23. Column Type
|

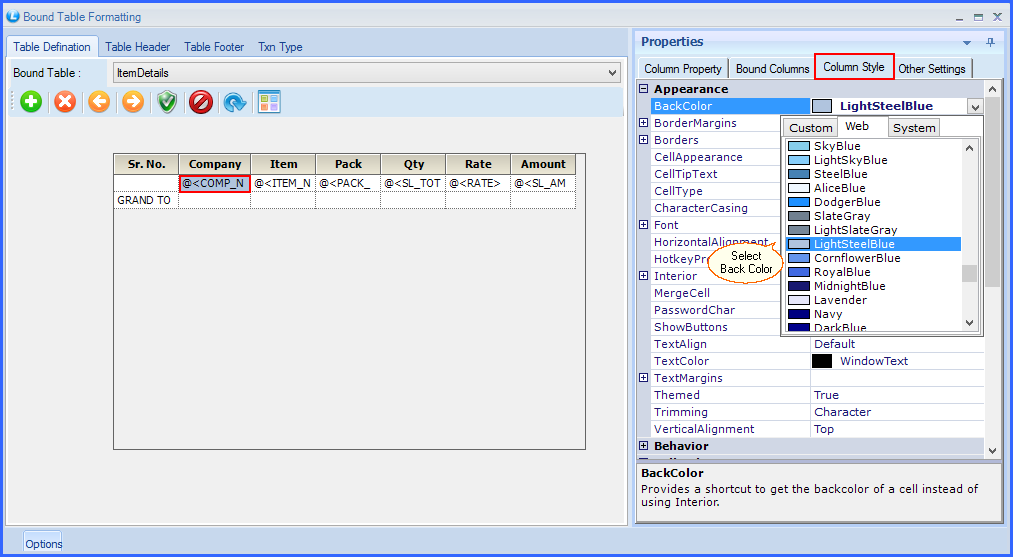
Column Style is used to give a special style to your Columns.There are many features in this tab. Few of them are as mentioned below that you can add in your Bound Table.
Fig 24. Back Color
|
Back Color:
You can change the Back Color of any column through this option. |
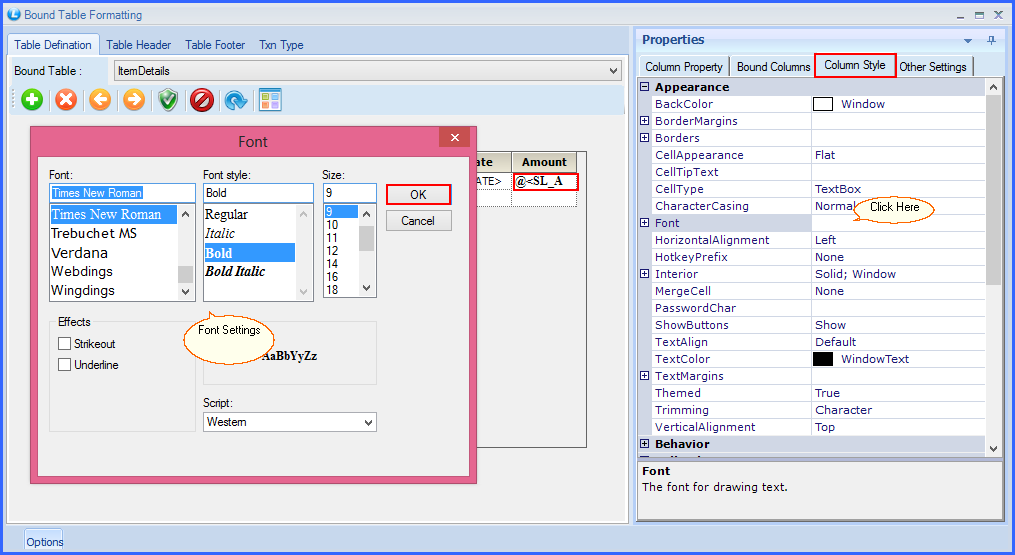
Fig 25. Font
|
Font:
You can change the style of Font and its size through this option. |
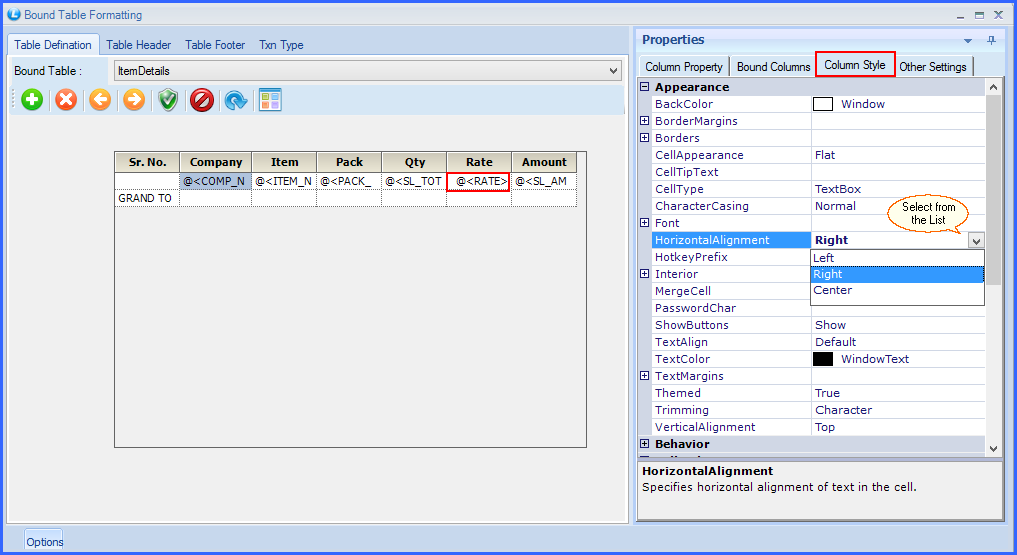
Fig 26. Horizontal Alignment
|
Horizontal Alignment:
This option is used to change the Horizontal Alignment of Columns. You can set it to Left, Right or Center according to your requirements. |
Column Style Preview:
It will look as follows after applying all the changes in the Column Style Tab.
 .
.
Fig 27. Column Style Preview
This tab is used to change the additional settings.There are many features in this tab. Few of them are as mentioned below that you can add in your Bound Table.
Fig 28. Aply Style type
Fig 29. Appearance
|
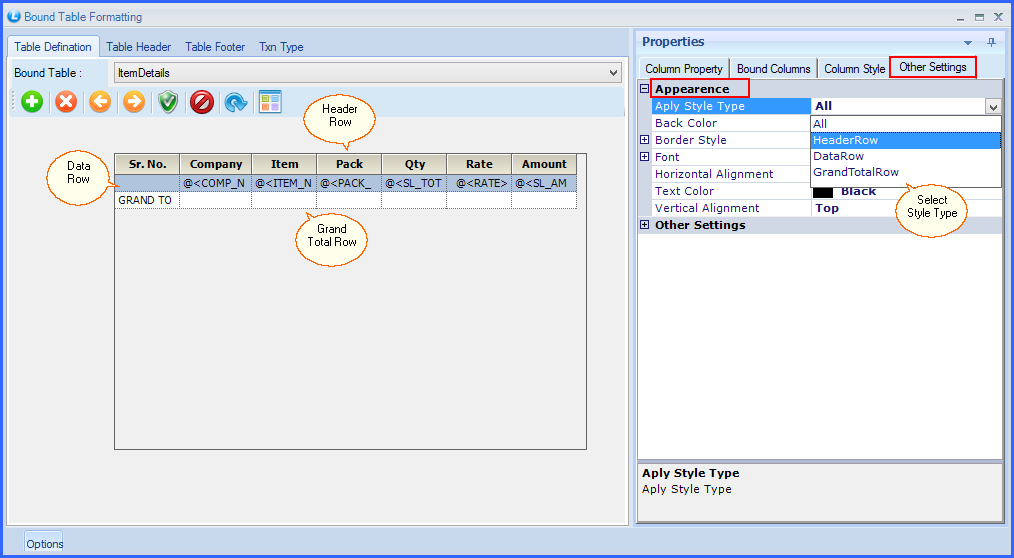
Appearance:
a) Aply style type: You can select whether the changes are to be made in the entire table, in Header Row, in Data Row or Grand Total Row through this option. See the window.
b) You can also change the Back Color from Appearance Tab.
c) Border style: This option allows you to change the style of Border used in the Bound Table.
d) Font: As cleared from the name, you can change the style of the Font through this option. It also allows you to give Horizontal or Vertical Alignment to your Table and change the Color of the font used in the table.
|
Fig 30. Other Settings
|
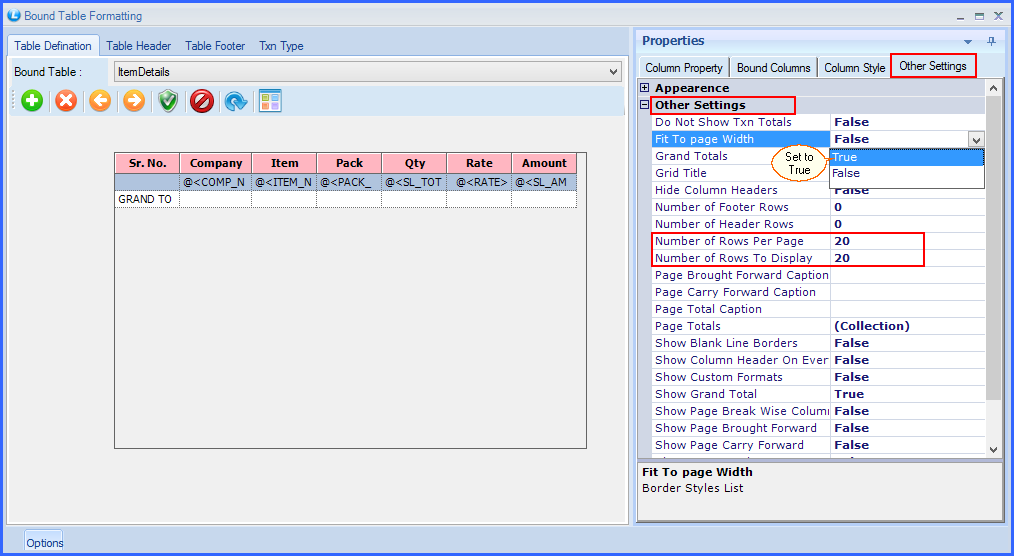
Other Settings:
a) Fit to Page Width: Set this option to True to Fit it according to the Width of the Page.
b) Number of Rows per Page:You can specify the number of rows in your Bill for the data. Rows will be added internally in the Bill.
c) Number of Rows to Display: You can specify the number of rows you want to display in your Bill for the data. Rows will be displayed in our Bill.
|
How to Add Decimal in Values?
To add Decimal in Values, Click on Column Property> Column Expression> Number> Format. See the window below:
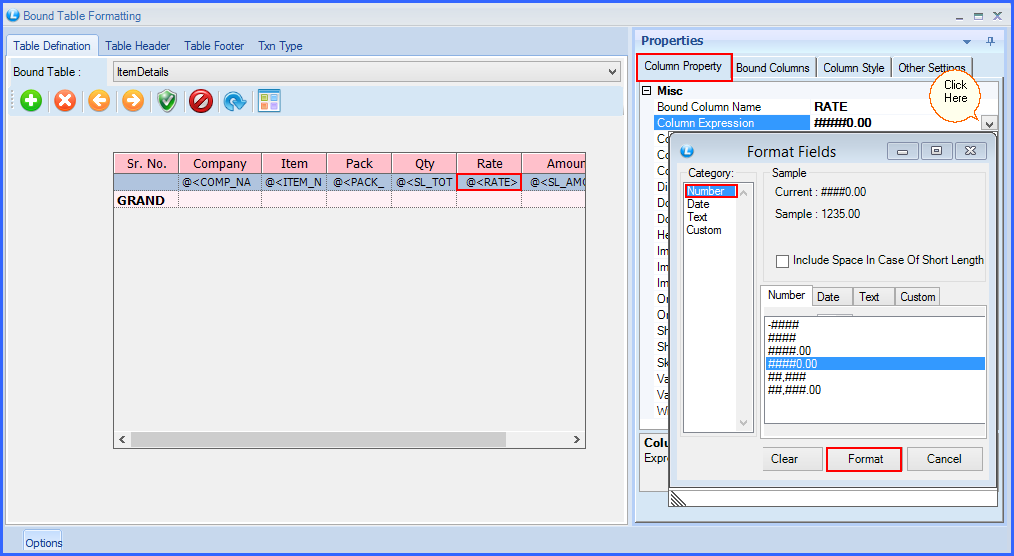
Fig 31. Add Decimal
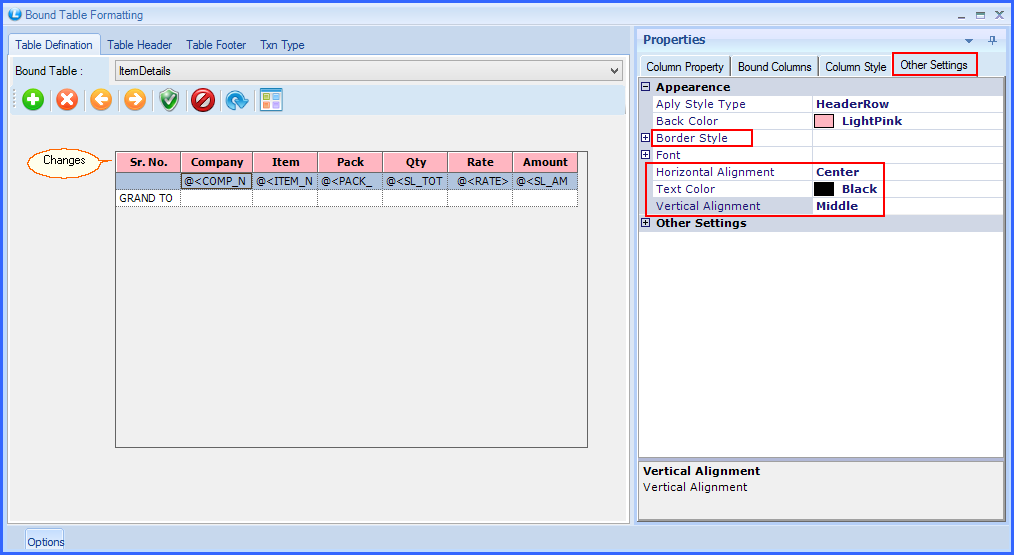
Other Settings Preview:
It will look as follows after applying all the changes in the Other Settings Tab.
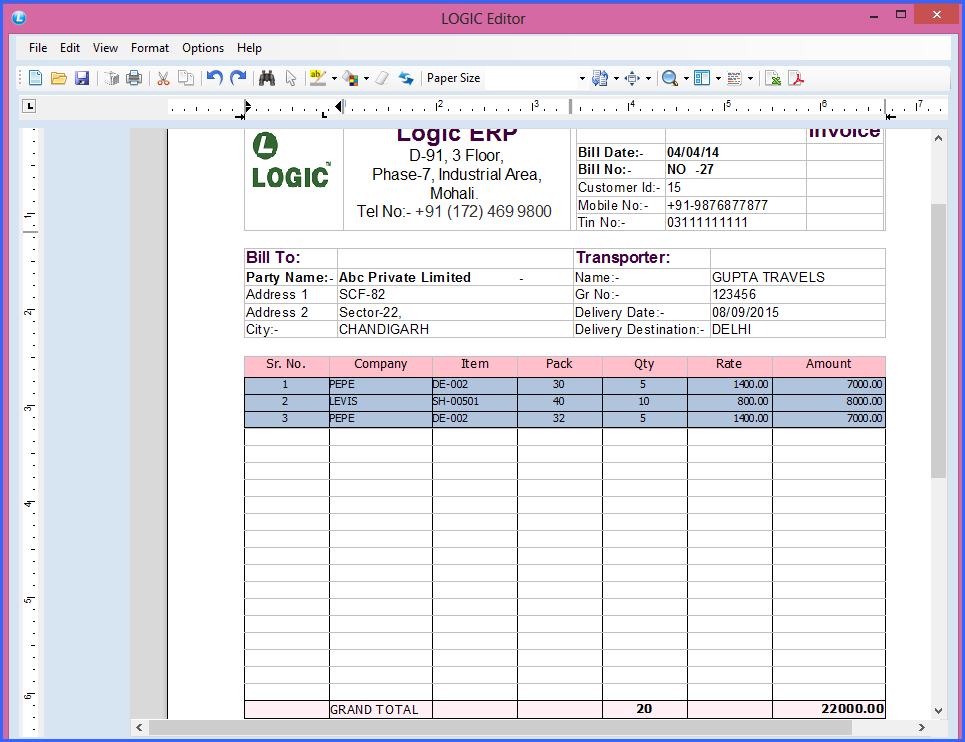
Fig 32. Other Settings Preview