|
Setup Branches |
  
|
| Show/Hide Hidden Text |
|
Setup Branches |
|
| Show/Hide Hidden Text |
![]() This form allows you to define your stores, retailers, warehouse etc. You can purchase an item from the main store & allocate it to its branches and keep complete record of sales. You can also check the online bills of various branches through this form. Also, you can save various details about its different branches through this field that includes Branch Name, Address, TIN number etc.
This form allows you to define your stores, retailers, warehouse etc. You can purchase an item from the main store & allocate it to its branches and keep complete record of sales. You can also check the online bills of various branches through this form. Also, you can save various details about its different branches through this field that includes Branch Name, Address, TIN number etc.
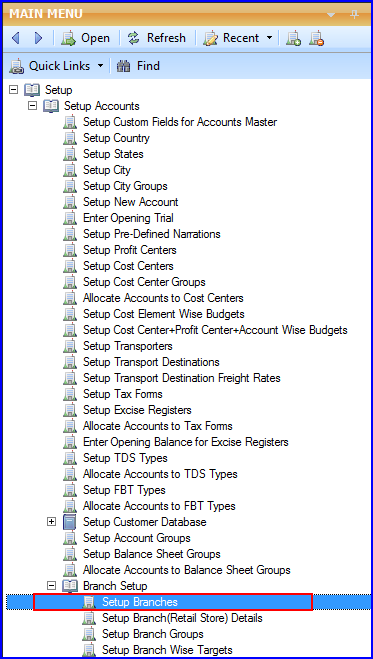
![]() Setup Branches: Main Menu: Setup > Setup Accounts > Branch Setup > Setup Branches
Setup Branches: Main Menu: Setup > Setup Accounts > Branch Setup > Setup Branches
Fig. 1 Main Menu |
Enter the details of the Branch like Branch Name, Branch Short Name, Address and TIN No. Branch code will be generated automatically once you hit the 'Save' button.
|
You can't delete the Tin No. once added. |
![]() EXPORT PCS INFO WITH STRF: If you have a number of items in your stock and you want to give unique identity to each Piece of the stock, set this option to TRUE, otherwise by default it is False.
EXPORT PCS INFO WITH STRF: If you have a number of items in your stock and you want to give unique identity to each Piece of the stock, set this option to TRUE, otherwise by default it is False.
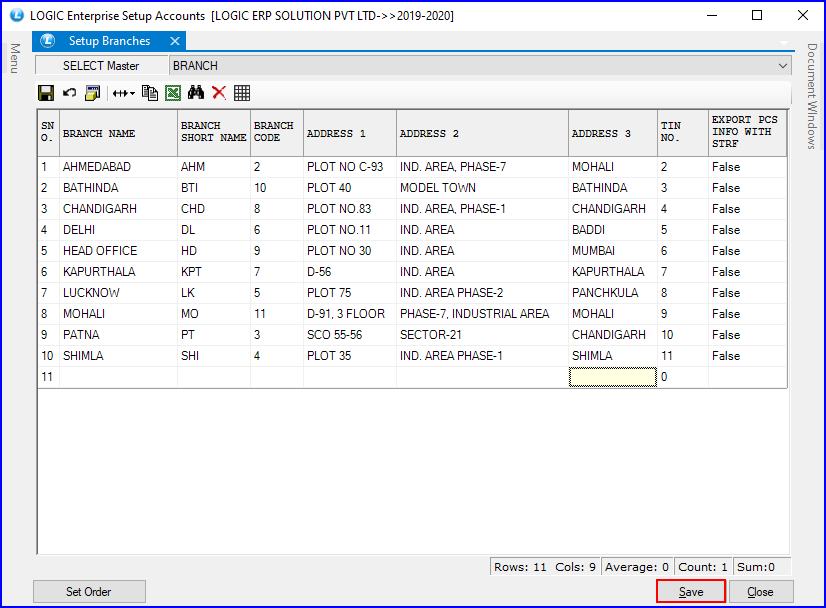
Fig. 2 Setup Branches
|
To save the data entered by the user, user have to press enter button and the cursor should be on next line in the grid. |
There are two Buttons available in the bottom of the Grid Order button, Save Button and Close Button.
![]() Save Button: Click to save the changes made by user.
Save Button: Click to save the changes made by user.
![]() Close Button: Click to exit.
Close Button: Click to exit.
Click on Set order Button in order to set the list order. You can even set list in alphabetical order.
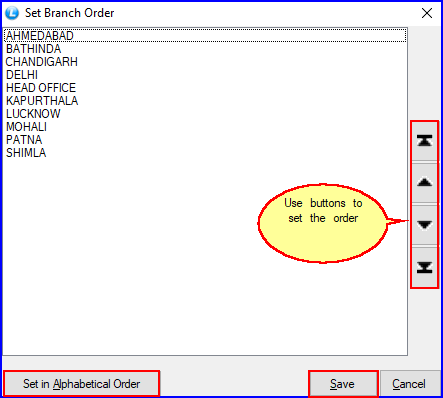
Fig. 3 Set Order