|
Allocate GST e-Invoice Number to Voucher |
  
|
| Show/Hide Hidden Text |
|
Allocate GST e-Invoice Number to Voucher |
|
| Show/Hide Hidden Text |
![]() Click on Allocate GST e-Invoice Number to Voucher.
Click on Allocate GST e-Invoice Number to Voucher.
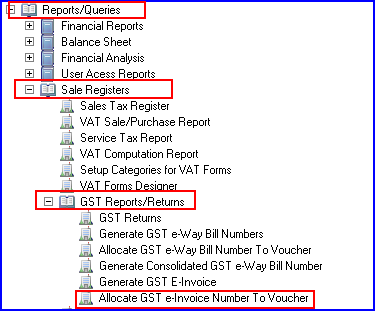
Main Menu > Reports/Queries > Sale Registers > GST Reports/Returns > Allocate GST e-Invoice Number to Voucher.
Fig. 1 Main Menu |
![]() You will see two options on the top of the screen. One is Sale Bill and second is Retrieve From Excel.
You will see two options on the top of the screen. One is Sale Bill and second is Retrieve From Excel.

Fig. 2 Allocate GST e-Invoice Number To Voucher
![]() Sale Bill: Click on Sale Bill then Refresh button and Enter Details like Party Name, Bill Number, Bill Date, IRN Number, ACK No., ACK Date.
Sale Bill: Click on Sale Bill then Refresh button and Enter Details like Party Name, Bill Number, Bill Date, IRN Number, ACK No., ACK Date.
![]() Retrieve From Excel: Click on Retrieve From Excel checkbox. Click on browse button. Select file and Click on Refresh button.
Retrieve From Excel: Click on Retrieve From Excel checkbox. Click on browse button. Select file and Click on Refresh button.
![]() Attach QR Image: Click on Attach QR Image button to insert the QR code image saved in your computer system that you downloaded from the e-Invoice portal. Click on browse button. Select file and Click on Refresh button.
Attach QR Image: Click on Attach QR Image button to insert the QR code image saved in your computer system that you downloaded from the e-Invoice portal. Click on browse button. Select file and Click on Refresh button.
Now, Go to the government portal website Now, Go to the government portal website .
![]() For E-Invoice System Login: Enter the registered username and password -> Enter Captcha ->Then click on Login button.
For E-Invoice System Login: Enter the registered username and password -> Enter Captcha ->Then click on Login button.

Fig. 3 E-Invoice System Login
![]() For E-Way Bill System Login: Enter the registered username and password -> Enter Captcha ->Then click on Login button.
For E-Way Bill System Login: Enter the registered username and password -> Enter Captcha ->Then click on Login button.

Fig. 3.1 E-Way Bill Login Screen
![]() Click on For GSP button.
Click on For GSP button.

Fig. 4 For GSP
![]() Add details to register your GST Suvidha Provider.
Add details to register your GST Suvidha Provider.

Fig. 5 Register your GST Suvidha Provider
![]() View details of Registered GST Suvidha Provider.
View details of Registered GST Suvidha Provider.

Fig.6 View Details
Sale Bill - Print Designer and Printing
![]() Now, go to the Continuous Prinint > Sale Bill - Print Designer and Printing. You can Custom Create QR Image here.
Now, go to the Continuous Prinint > Sale Bill - Print Designer and Printing. You can Custom Create QR Image here.

Fig.7 Generate QR Image
![]() For e-Invoice QR image generation, click on Custom Image button.
For e-Invoice QR image generation, click on Custom Image button.

Fig. 8 QR Bar Code Image Settings