|
Setup City |
  
|
| Show/Hide Hidden Text |
|
Setup City |
|
| Show/Hide Hidden Text |
![]() This form allows you to create a new city or edit an old one. The cities you will create using this form will be available to you in the Account\Ledger Creation.
This form allows you to create a new city or edit an old one. The cities you will create using this form will be available to you in the Account\Ledger Creation.
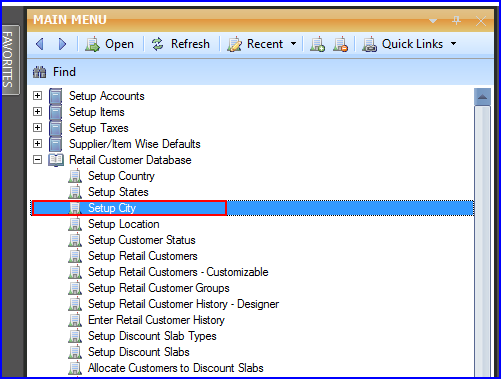
![]() Setup City: Main Menu > Retail Customer Database > Setup City.
Setup City: Main Menu > Retail Customer Database > Setup City.
Fig 1. Main Menu |
With each city name user can provide STD code and State Name of the city.
![]() City Name: Enter the new city name you want to add the grid. Press enter to save the city name & to move the next in the Grid.
City Name: Enter the new city name you want to add the grid. Press enter to save the city name & to move the next in the Grid.
![]() STD Code: User can enter the STD Code here. It is an optional column,it can be left blank.
STD Code: User can enter the STD Code here. It is an optional column,it can be left blank.
![]() State Name: User can select state name from the list.It is an optional column.
State Name: User can select state name from the list.It is an optional column.
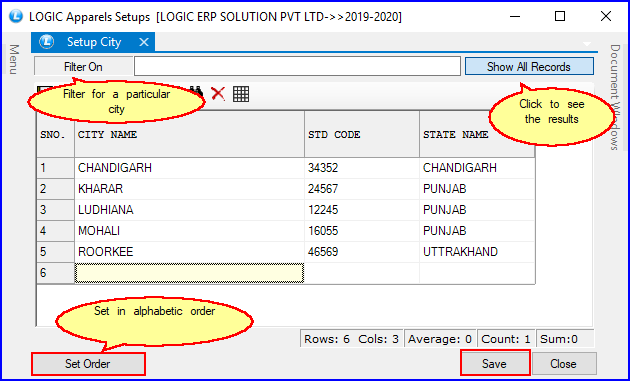
Fig 2. Setup City
|
1) To save the data entered by the user, user have to press enter button and the cursor should be on next line in the grid. 2) Once the city is created the user cannot delete the city. The user can only modify the record. To do this make the changes and click on Save button or press Alt+S to save the changes. |
![]() Filter On: To filter the list on basis name, enter the value in the text box and press Enter Key.
Filter On: To filter the list on basis name, enter the value in the text box and press Enter Key.
![]() Show All: To display the list of all the cities check the Show All box.
Show All: To display the list of all the cities check the Show All box.
There are three Buttons available in the bottom of the Grid Order button, Save Button and Close Button.
![]() Order Button: Click on order button > List to order Displayed. When click on order button the caption changes into Set in alphabetical order. Click on this button arranges the list into alphabetical order, as shown in Setup State in topic Button.
Order Button: Click on order button > List to order Displayed. When click on order button the caption changes into Set in alphabetical order. Click on this button arranges the list into alphabetical order, as shown in Setup State in topic Button.
![]() Save Button: Click to save the changes made by user.
Save Button: Click to save the changes made by user.
![]() Close Button: Click to exit.
Close Button: Click to exit.