|
Filter List |
  
|
|
Filter List |
|
![]() If your worksheet contains a lot of content, it can be difficult to find information quickly. Filter List can be used to narrow down the data in your worksheet, allowing you to view only the information you need.
If your worksheet contains a lot of content, it can be difficult to find information quickly. Filter List can be used to narrow down the data in your worksheet, allowing you to view only the information you need.
![]() New Filter List Creation
New Filter List Creation
![]() Click on the Add Sheet to add a Filter List in your DB-Design. Then, click on Add Filter from the top options of the window.
Click on the Add Sheet to add a Filter List in your DB-Design. Then, click on Add Filter from the top options of the window.
OR
![]() Right click on the existing sheet (Chart) and Click on the Add Sheet. Then, Click on the New Sheet Object and then, Filter List option.
Right click on the existing sheet (Chart) and Click on the Add Sheet. Then, Click on the New Sheet Object and then, Filter List option.
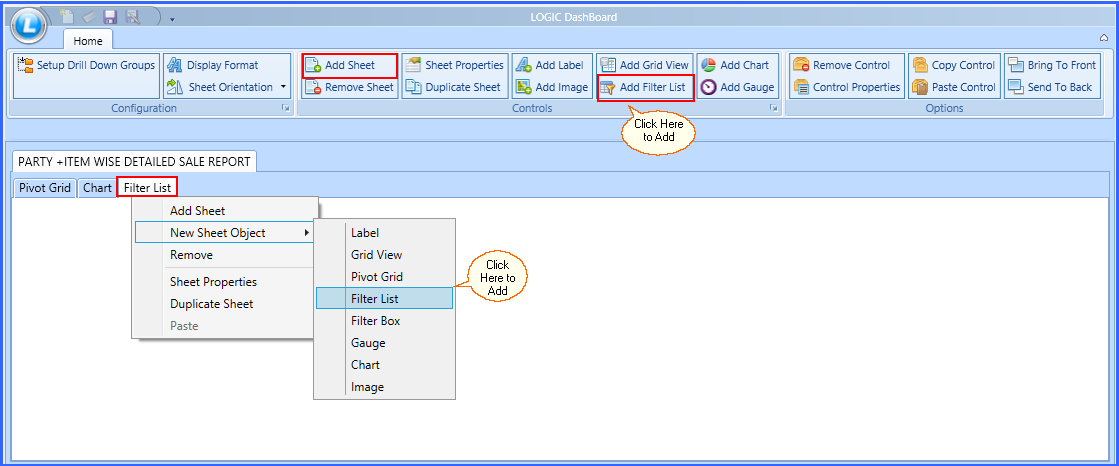
Fig 1. Create Filter List
![]() Filter property Window will appear on your Screen with following Properties:
Filter property Window will appear on your Screen with following Properties:
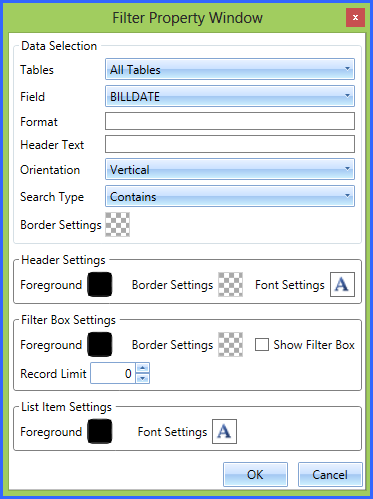
Fig 2. Filter Property Window
![]() Filter List Properties
Filter List Properties
Filter List has four types of properties. You can select the one as per your requirement. Read Below:
![]() Data Selection: This contains all the important parameters of the filter list. Select Tables, Field, Format, Header Text, Orientation, Search Type, Border Settings through it.
Data Selection: This contains all the important parameters of the filter list. Select Tables, Field, Format, Header Text, Orientation, Search Type, Border Settings through it.
|
1) Choose your Field carefully. Your Filter List will be created for the Selected Field. 2) Give Header Text similar to your Field selection. |
![]() Header Settings: You can change the Foreground Color, Border Settings and Font Settings of the header through this option.
Header Settings: You can change the Foreground Color, Border Settings and Font Settings of the header through this option.
![]() Filter Box Settings: Filter Box Settings allows you to change the Foreground Color, Border Settings and Font Settings of the Filter Box Settings through this option.
Filter Box Settings: Filter Box Settings allows you to change the Foreground Color, Border Settings and Font Settings of the Filter Box Settings through this option.
![]() List Item Settings: You can select the Foreground Color and Font Settings of List Items through this option.
List Item Settings: You can select the Foreground Color and Font Settings of List Items through this option.
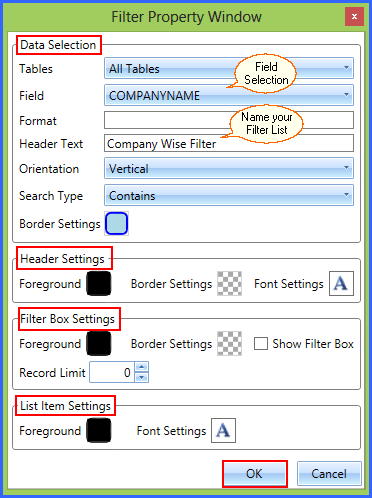
Fig 3. Filter List Properties
![]() Once you have selected all the properties, your Filter List will appear as below:
Once you have selected all the properties, your Filter List will appear as below:
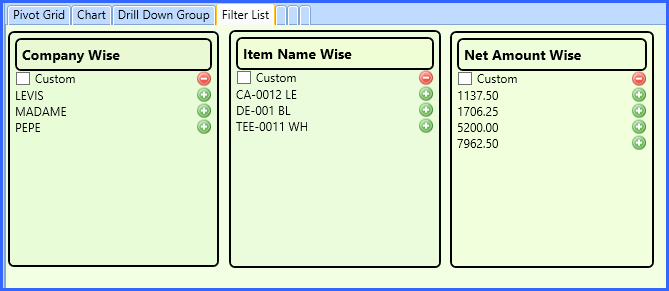
Fig 4. New Filter List