|
Setup Retail Customer |
  
|
| Show/Hide Hidden Text |
|
Setup Retail Customer |
|
| Show/Hide Hidden Text |
![]() This form allows you to create the database of the Retail Customers.
This form allows you to create the database of the Retail Customers.
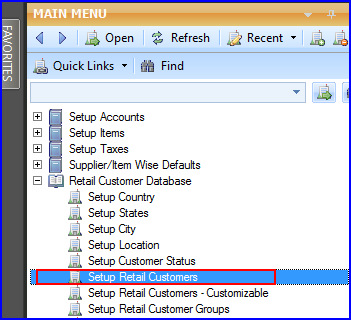
![]() Setup Retail Customer: Main Menu > Retail Customer Database > Setup Retail Customers.
Setup Retail Customer: Main Menu > Retail Customer Database > Setup Retail Customers.
Fig 1. Main Menu |
![]() Country: Select the country name from the list. It is mandatory column can't be left blank.
Country: Select the country name from the list. It is mandatory column can't be left blank.
![]() State: Select the state name from the list. This list contains the state names according to the country selected. It is a mandatory column can't be left blank.
State: Select the state name from the list. This list contains the state names according to the country selected. It is a mandatory column can't be left blank.
![]() City: Select the city name from the list. This list contains the cities names according to the selected state. It is a mandatory column can't be left blank.
City: Select the city name from the list. This list contains the cities names according to the selected state. It is a mandatory column can't be left blank.
![]() Location: Select the location from the list. It is a optional column can be left blank.
Location: Select the location from the list. It is a optional column can be left blank.
![]() Branch: Select the branch from the list.
Branch: Select the branch from the list.
![]() Membership No: Select the membership no. from the list. It is a optional column can be left blank. It will be filled automatically. This number is unique and customers can be identified through this unique number.
Membership No: Select the membership no. from the list. It is a optional column can be left blank. It will be filled automatically. This number is unique and customers can be identified through this unique number.
![]() Title: Select the title from the list.
Title: Select the title from the list.
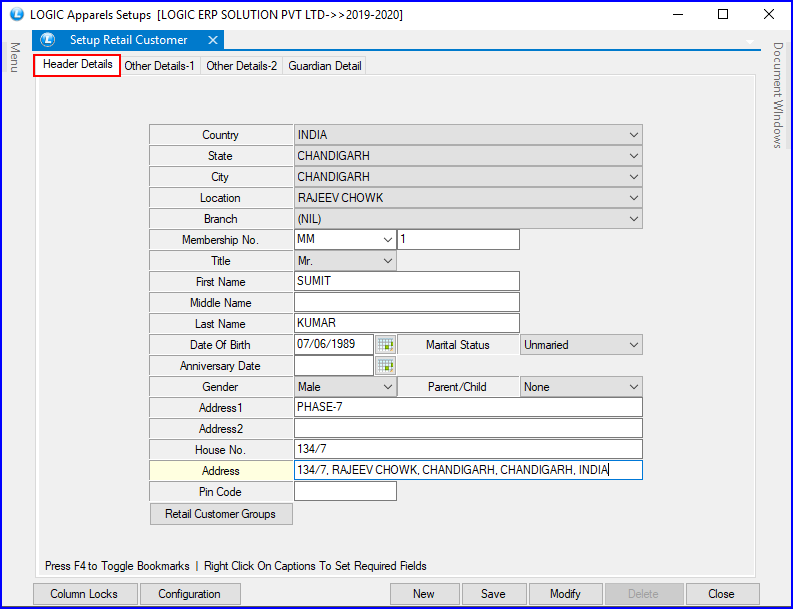
Fig 2. Setup Retail Customer Database (Header Details)
![]() Telephone Numbers: Enter the different telephone numbers in Telephone 1 and Telephone 2 columns manually.
Telephone Numbers: Enter the different telephone numbers in Telephone 1 and Telephone 2 columns manually.
![]() Mobile: Enter the Mobile Number manually.
Mobile: Enter the Mobile Number manually.
![]() Fax: Enter the Fax number of the retail customer manually.
Fax: Enter the Fax number of the retail customer manually.
![]() E-mail: Enter the email address of the retail customer manually.
E-mail: Enter the email address of the retail customer manually.
![]() Favorite Brand: Select the Favorite Brand of the retail customer from the list.
Favorite Brand: Select the Favorite Brand of the retail customer from the list.
![]() Suggested Brand: Enter the suggested brand manually.
Suggested Brand: Enter the suggested brand manually.
![]() Receive Updates: Select Yes / No from the list.
Receive Updates: Select Yes / No from the list.
![]() Preferred Way To Contact: Select the preferred way from the list according to the requirement.
Preferred Way To Contact: Select the preferred way from the list according to the requirement.
![]() Draw Winner: Select Yes / No from the list according to the requirement.
Draw Winner: Select Yes / No from the list according to the requirement.
![]() Professional Details: Select the professional details from the list.
Professional Details: Select the professional details from the list.
![]() Company: Enter the company name manually. It is an optional column can be left blank.
Company: Enter the company name manually. It is an optional column can be left blank.
![]() Addresses: Enter the different office addresses in Office Address1 and Office Address 2 manually. These are optional column can be left blank.
Addresses: Enter the different office addresses in Office Address1 and Office Address 2 manually. These are optional column can be left blank.
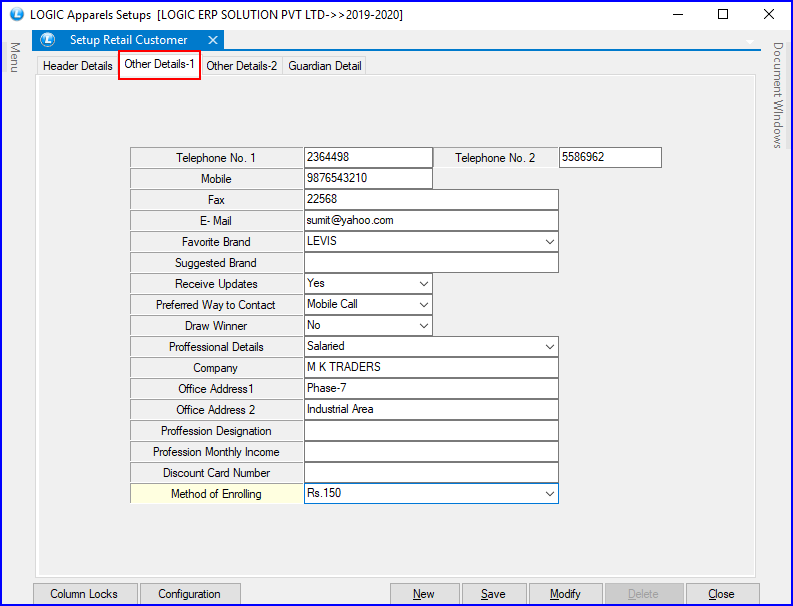
Fig 3. Setup Retail Customer Database (Other Details-1)
![]() Spouse Name: Enter the spouse name manually.It is an optional column can be left blank.
Spouse Name: Enter the spouse name manually.It is an optional column can be left blank.
![]() Feedback Collection\Ambience\Services: Select from the list.
Feedback Collection\Ambience\Services: Select from the list.
![]() Remarks: Enter the remarks in the provided text area.
Remarks: Enter the remarks in the provided text area.
![]() Age: Enter the age manually. It is an optional column can be left blank.
Age: Enter the age manually. It is an optional column can be left blank.
![]() Preferred Wear: Select the preferred wear from the list.
Preferred Wear: Select the preferred wear from the list.
![]() I Shop When: Select from the list.
I Shop When: Select from the list.
![]() Size: Select the size from the list
Size: Select the size from the list
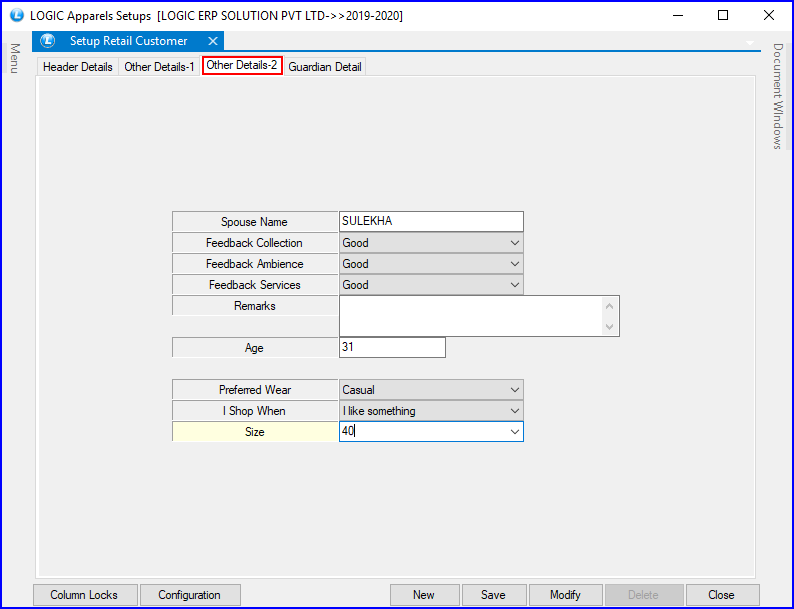
Fig 4. Setup Retail Customer Database (Other Details-2)
![]() Column Locks: Used to hide selected columns from the form. Click> Setup Retail Customer dialog box> check the columns which you want to hide > click save.
Column Locks: Used to hide selected columns from the form. Click> Setup Retail Customer dialog box> check the columns which you want to hide > click save.
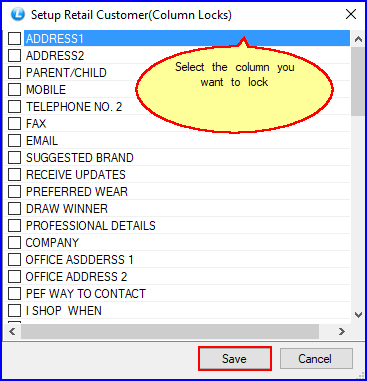
Fig 5. Column Locks
![]() Configuration: This option is used to set configuration for the retail customers. After setting configurations, click on OK button to save the changes.
Configuration: This option is used to set configuration for the retail customers. After setting configurations, click on OK button to save the changes.

Fig 6. Configuration
![]() Save: Used to save the changes made by user. Click> Confirm dialog box> click Yes to save the record.
Save: Used to save the changes made by user. Click> Confirm dialog box> click Yes to save the record.
![]() Modify: Used to modify the existing records.Click> Retail Customer Search dialog box> make the changes according to the requirements> click ok.
Modify: Used to modify the existing records.Click> Retail Customer Search dialog box> make the changes according to the requirements> click ok.