Every business has unique requirements and LOGIC puts its best foot forward to satisfy them in the best way. We have introduced a new option to select Different Billing and Shipping information (Bill To/ Ship To) in Sale Bill if needed.
For Example: You are a party of Delhi(A/c Entry Customer) and you ordered items from Punjab but want to be shipped within Punjab (Customer Name) instead of Delhi. Until now Customer Name (Not A/c Entry customer) has been considered as bill to party and GST validations are performed against the same and GSTR-1 is generated against the same while accounting entries are posted against A/c Entry customer.
Now, we have provided an option to configure which field (Customer or A/c Entry Customer) should be used as Bill to Party.
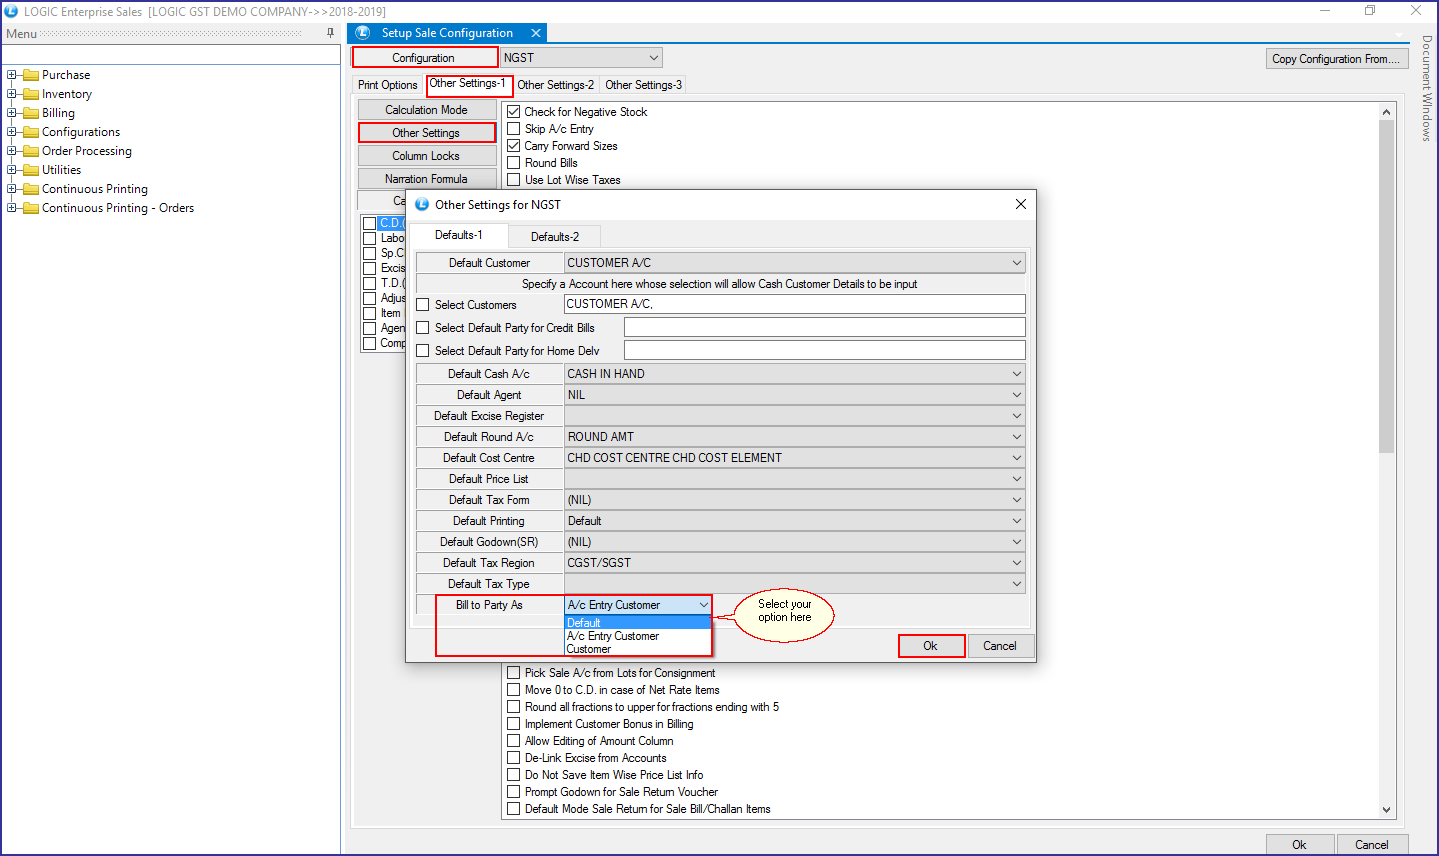
Main Menu: Billing> Sale Voucher Configuration
Setup Sale Configuration window will appear on your screen. Click on Configuration> Other Settings-1> Other Settings. You will see an option: Bill To Party As; Default, A/c Entry Customer and Customer.
1) In Default settings, Account Name will act as both Billing and Shipping Account.
2) If you select A/c Entry Customer, your billing party would be A/c Entry Customer and shipping Party would be Account Name.
New Implementation in VB Printing:(How to Add A/c Entry Customer Fields?)
If you are using Sale Bill Printing in VB, there are some implementations in VB for this option.
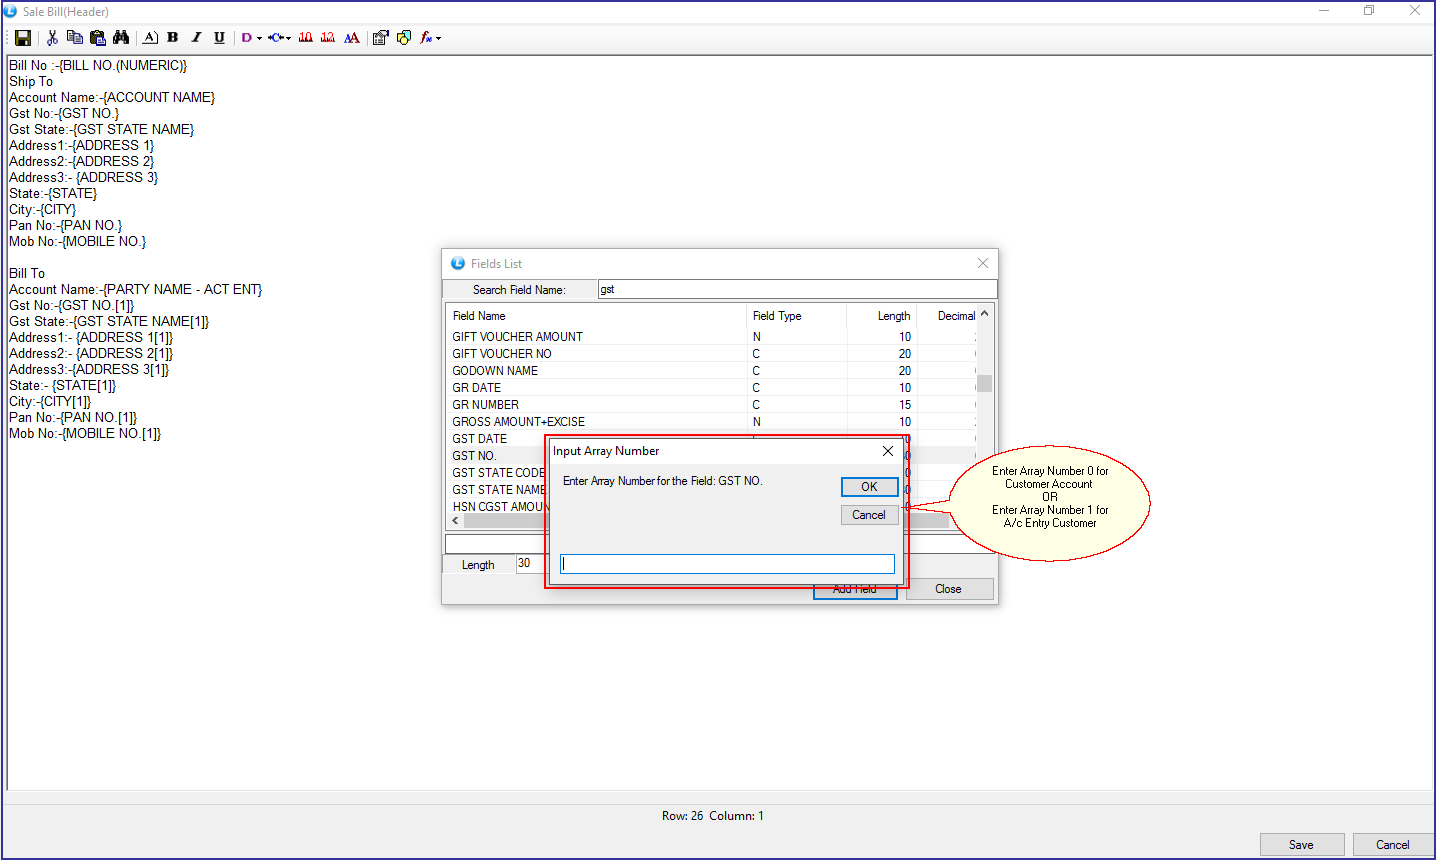
Main Menu: Setup> Configurations> Sale Multiple Printing Configuration
If you want to insert details of Account Name or A/c Entry customer fields in Header part of your bill, click on Header tab. A new window will appear on your screen. Click on Insert Fields button. Field List will open up. Select the fields and click on Insert Field button. Confirmation window will appear and click on ‘Yes’ button.
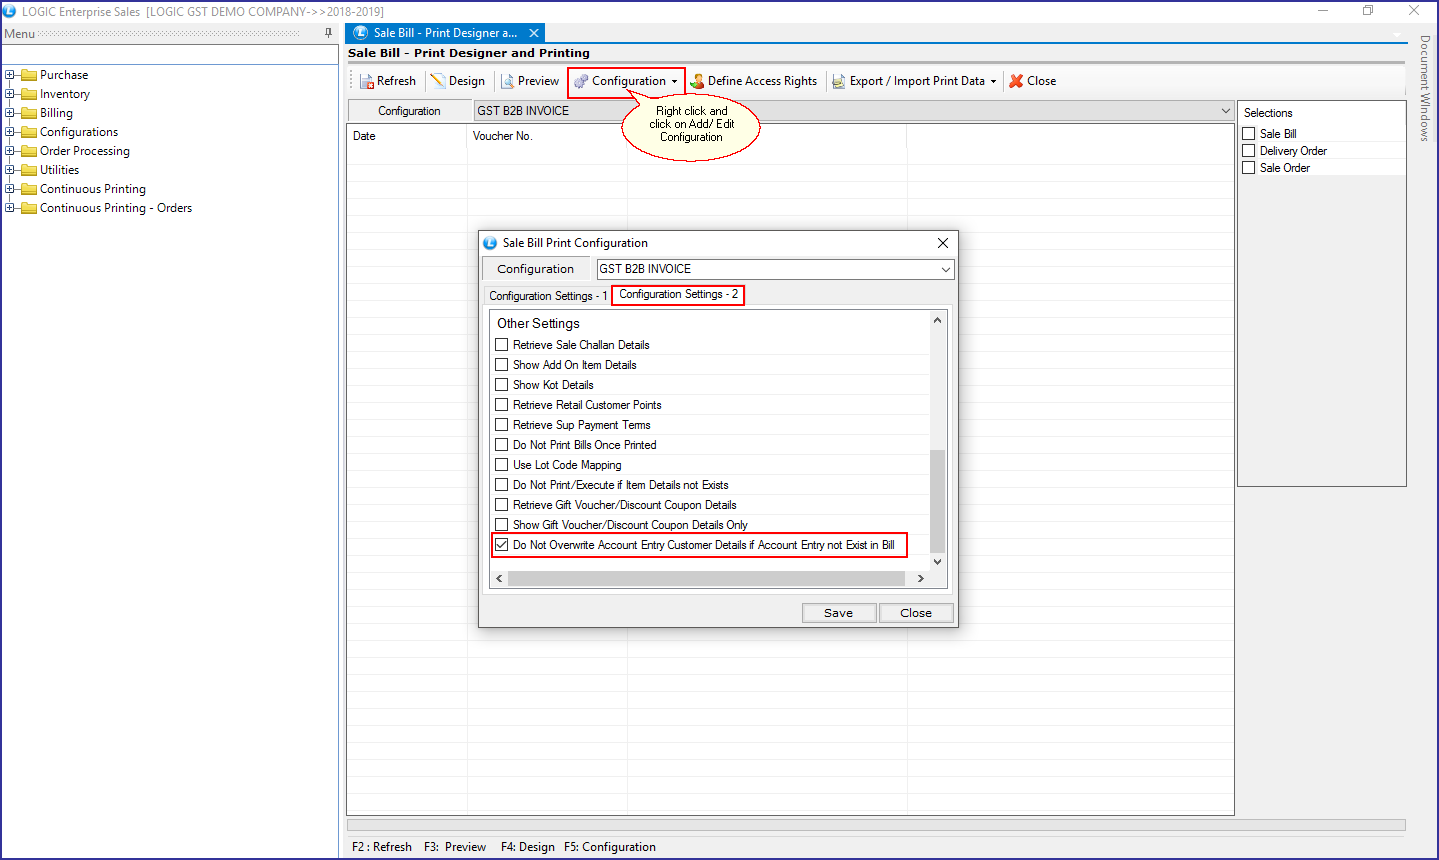
New Implementation in .Net Printing: (Do not overwrite Account Entry Customer Details if Account Entry not exist in bill)
If you are using Sale Bill Print Designer and do not want to overwrite your Account Entry Customer Details with Account Name, in case your Account entry doesn’t exist in the printing of sale bill, Click on this option. If you don’t click this, it will by default overwrite the details in the sale bill.
For Example: You have not written anything in Account Entry Customer it will automatically copy the details of Account Name as Ship To. But, if you select this option it will not overwrite Account Entry Customer Details.
Main Menu: Inventory> Continuous Printing> Sale Bill Print Designer and Printing.
A new form will appear on your screen. Click on Configuration> Add/ Edit Configuration> Configuration Settings-2. You will see a checkbox for this option. Click on it to not overwrite Account Entry Customer Details if Account Entry not exist in bill.