Database Backup Module introduced in Logic

Database Backup Module introduced in Logic: Regardless of how large or small your business may be, data is an essential aspect of running it. The loss of business data can end up costing you a lot of money. To ensure faster database backup, we have introduced a new module for backing up data more securely and efficiently. Follow the written below steps to manage backup plans using this module.
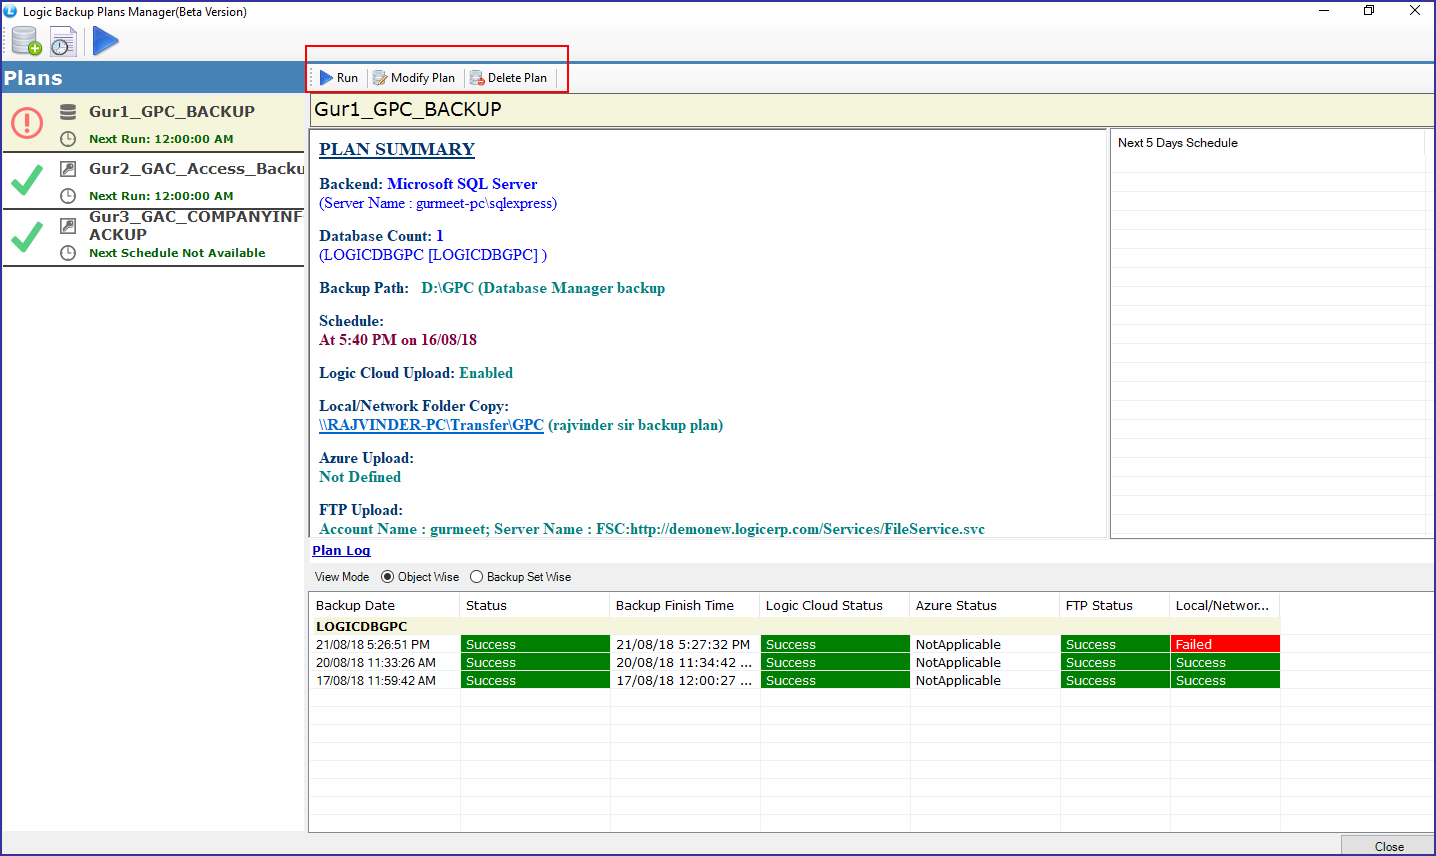
How to Take Database Backup?
When you login the software, click on the manage companies. On the top options, click on Manage backup plans(Advance Version).

1) Create a New Plan: Click on create new plan button from the top left side of your window. Add new Backup Plan window will appear on your screen. Enter Plan name. Then, click on Connect to Data. Select your Database connection type whether Microsoft SQL Server or Microsoft Access. Enter Server name, user name and password. Hit Test Connection button and if successful, click on save button.
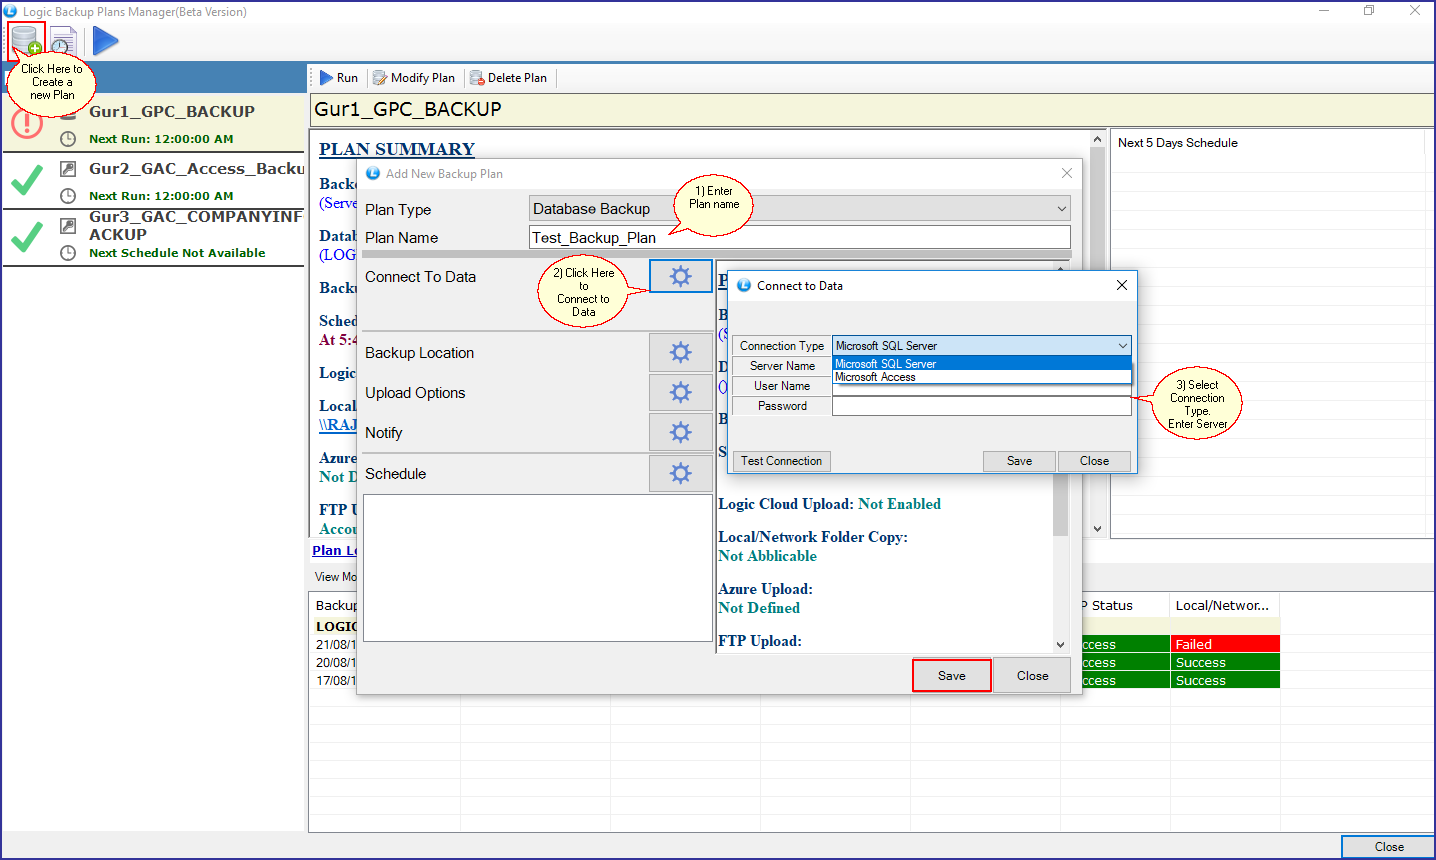
Then, Click on Databases button and select databases for backup. You can select it from databases or companies.

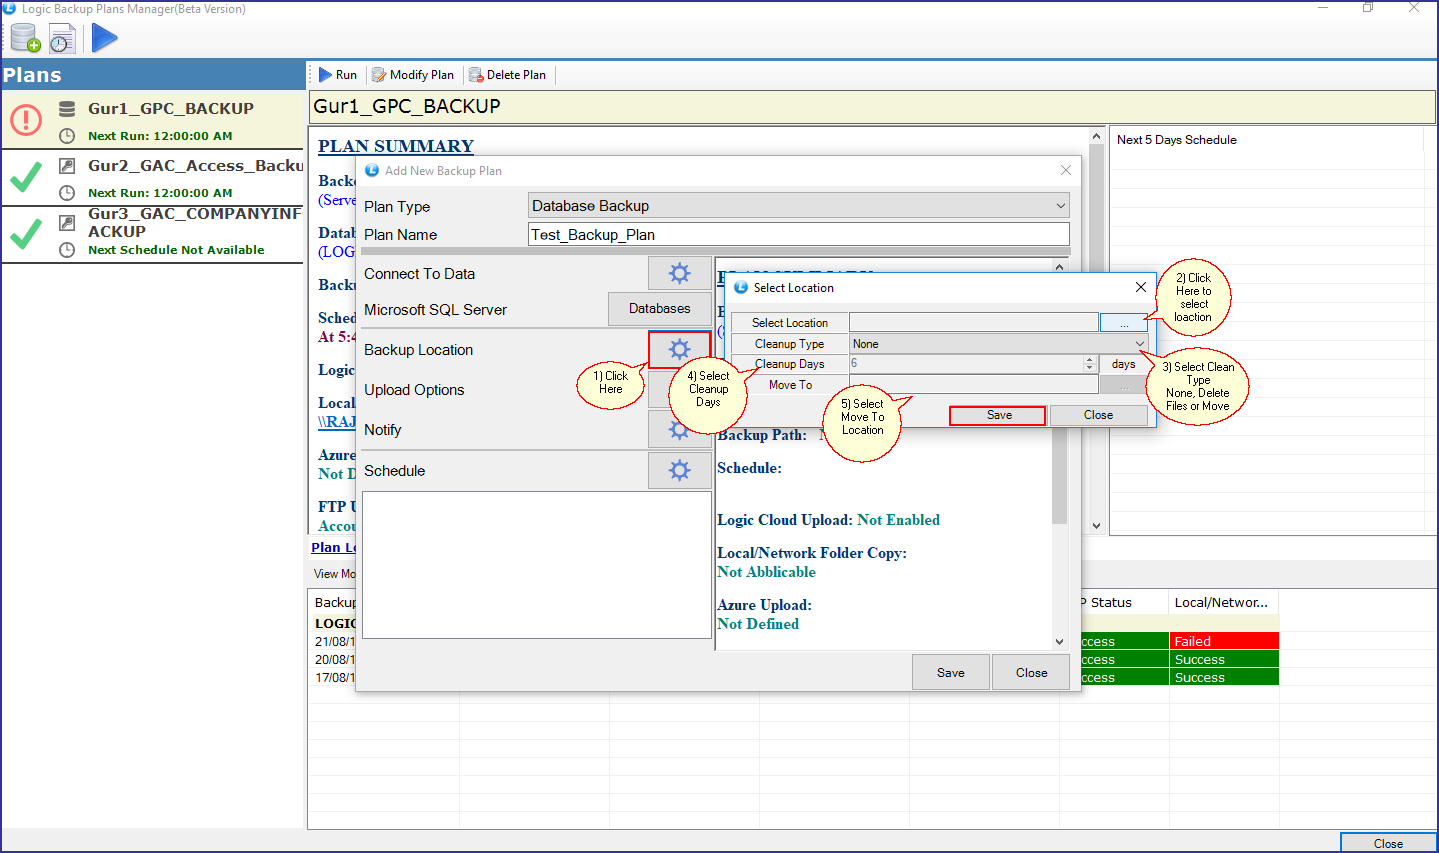
2) Backup Location: Click on the Backup locations button. Select Location window will appear on your screen. Select path of the location in your window where you want to take the backup. You can also select the cleanup type: None, Delete Files and Move Files. Select cleanup days and Move To path, if Move Files option selected.
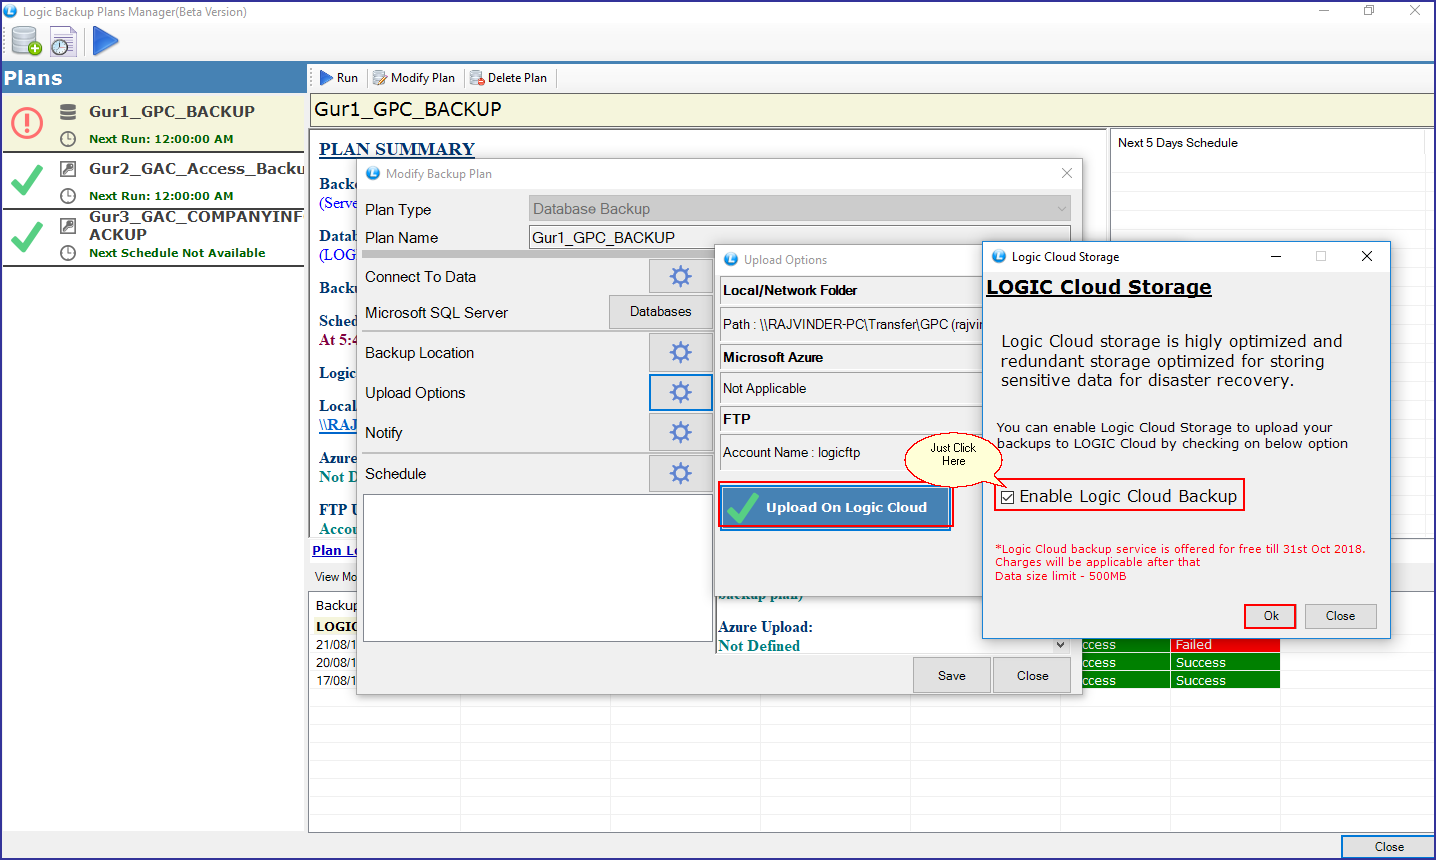
3) Upload Options: Logic offers you different ways to store your precious data. Along with a copy of backup on your machine, you can also take the data backup on a computer available on the network, Microsoft Azure, FTP and Logic Cloud.
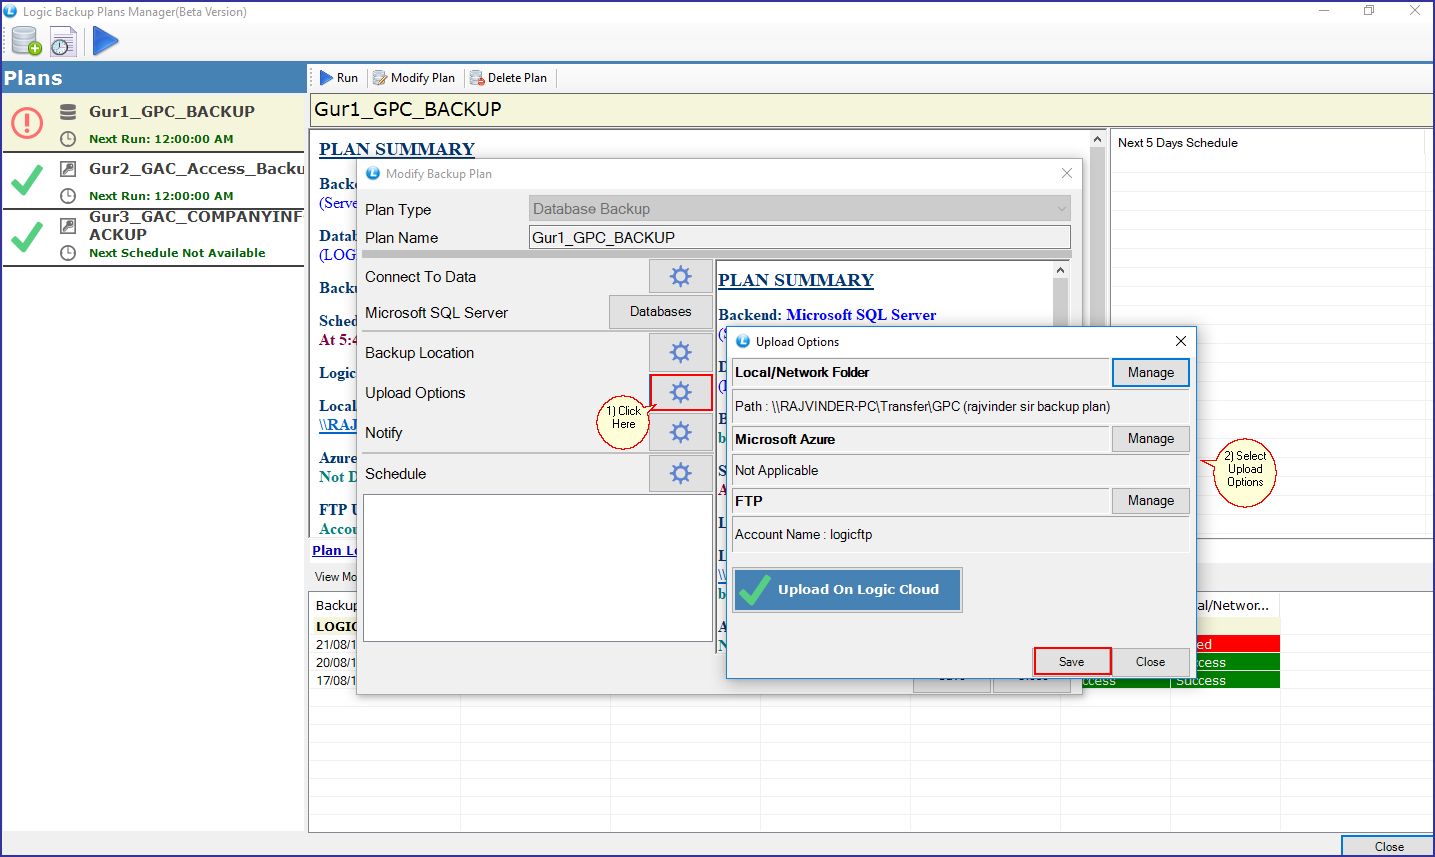
How to Upload on LOGIC Cloud?
LOGIC ERP provides secure cloud backup services for business giving you peace of mind that your data is safe. Logic Cloud Backup Services is offered for free till 31st October 2018. Logic offerings provide users with a just to click to setup and manage service. It’s never been simpler to protect your business from data loss.
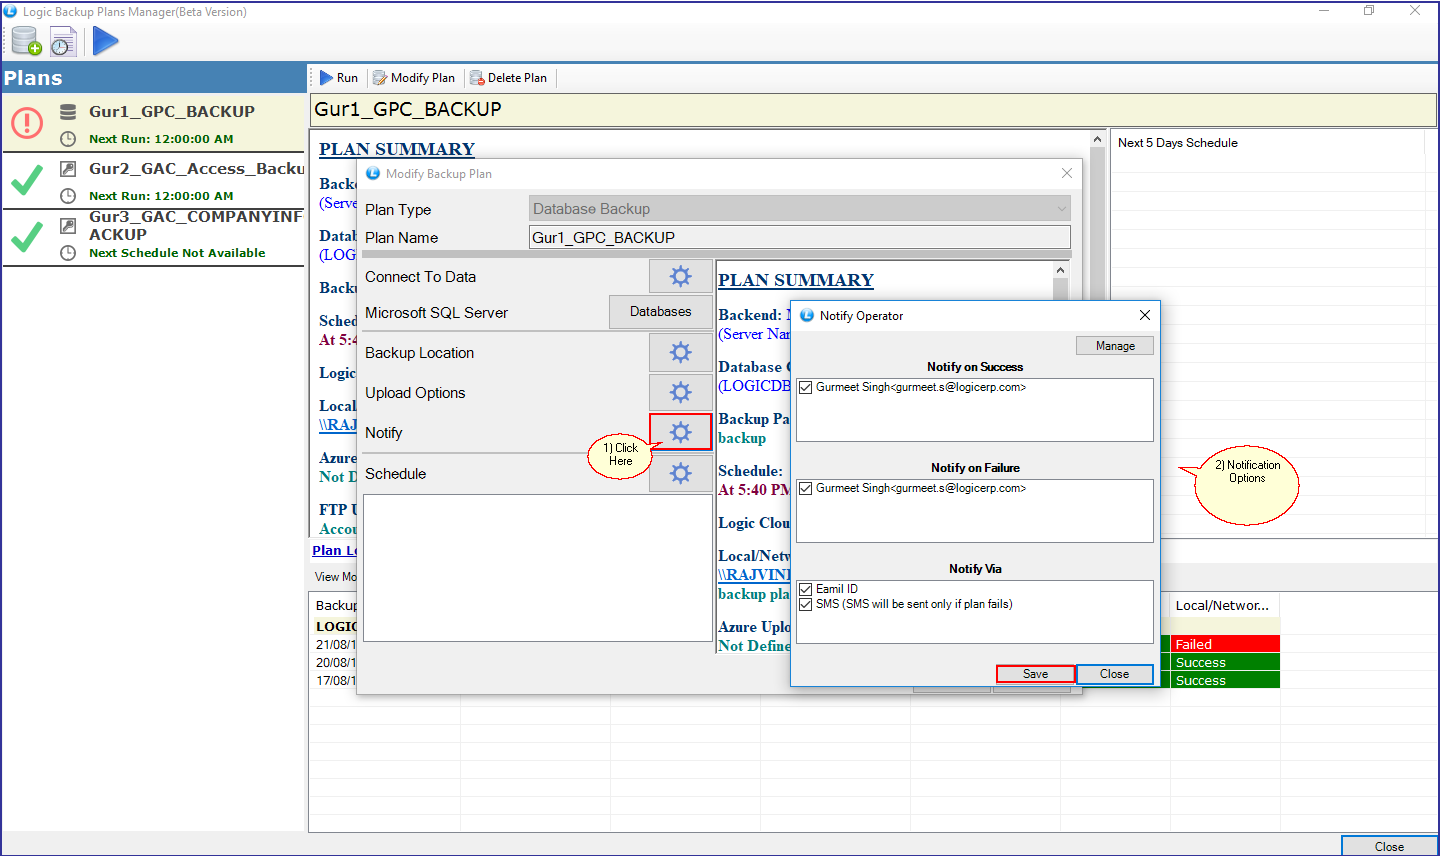
4) Notify: Click on the notify button. You can setup your email id and mobile number to get the notification of failure or success of the data backup. Only email will be sent on the successful execution of data backup plan, whereas email and SMS can be sent (If selected) on the failure.
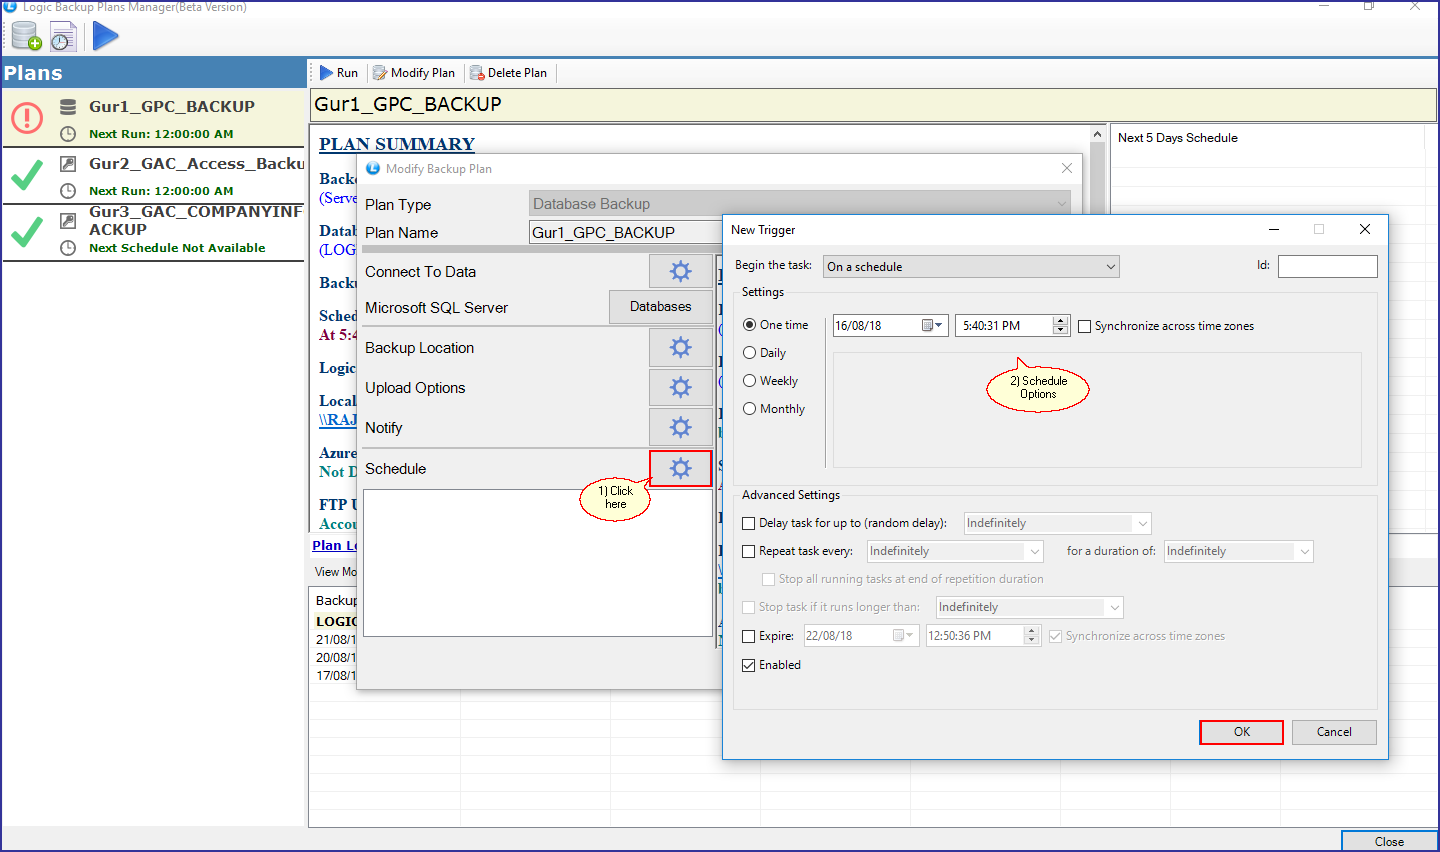
5) Schedule: You can also schedule the backup. Click on the Schedule button. New Trigger window will appear on your screen. Make the settings as per your needs and click on OK button.
Final Backup Plan: