Stockist to Retailer Stock Transfer Option Added

Stockist to Retailer Stock Transfer Option Added: Wholesale distribution is the process of selling products to retailers, who will then make the final sale. Wholesalers act as the retailer’s ‘buying agent’ and saves them from the trouble of searching out and assembling goods from several manufacturers. Sale of a wholesaler (Stockist) is the purchase of retailer.
Stockist sends sale bill of all the items and retailer has to keep the record of each item through its purchase. It was quite difficult for a retailer to do it manually. Now, through this implementation wholesaler can simply export the file with the list of items and retailer can import it and thus, save the time to keep the record manually.
Both stockist and retailer have to register through their respective login ids.
Open Logic.NET.UI.StockistRetailerManagement.exe from the Common folder in the setup folder of LOGIC.
Stockist: A stockist needs to follow the below steps to Export Sale Bill.
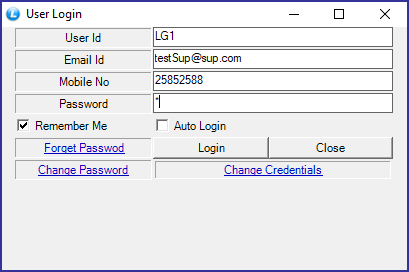
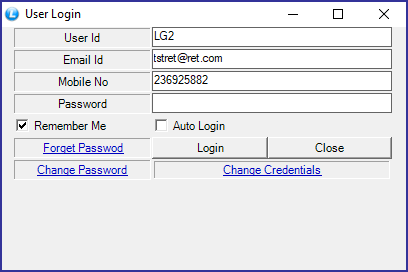
Step 1: Login: Login from the User Id.
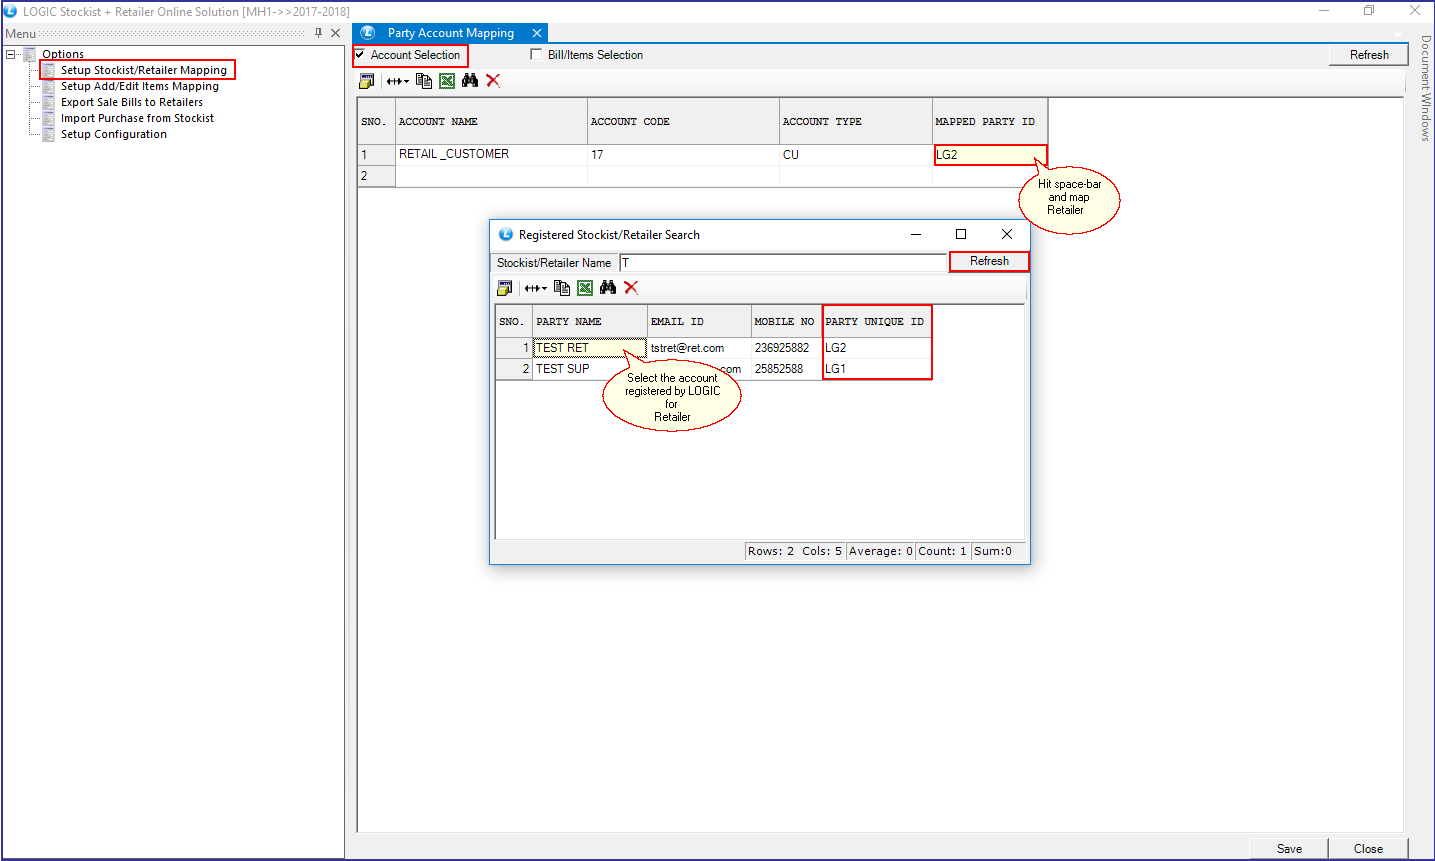
Step 2: Account Mapping: A new screen will appear on your screen. Stockist has to do mapping with its retailer.
Click on Setup Stockist/ Retailer Mapping.
Click on Account selection and then, select an account of the retailer (You can create an account of the Retailer from Main Menu> Setup> Setup Accounts> Setup New Account ). Hit Refresh button.
Retailer account will appear on the screen with mapping id of the retailer.
Click on Save button.
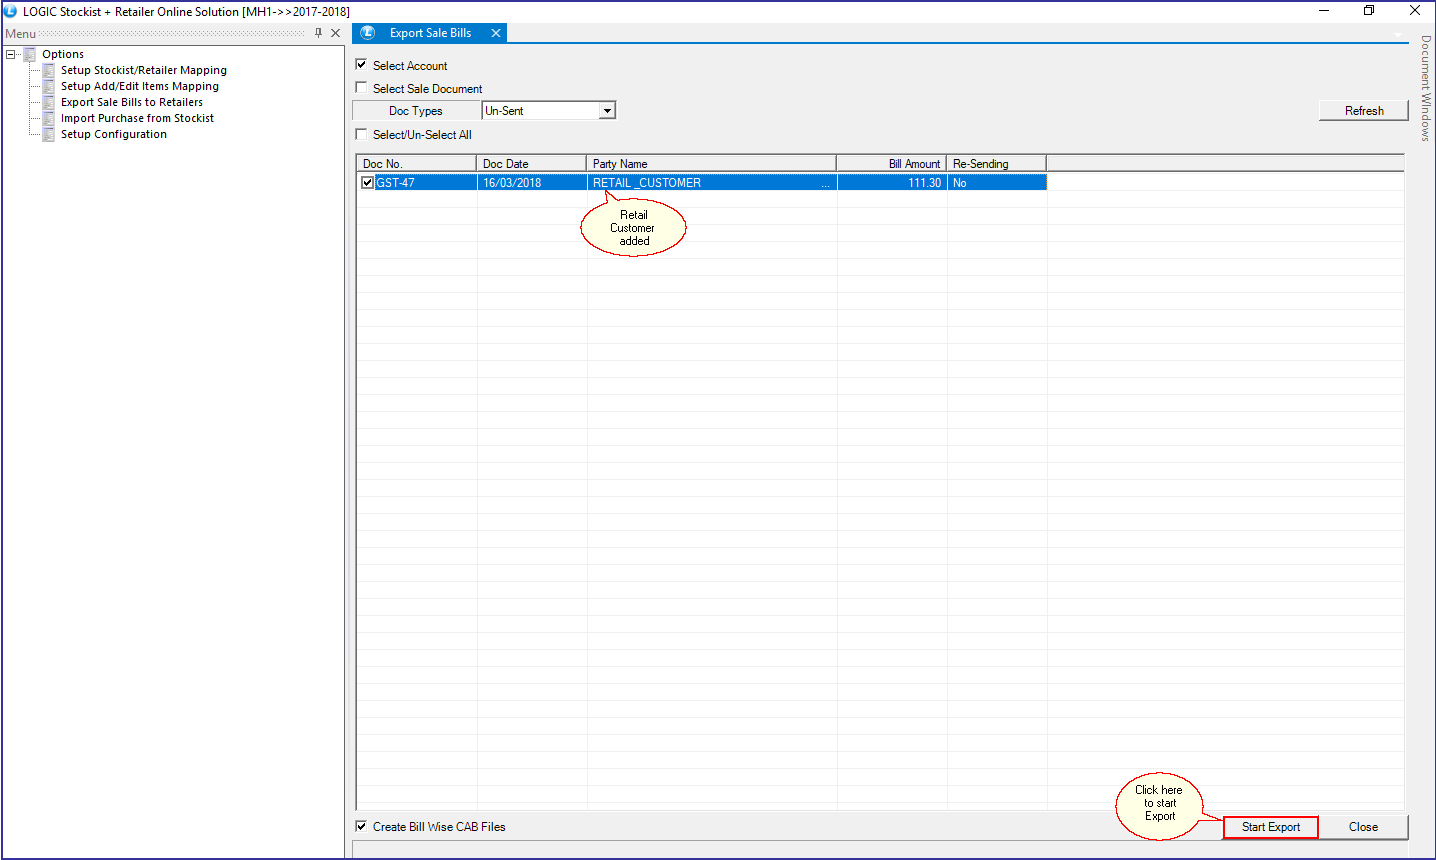
Step 3: Export Sale Bill: Click on Export Sale Bill to Retailers. A new window will appear on your screen.
Click on Select Account and select an account of the retailer.
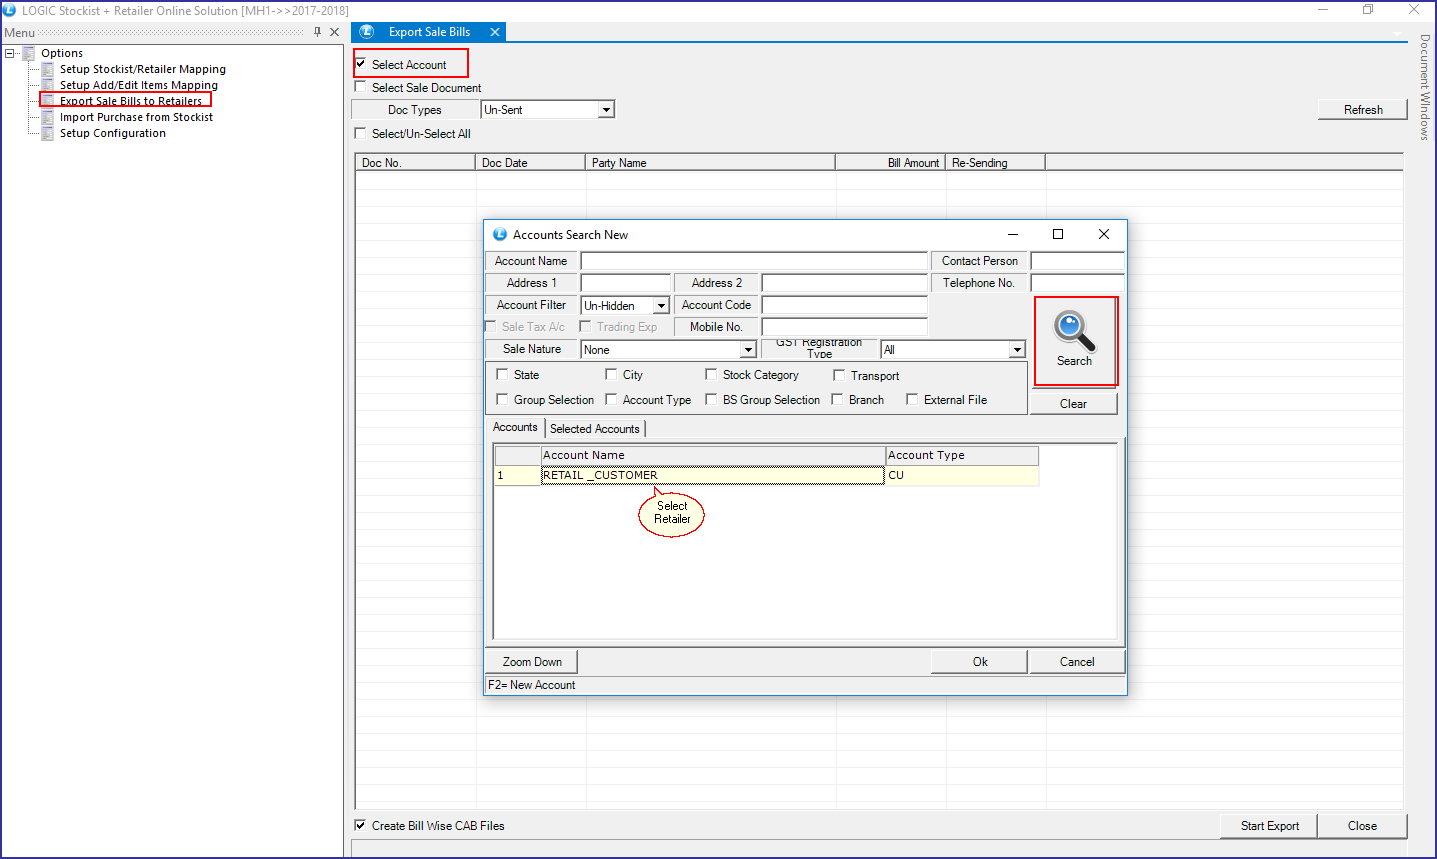
Select account of the Retailer and click on ‘Start Export’ button. Your file will be exported at Logic’s Server and the particular retailer can fetch it through it.
Retailer:
A retailer needs to follow the below steps to Import file.
Step 1: Login: Login from the User Id.
Step 2: Account Mapping: A new screen will appear on your screen. The retailer has to do mapping with its Stockist.
Click on Setup Stockist/ Retailer Mapping.
Click on Account selection and then, select an account of the stockist(You can create an account of the Stockist from Main Menu> Setup> Setup Accounts> Setup New Account ). Hit Refresh button.
Stockist account will appear on the screen with mapping id of the stockist.
Click on Save button.

Click on Setup Configuration. You can set Conversion Factor here. Conversion Factor is used to convert One item into different packings while entering the stock sent by stockist.

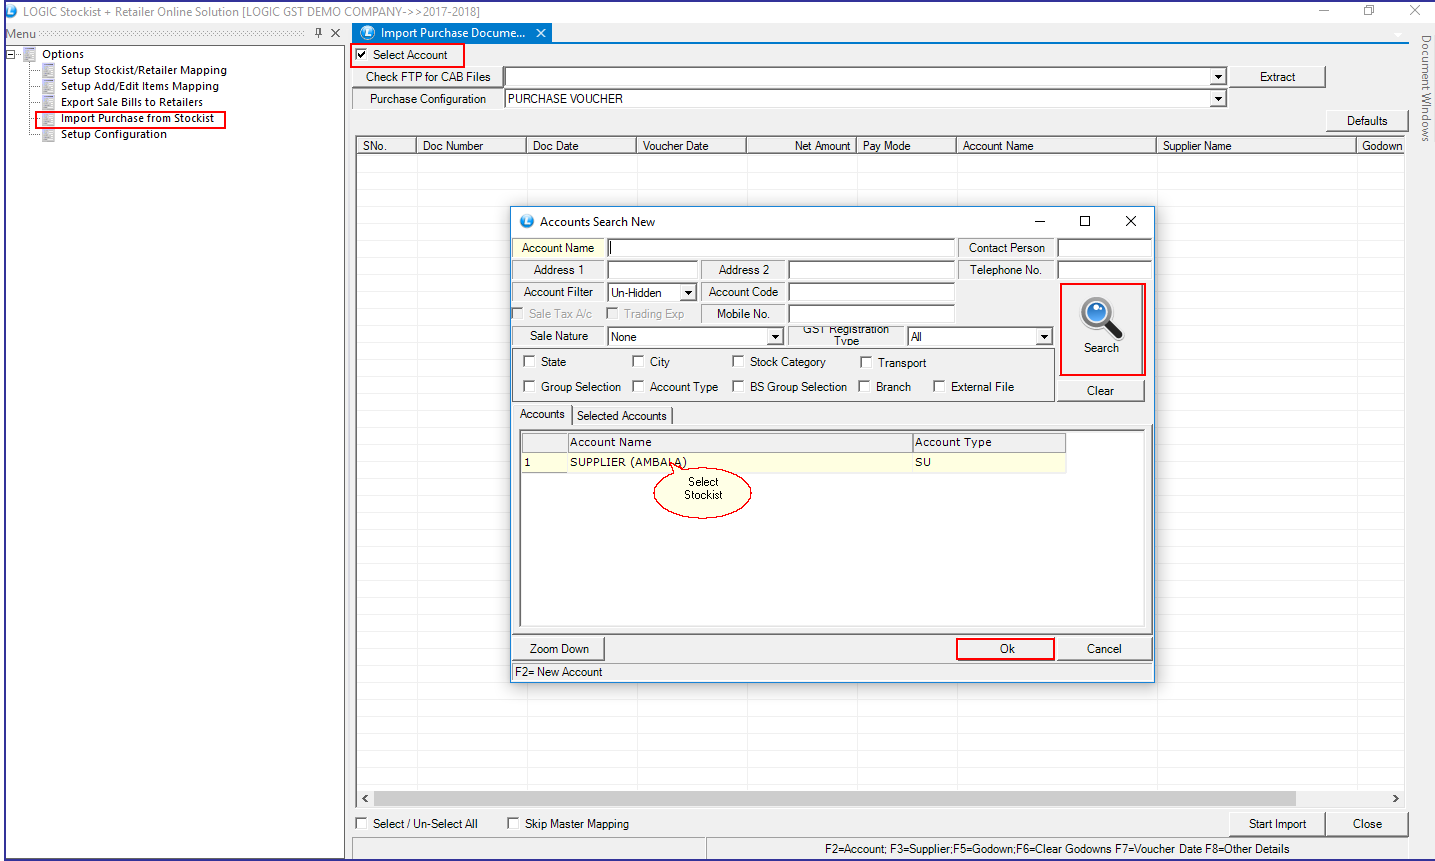
Step 3: Import Purchase: Click on Import Purchase from Stockist. A new window will appear on your screen.
Click on Select Account option and select an account of stockist.
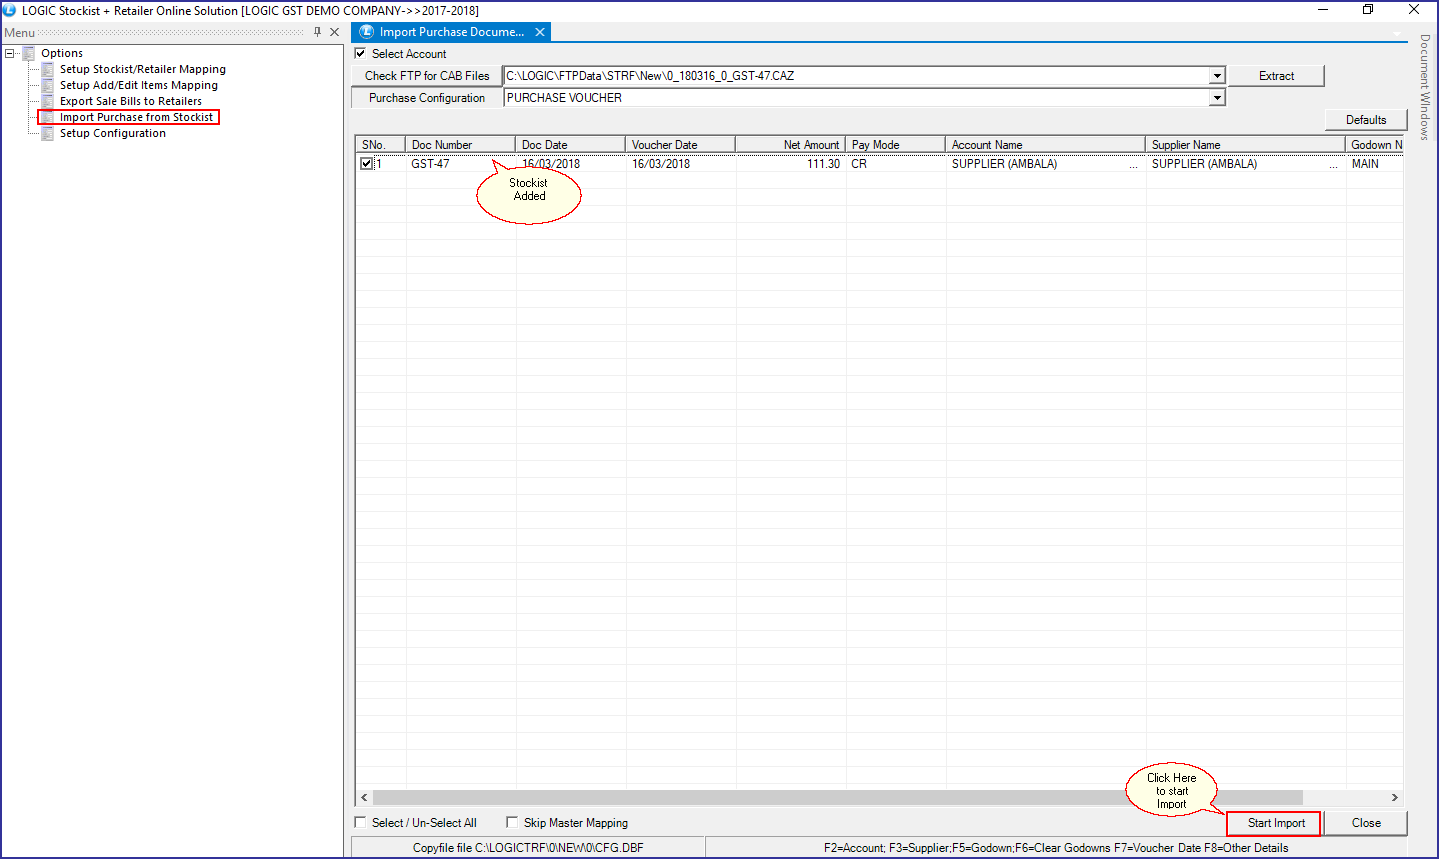
The retailer doesn’t need to do anything with Check FTP for CAB Files button.
Select account of the stockist and click on ‘Start Import’ button. You will fetch the data sent by stockist and saved on the Logic Server.
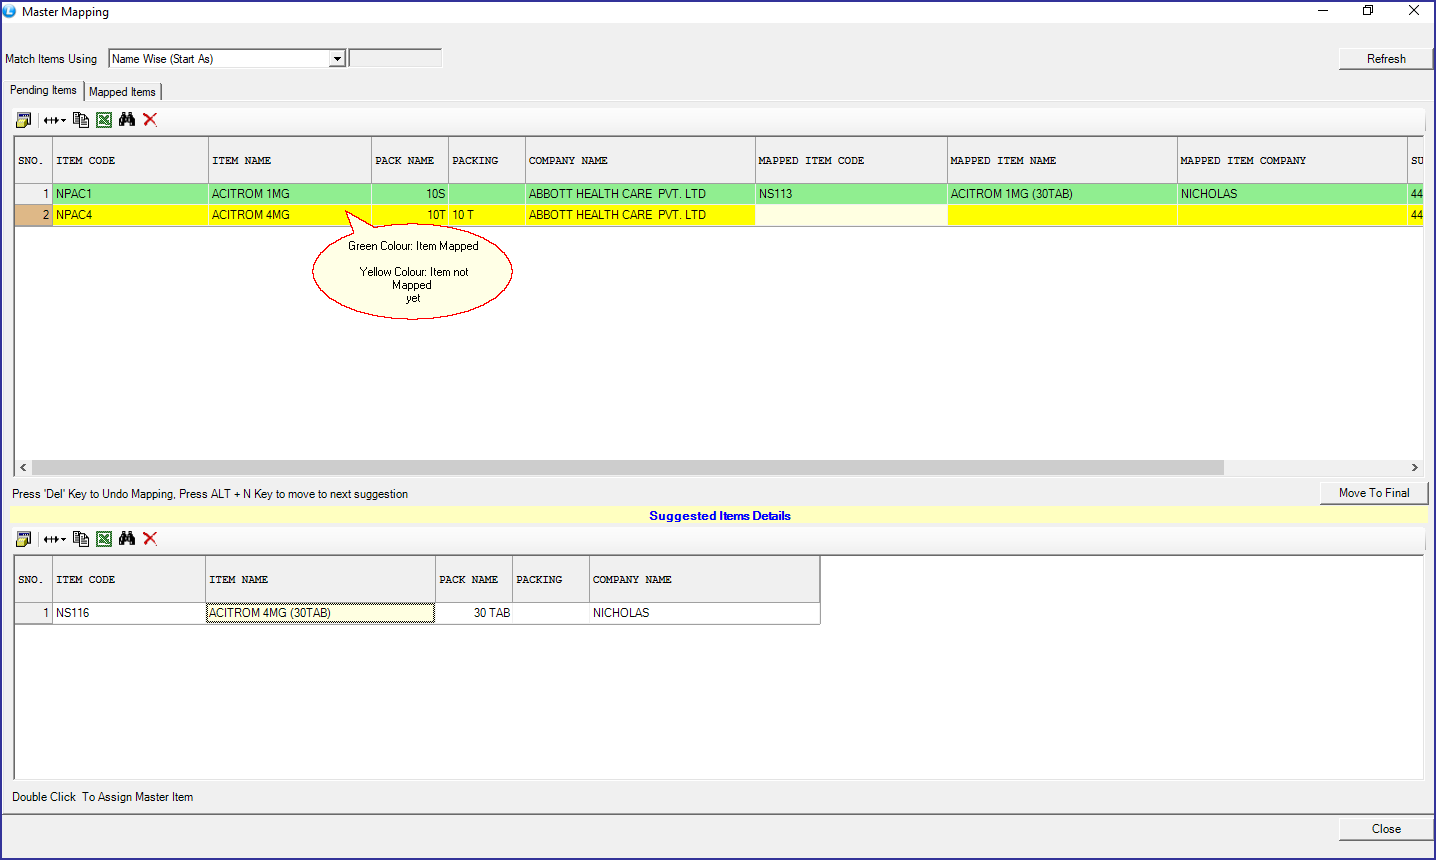
How mapping is done?
In order to do the mapping for the first time, hit the spacebar on mapped Party ID in Setup Stockist/ Retailer Mapping.
Set filter from the top of the window. You can set it as; Company+Name+Pack Wise, Comapny+Name Wise (Exact), Name Wise (Start As), Ignore (-) between Item Name, Ignore Space between Item Name or Match First “N” Characters.

Select item name.
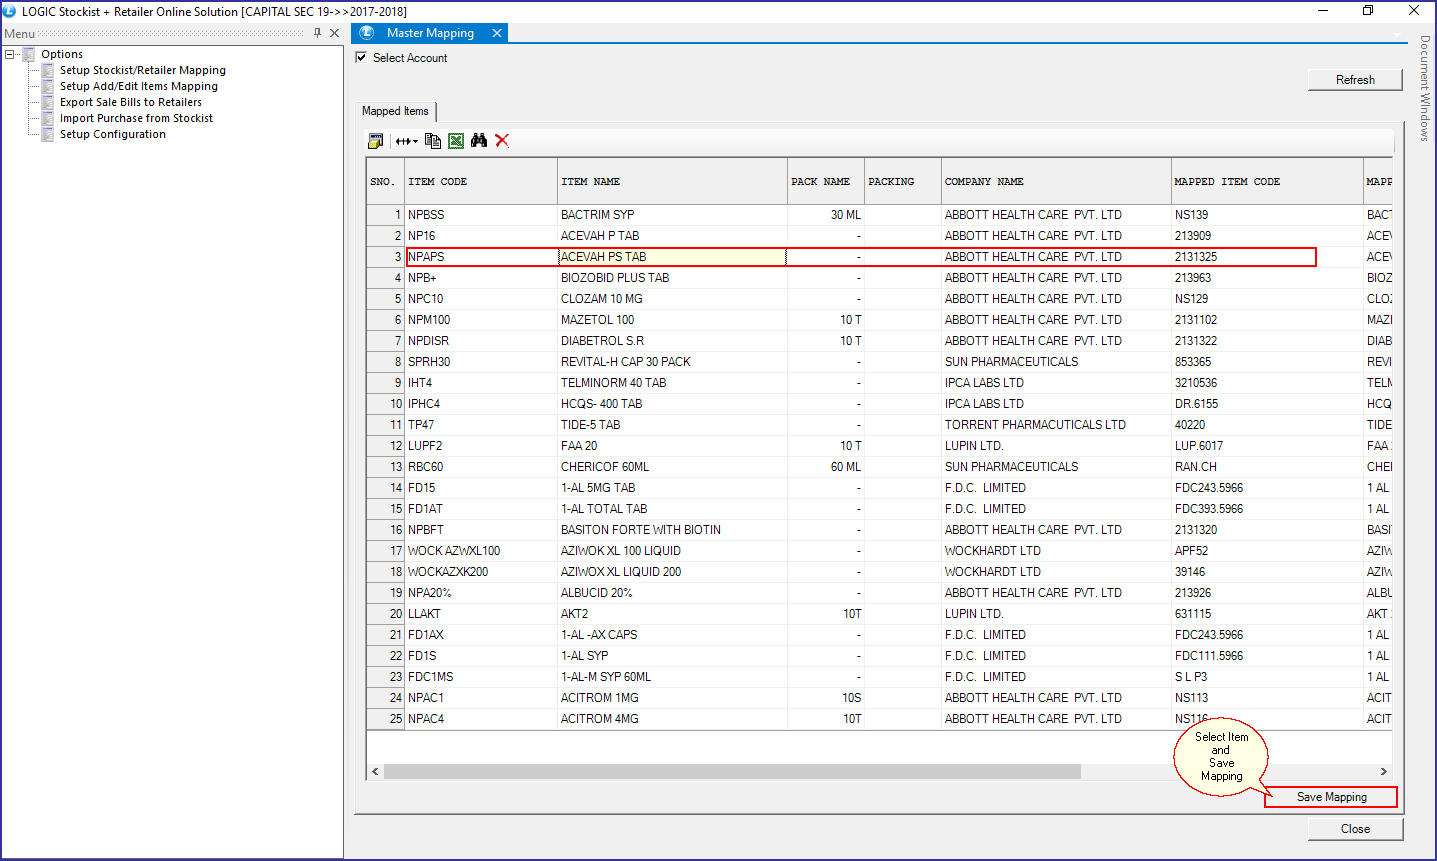
Selected items will appear on your screen.
Double click on the items from Suggested Item Details. Mapped items will appear in Green color and unmapped items will appear in Yellow color.
Click on ‘Move To Final’ button.