|
Additional Features |
  
|
| Show/Hide Hidden Text |
|
Additional Features |
|
| Show/Hide Hidden Text |
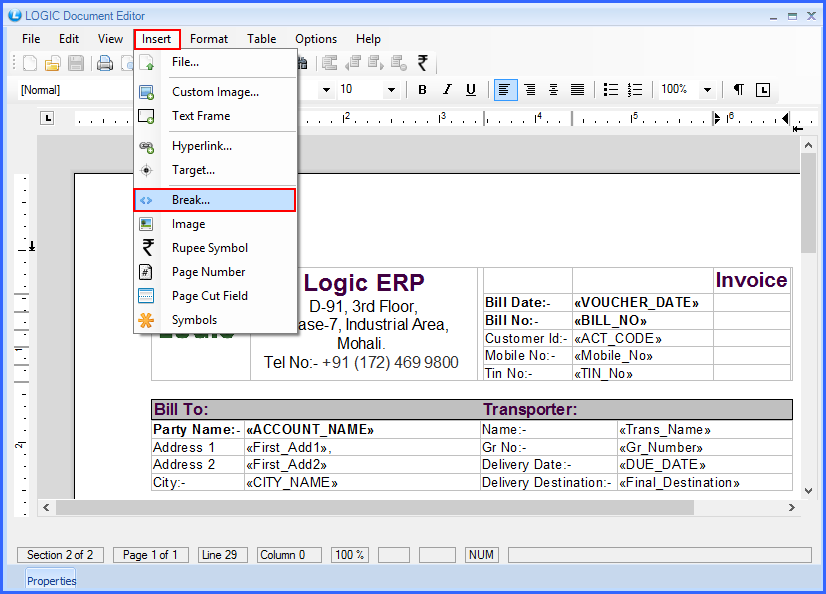
There are many additional features that are included in the Header. Few of them are as follows:
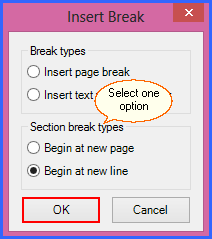
1) ![]() Break Line:
Break Line:
|
||||||||
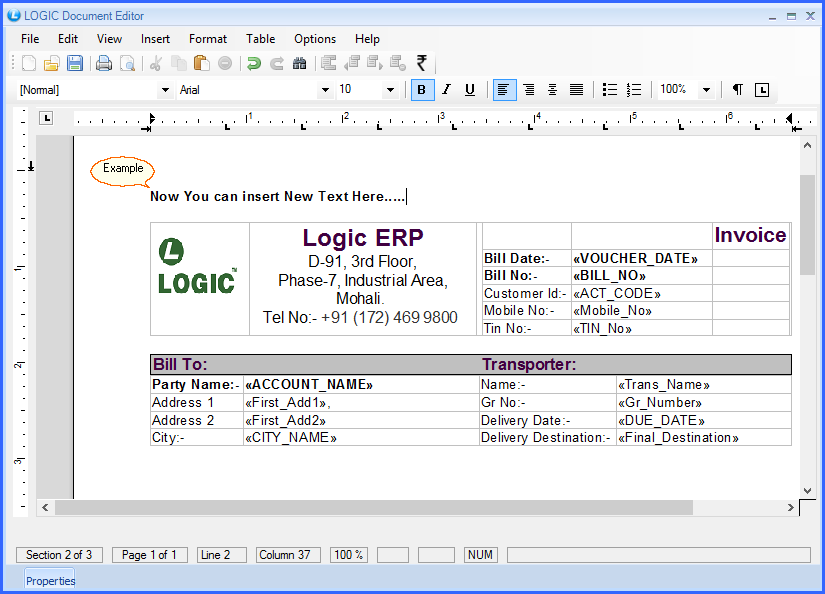
2) ![]() How to Add Header and Footer?
How to Add Header and Footer?
You can add a common Header and Footer in your sale Bill. Click on View > Header or Footer.
Header: A page header (or simply header) is text that is separated from the main body of text and appears at the top of a printed page or your sale bill. This text is common for all the pages of sale Bill. When you click on Header, a doted box will appear at the top of the bill, click inside this box for the text that you want to be appeared as your Header of the Sale Bill Print.
Footer: A page Footer (or simply Footer) is text that is separated from the main body of text and appears at the bottom of a printed page or your sale bill. This text is common for all the pages of sale Bill. When you click on Footer, a doted box will appear at the bottom of the bill, click inside this box for the text that you want to be appeared as your Footer of the Sale Bill Print.
|
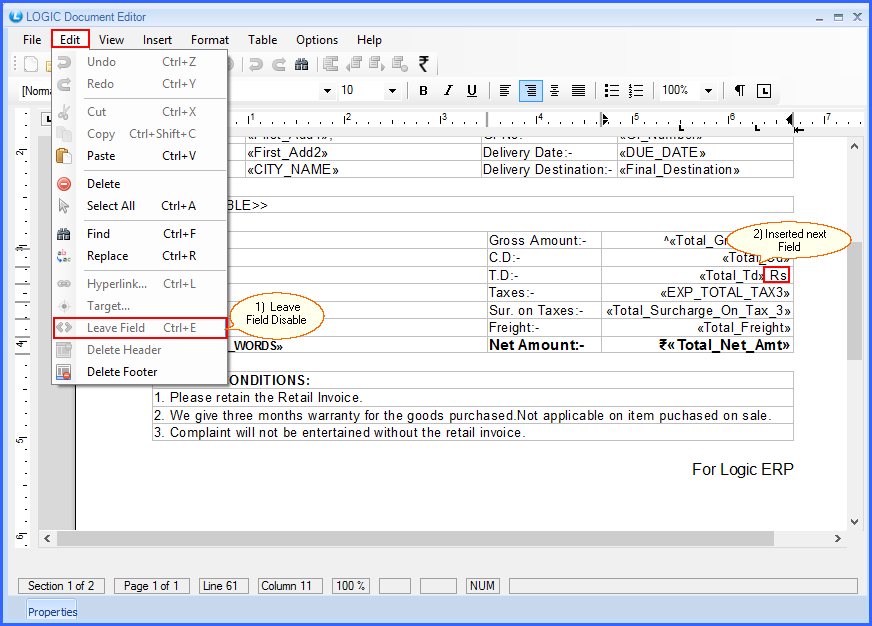
3) ![]() What is the concept of Leave Field?
What is the concept of Leave Field?
Click on Edit > Leave Field.
Leave Field is used to break the continuity of the Fields. If you are inserting more than one field in a same row for different values, you have to use the concept of Leave Field. Make sure that Leave Field is disable while inserting more than one Field.
Fig 4.Leave Field
For Example: If you want to add Rs. in the same field, See if Leave Field is Disable to show it in Preview. If Leave Field is enabled, the content you will add will not display during Previewing. |
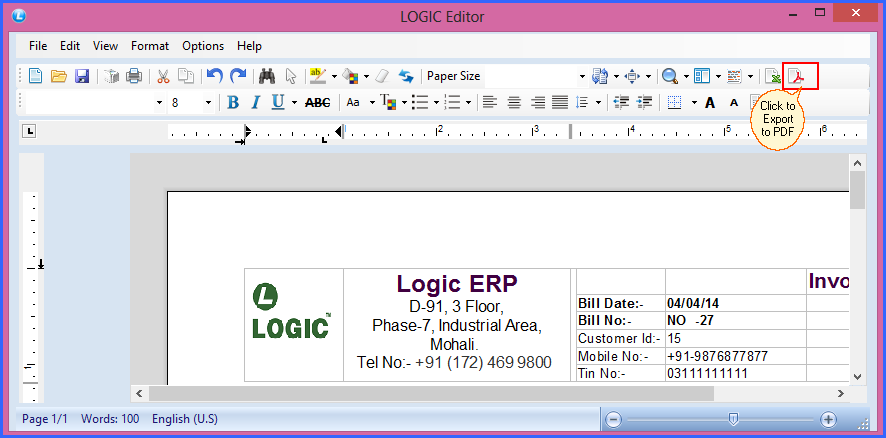
4) ![]() How to Export a Sale Bill to PDF?
How to Export a Sale Bill to PDF?
Once you have completed the designing, you will click on the Print Preview. In the Logic Editor, there is an option to Export it to PDF, click on it and save it your drive. It will be reported to your Computer. See the window below:
Fig 5.PDF
|
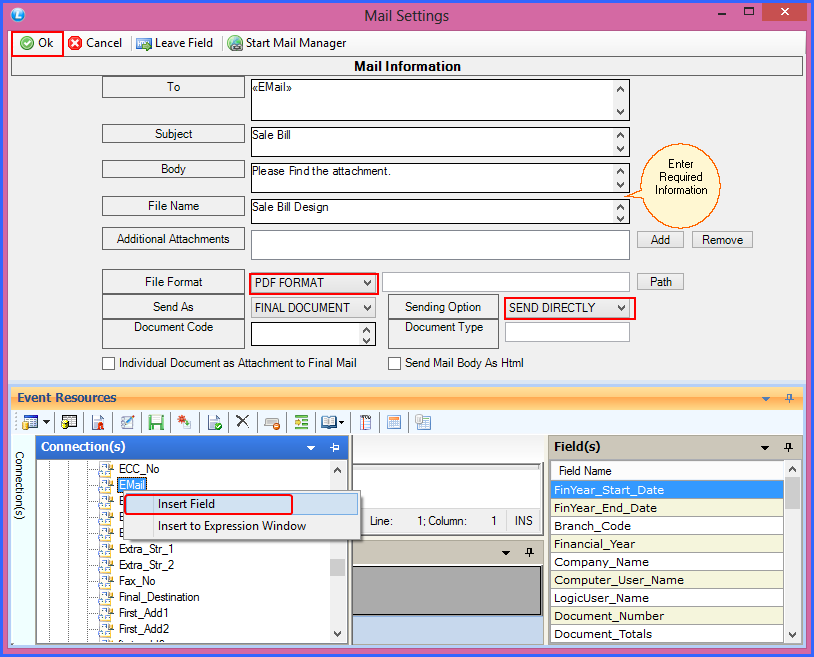
If you want to mail the sale bill to your customers, Click on Options > Mail Settings. A window will appear on your screen. Enter the required information.
To: Enter the recipient mail address, if you don't want to enter it manually, you can insert a field for it from Properties> Bill Header Details > EMail.
File Format: You can save your sale bill print document in a particular format. There are three formats available: RTF Format, PDF Format and HTML Format.
Send As: You can have control on how you wish to send your Sale Bill. You can send As Individual Document or Final Document.
Sending Option: You can select the Sending Option to choose the way of sending your sale bill mail. There are three types of options available:
1) Don't Send: If you don't want to send your mail to the recipient, select this option. 2) Send Directly: If you want to send your mail directly to the recipient, select this option. You can't see the preview form in this case. 3) Preview & Send: If you want to first preview your bill and then, send it, select this option.
Send Mail Body as HTML: If you select this checkbox, attachment will not send in the mail and file is send as HTML Body.
Individual Document as Attachment to Final Mail: If you select this option, all selected bills will send to the recipient in the final Mail.
Enter Subject, Body, File Name, Select the Format of your File and Select Send Directly. Click on OK. See the window for reference.
Fig 6. Mail Settings
|
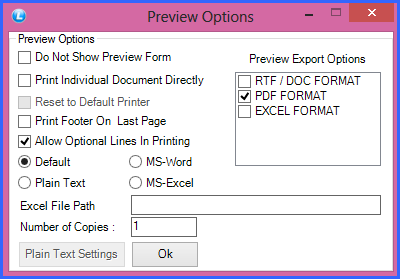
6) ![]() What are Preview Options available?
What are Preview Options available?
Click on Options > Preview Options. A window will appear on your screen with several options. You can select the option according to the requirements of your Sale Bill.
For Example: The Document Header of Previous Bill may be printed on the next Sale Bill during multiple printing if you don't check this option.
Fig 7.Preview Options
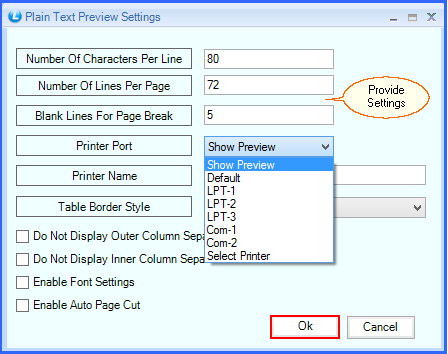
Fig 10.Plain Text Preview Settings
|
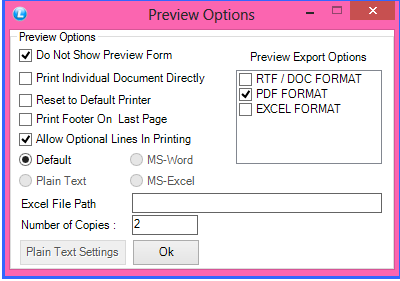
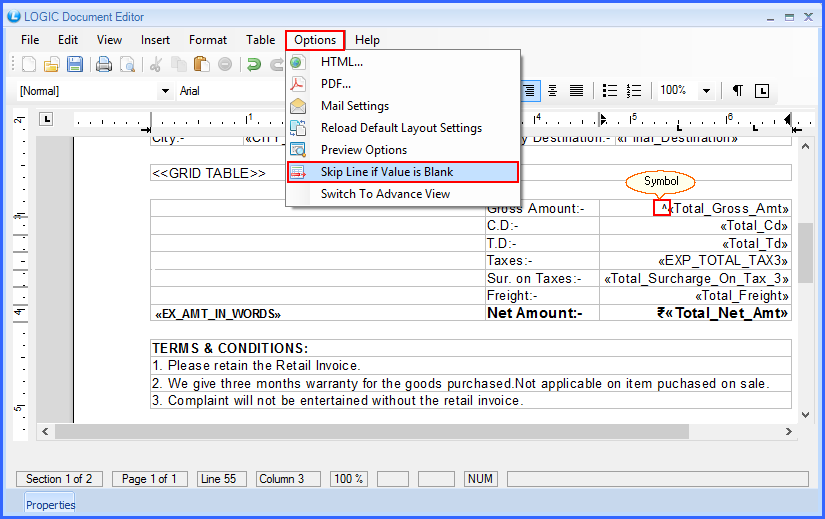
Click on Options > Skip Lines If Value is Blank. This option will enable from Options > Preview Options > Allow Optional Line in Printing.
You can use this option in a case when a value in your Footer is blank. The line or row with blank or null value will be skipped while printing if this option is enabled. In simple words, a line or row with blank value will not be displayed while printing of sale Bill.
See the window as example:
Fig 11. Skip Line if Value is Blank
|
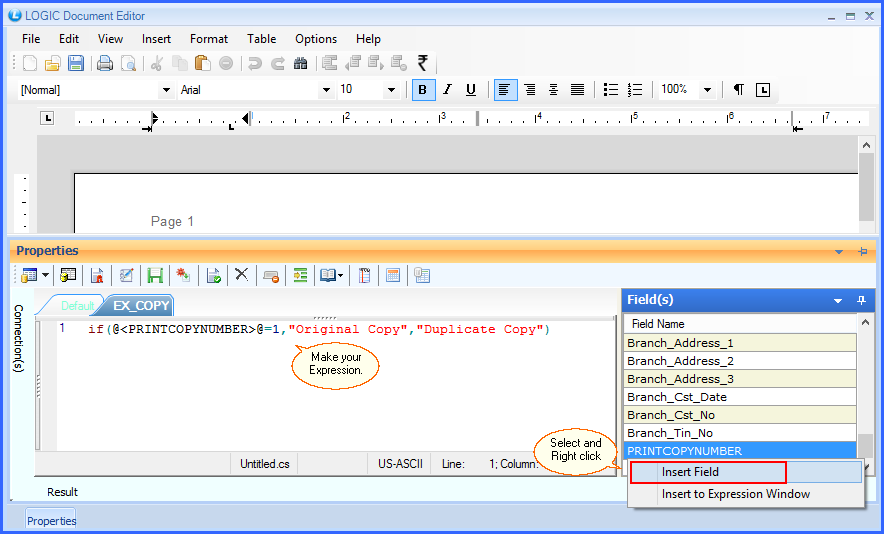
In order to insert bar code in your sill bill design;
Click on the area in sale bill design where you want to insert barcode.
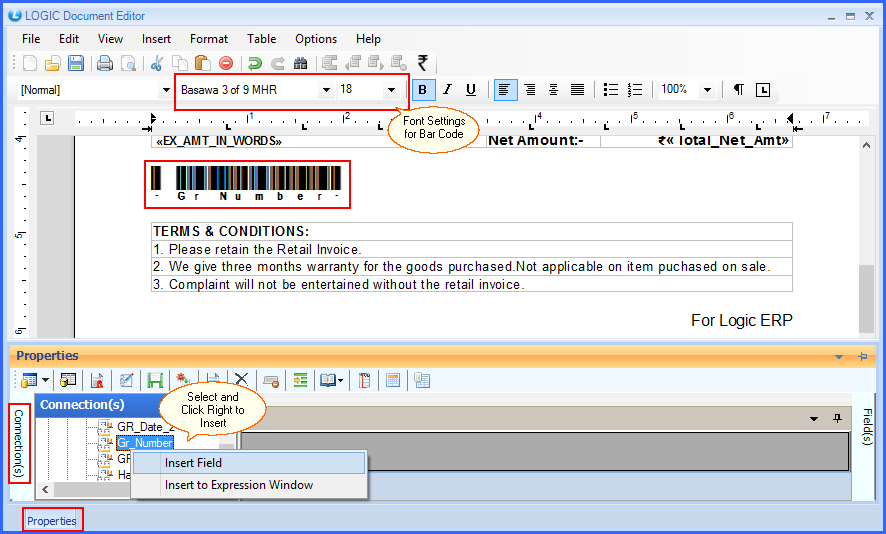
Click on Properties> Connection(s)> Bill Header Details> GR_Number. You can select any unique field to make it your Bar Code. Select the Field and Click Right to insert Field.
Bar Code will appear on your screen. Select it and Change the font settings according to the requirement of your bill.
Bar Code will be added in your design. You can Preview and Print it.
Fig 12. Insert Bar Code
|
9) ![]() How to use Custom Image and Text Frame?
How to use Custom Image and Text Frame?
Custom Image: Click on Insert > Custom Image. This option allows you to change the position and size of Image.
Text Frame: Click on Insert > Text Frame. You can use this option to create a text around a text or an image.
Custom Image and Text Frame are together used to insert Barcode in the sale Bill design. See How:
Insert custom Image first and then Insert Text Frame.
Double click somewhere in the Text Frame.
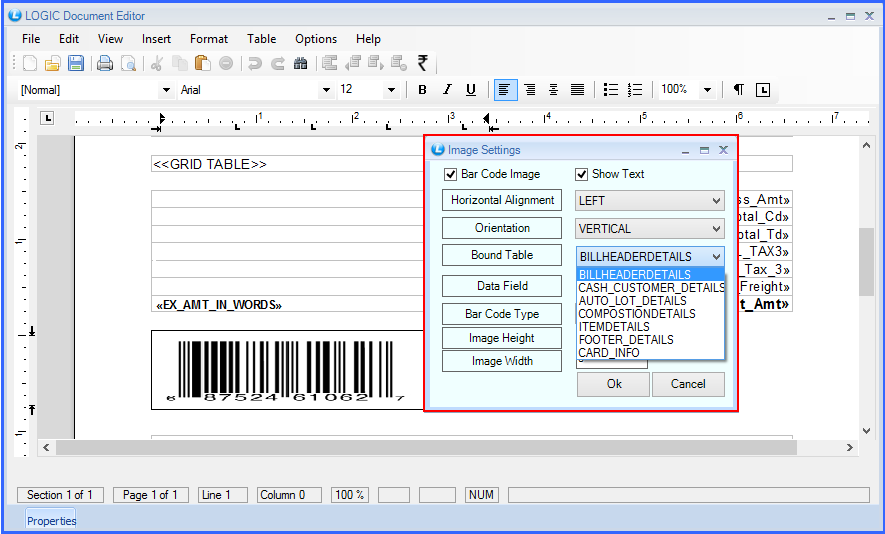
Image Settings window will appear on your screen. Click on Bar Code Image and Show Text to display your text & Image. You have to select Horizontal Alignment and Orientation of the Image. In the next two columns, you will see the database fields, select the database fields from Bound Table and Data Field. Then, select Bar Code Type and mention Height & Width of Image and Click on Ok.
Fig 13. Insert Custom Image and Text Frame
|
10) ![]() How to Insert Page Number?
How to Insert Page Number?
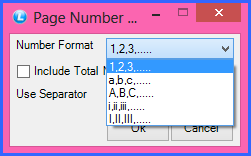
Click on Insert > Page Number. Page Number Settings window will appear on your screen. Select the Format and click on OK.
Fig 14. Page No. Settings
|