|
Sale Bill Print Designer (.Net) |
  
|
| Show/Hide Hidden Text |
|
Sale Bill Print Designer (.Net) |
|
| Show/Hide Hidden Text |
![]() Sale Bill is a legal document that is given by the 'seller' to the 'buyer' when some transaction is made. It includes all types of information that is related to Sale such as, Item Name, Item Quantity, Amount etc.
Sale Bill is a legal document that is given by the 'seller' to the 'buyer' when some transaction is made. It includes all types of information that is related to Sale such as, Item Name, Item Quantity, Amount etc.
![]() You can set up the Sale Bill in LOGIC ERP software.
You can set up the Sale Bill in LOGIC ERP software.
![]() Once you have successfully entered the Sale Bill, next is Print of bill . To print a bill, you need to have its design first. LOGIC ERP software provides a feature to design your own format for sale bill. It offers a simple, professional solution for invoicing your customers or clients.
Once you have successfully entered the Sale Bill, next is Print of bill . To print a bill, you need to have its design first. LOGIC ERP software provides a feature to design your own format for sale bill. It offers a simple, professional solution for invoicing your customers or clients.
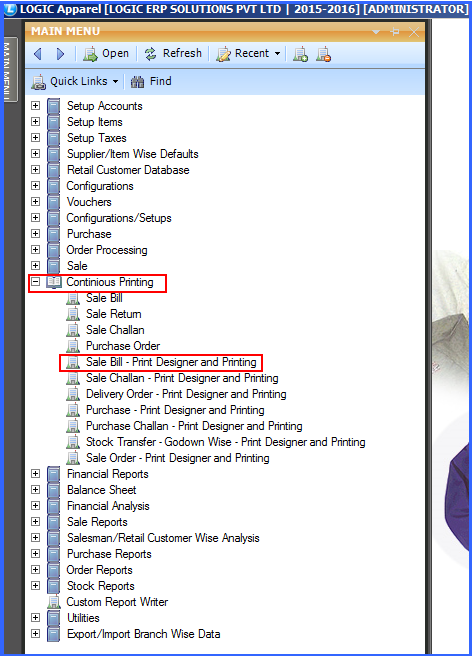
![]() Sale Bill Designing: Main Menu > Continuous Printing > Sale Bill Print Designer and Printing.
Sale Bill Designing: Main Menu > Continuous Printing > Sale Bill Print Designer and Printing.
Fig 1. Main Menu
|
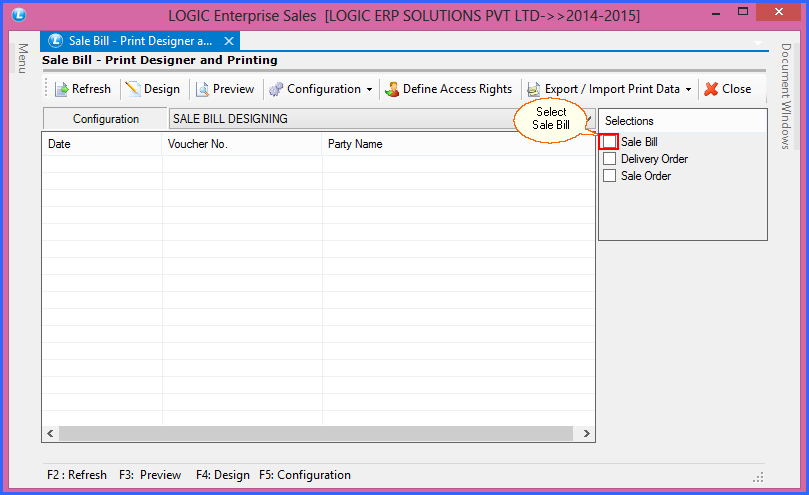
Sale Bill Print Designer and Printing form will open on your screen. See the window below and options available:
![]() Toolbar
Toolbar
![]() Configurations
Configurations
![]() Selections
Selections
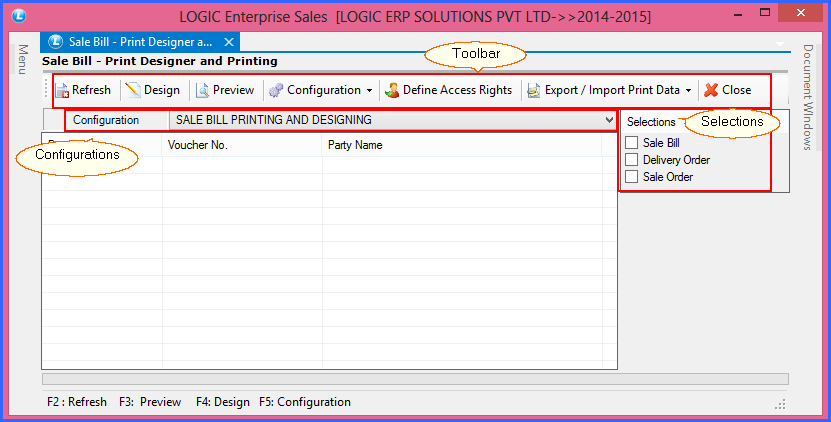
Fig 2. New Sheet
![]() Tool Bar: A toolbar is a vertical or horizontal row of clickable icons that perform specific operating system or application functions. It is present on the top of the window with many icons that perform following functions:
Tool Bar: A toolbar is a vertical or horizontal row of clickable icons that perform specific operating system or application functions. It is present on the top of the window with many icons that perform following functions:
Fig 3. Toolbar
|
Steps to Start Designing a Sale Bill:
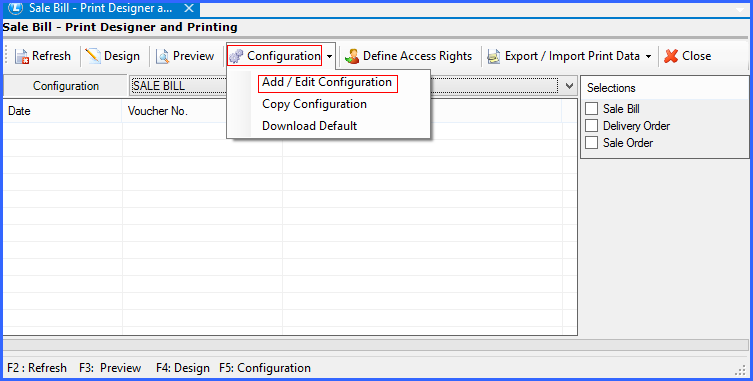
Step 1: Add Configuration : This option allows you to add a new configuration for your bill.
Fig 4. Configuration
|
1) Click on the Configuration button from Toolbar. Select Add / Edit Configuration. |
Fig 5. Add/ Edit Configuration
|
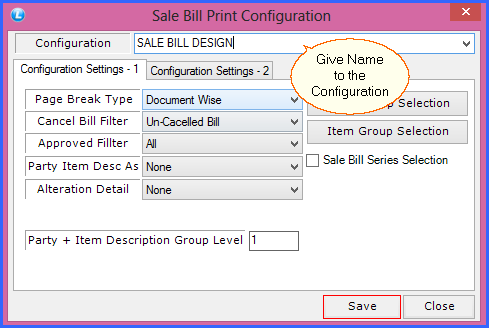
2) Change the name of the Configuration and other settings that you want in your Configuration. |
Fig 6. Added Configuration
|
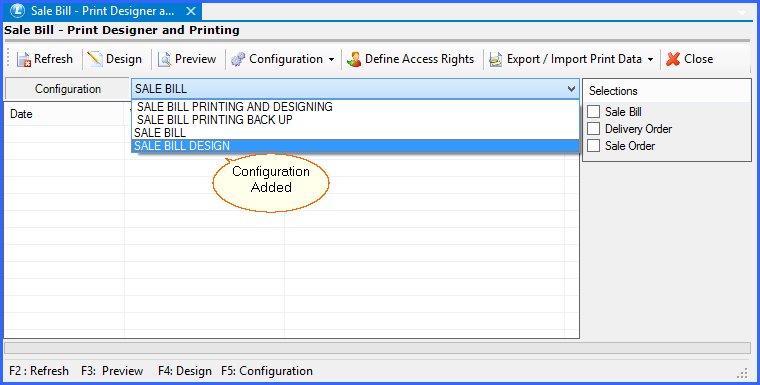
3) Click on the Save button, a message will pop on your screen Click Save and then, Done. Configuration will be added in your Configuration List. |
Step 2: Selection: Selections option at the right side allows you to select a bill of your choice.
Fig 7. Bill Selections |
1) See the Selections option in the right side of your window, Select Sale Bill to design a Sale bill.
|
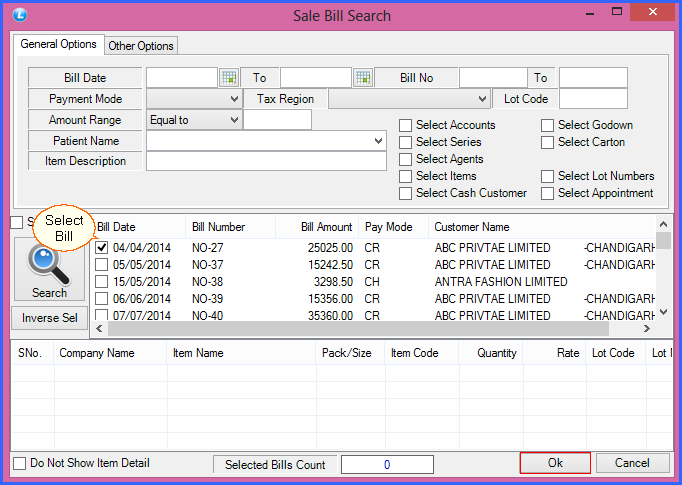
Fig 8. Item Selection
|
2) A window will appear on your screen to search the item.
|
Step 3: Select Bill: Select the bill (For which you want to design bill).
Step 4: Refresh: Select the item from the window and Click on Refresh button from Toolbar. You can Press F2 from Keyboard as well.
Step 5: Design: Now you are ready to design your bill. Click on Design from Toolbar or Press F4 from Keyboard.
![]() Have a Quick look on the Steps to start Designing a Bill:
Have a Quick look on the Steps to start Designing a Bill:
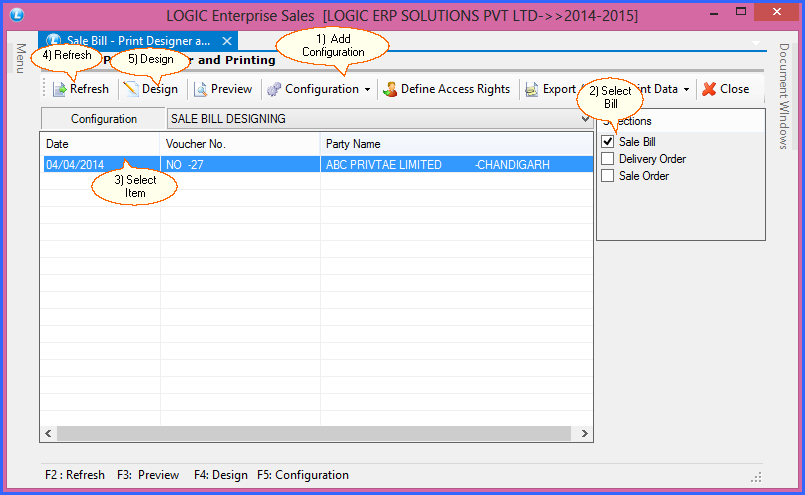
Fig 9. Step To Start Bill Design