|
Item With Multiple Company+Shade+Size |
  
|
| Show/Hide Hidden Text |
|
Item With Multiple Company+Shade+Size |
|
| Show/Hide Hidden Text |
![]() The user can create Items with multiple Shades and Sizes by using this form. The form contains three main parts : Item Details, Company and Pack / Sizes, Shades and Groups.
The user can create Items with multiple Shades and Sizes by using this form. The form contains three main parts : Item Details, Company and Pack / Sizes, Shades and Groups.
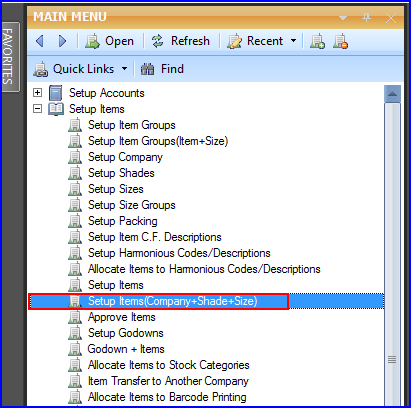
![]() Item with multiple (Company+Shade+Size): Main Menu > Setup Items > Setup Items (Company+Shade+Size).
Item with multiple (Company+Shade+Size): Main Menu > Setup Items > Setup Items (Company+Shade+Size).
Fig 1. Main Menu |
This section contains the details related to the items:
![]() Item Name: Select the Item Name from the list, it is a mandatory column can't be left blank.
Item Name: Select the Item Name from the list, it is a mandatory column can't be left blank.
![]() Finished/Raw: Select the type from the list. It is an optional column.
Finished/Raw: Select the type from the list. It is an optional column.
![]() Item Image: If user want to link the picture with Item then click on the Item Image button > Item Image dialog box appears > select the style from the list and provide the path of the picture > click ok. It is an optional column.
Item Image: If user want to link the picture with Item then click on the Item Image button > Item Image dialog box appears > select the style from the list and provide the path of the picture > click ok. It is an optional column.
Fig 2. Item Groups |
![]() Godown Name: Select the Godown Name from the list, that has been created in Godown Master. It is an optional column.
Godown Name: Select the Godown Name from the list, that has been created in Godown Master. It is an optional column.
![]() Rates: Enter the rates related to the item. Here user can define Basic Rate, Sale Rate, Purchase Rate, MRP and five other special rates related to the items.
Rates: Enter the rates related to the item. Here user can define Basic Rate, Sale Rate, Purchase Rate, MRP and five other special rates related to the items.
![]() Size Diff (Rs): It is the difference in the rates according to the size of the Items.
Size Diff (Rs): It is the difference in the rates according to the size of the Items.
![]() Taxes For Sale: Assign the sale tax for the Item from the list, that has been created in Setup Tax Types (Sale). It is an optional column.
Taxes For Sale: Assign the sale tax for the Item from the list, that has been created in Setup Tax Types (Sale). It is an optional column.
![]() Taxes For Purchase: Assign the purchase tax for the Item from the list, that has been created in Setup Tax Types (Purchase). It is an optional column.
Taxes For Purchase: Assign the purchase tax for the Item from the list, that has been created in Setup Tax Types (Purchase). It is an optional column.
![]() Item Description: Enter the description related to the items in the text box.
Item Description: Enter the description related to the items in the text box.
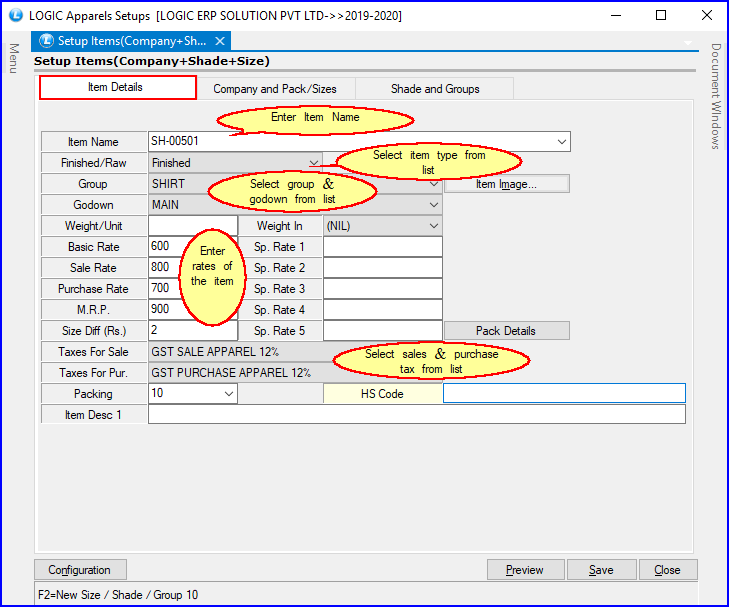
Fig 3. Item Details
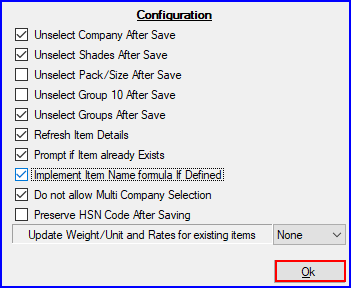
Click on button or press Alt+N > Configuration dialog box appears > check the boxes according to the requirements and click Ok or press Alt+O.
Fig 4. Configuration |
In this section select the company name and select the sizes.
![]() Filter Company: Enter the first character by which you want to filter company names and press enter.
Filter Company: Enter the first character by which you want to filter company names and press enter.
![]() Filter Sizes: Enter the first number or character by which you want to filter the sizes and press enter.
Filter Sizes: Enter the first number or character by which you want to filter the sizes and press enter.
![]() How To Create New Pack/Size: In order to create new pack/size press F2 > Setup Pack/Size dialog box appears, enter the pack name and pack short name and click Ok.
How To Create New Pack/Size: In order to create new pack/size press F2 > Setup Pack/Size dialog box appears, enter the pack name and pack short name and click Ok.
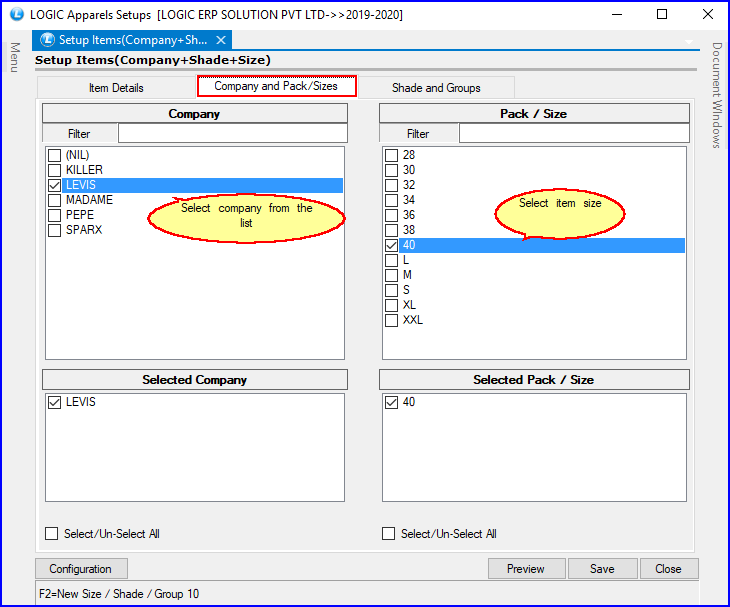
Fig 5. Company and Pack/Sizes
![]() In this section Shades are defined for the item. Select the shade from the list. The Shade list can be view in two ways :
In this section Shades are defined for the item. Select the shade from the list. The Shade list can be view in two ways :
1) Shade+ Shade Short Name
2) Shade Short Name+ Shade
![]() Filter Shades: Shades list can be filtered according to the number or character enter by user in Filter text box .
Filter Shades: Shades list can be filtered according to the number or character enter by user in Filter text box .
![]() How To Define New Shade: In order to define new shade press F2 > Setup Shade dialog box appears enter the Shade Name, Shade Short Name and click Ok or press Alt+O.
How To Define New Shade: In order to define new shade press F2 > Setup Shade dialog box appears enter the Shade Name, Shade Short Name and click Ok or press Alt+O.
![]() After entering all the information click on Save button or press Alt+S in order to save the record. Click Close button in order to exit from the window.
After entering all the information click on Save button or press Alt+S in order to save the record. Click Close button in order to exit from the window.
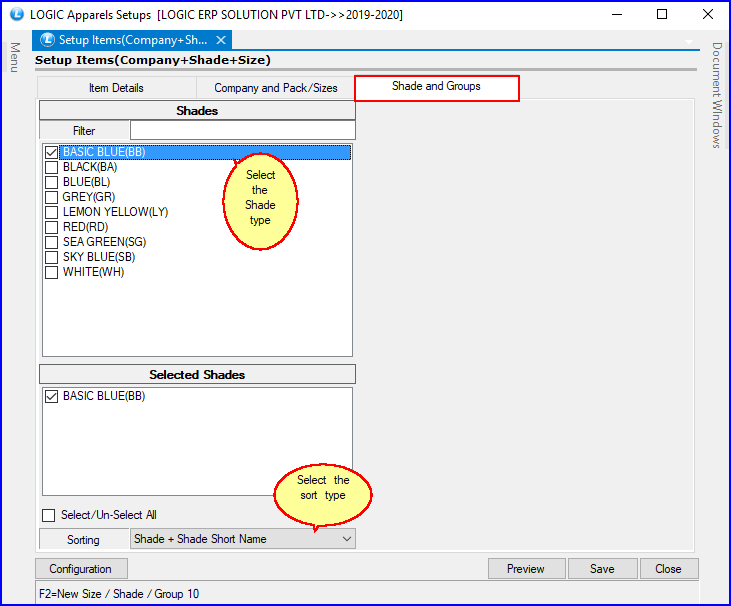
Fig 6. Shade and Groups
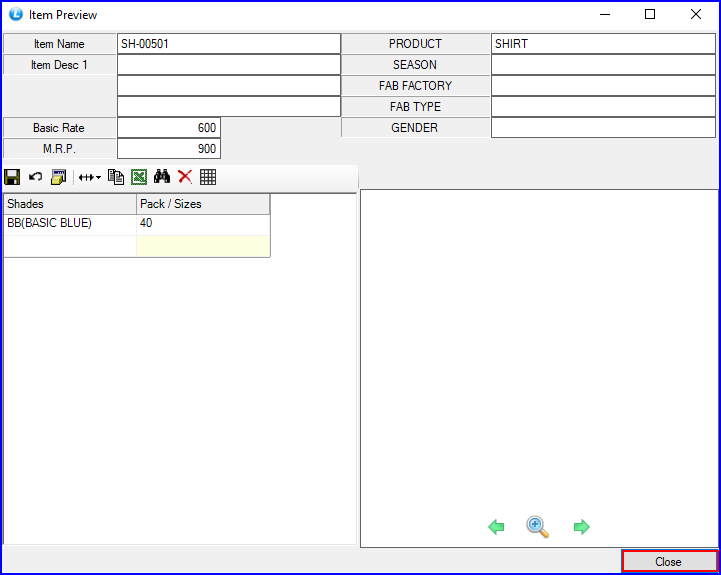
Click on Preview button or press Alt+P in order to view the preview of the selections. Click Close button to return to the main window.
Fig 7. Preview |