How to Pass a TDS Receivable Entry in LOGIC ERP (Complete Guide with Examples)

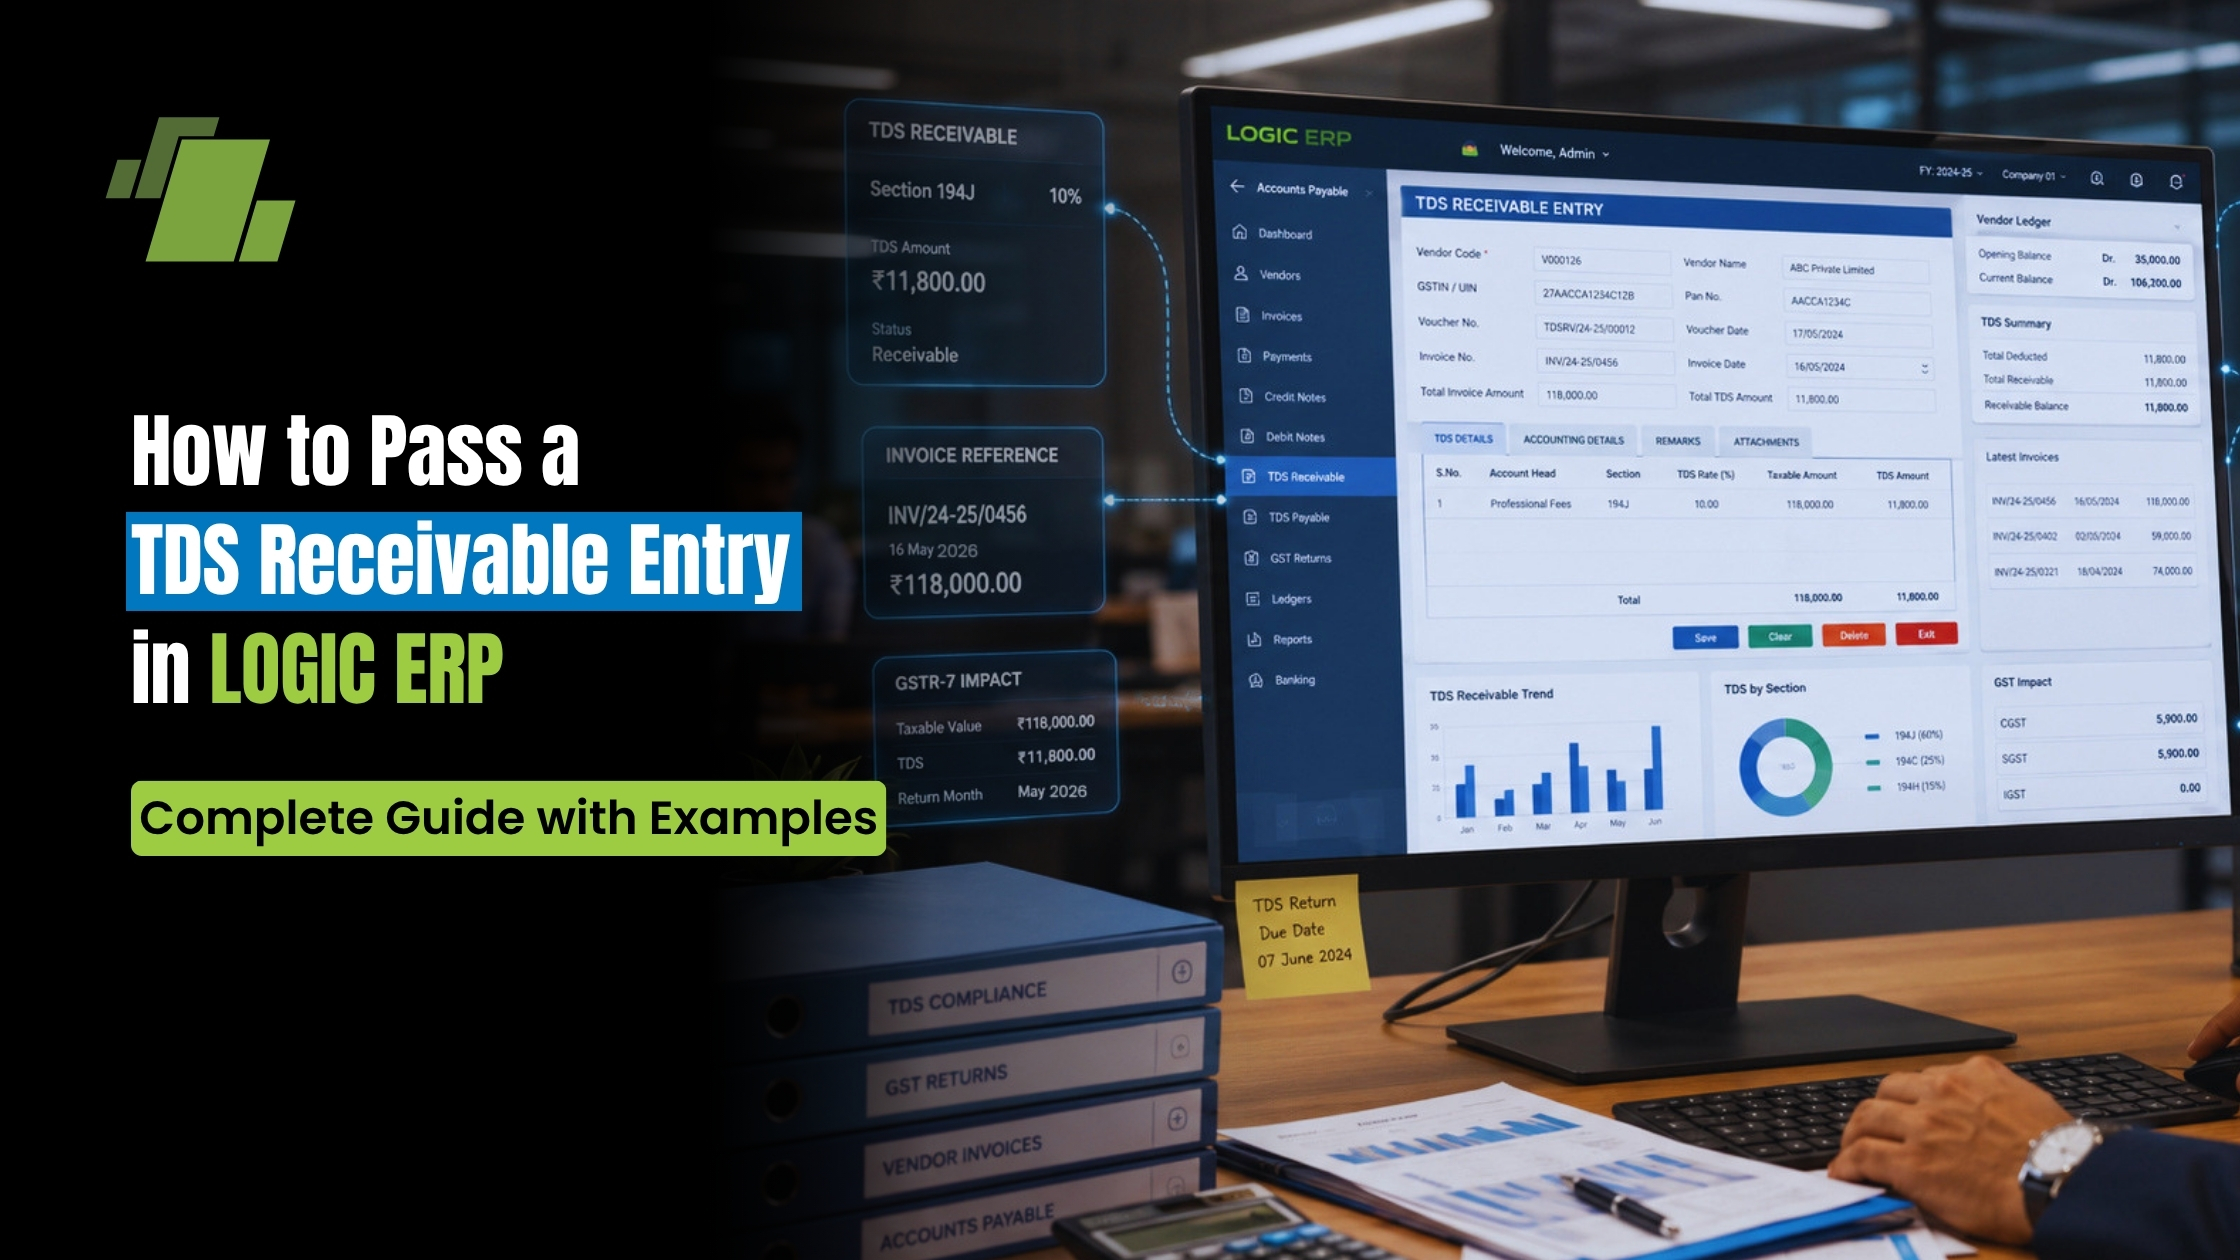
Managing TDS (Tax Deducted at Source) receivables accurately is essential for maintaining clean books, reconciling customer balances, and ensuring compliance with Indian taxation norms. LOGIC ERP now enables users to record TDS Receivable entries directly through Cash and Bank Receipts, making the process faster, more accurate, and audit-ready.
Contact Us
Free Demo Request
This detailed guide explains how to create, configure, and pass a TDS Receivable entry in LOGIC ERP, along with practical scenarios and accounting impact.
What is TDS Receivable?
TDS Receivable is the amount deducted by your customer while making payment, which you can later claim as credit while filing income tax returns.
Example:
- Total receivable from customer: ₹12,000
- TDS deducted by customer: ₹2,000
- Amount received in bank: ₹10,000
Here, ₹2,000 becomes your TDS Receivable (Current Asset).
Why Record TDS Receivable Properly?
- Ensures accurate customer ledger reconciliation
- Helps in income tax credit claims
- Maintains proper audit trail
- Prevents mismatch in financial statements
- Improves cash flow visibility
Step-by-Step: Configure TDS Receivable in LOGIC ERP
Step 1: Create TDS Receivable Account
- Go to Setup → New Account
- Create a new ledger:
- Account Name: TDS Receivable A/c
- Account Type: Current Assets
This account will track all TDS deductions receivable from customers.
Step 2: Configure Cash/Bank Voucher Settings
- Go to Cash/Bank Voucher Configuration
- Select:
- Bank Receipts OR
- Cash Receipts
Step 3: Set Default TDS Receivable Account
- Navigate to Other Options-1 tab
- Locate:
- “Default TDS Receivable A/c”
- Select the account created in Step 1
Step 4: Enable TDS Receivable Column
- Go to Column Locks
- Enable:
- TDS RECV ACT – UNLOCK
This activates the TDS Receivable field in receipt entries.
Step 5: Configure “Amount Column As” Option
You will see a new option in dropdown:
- TDS Receivable
You can choose how the amount behaves:
- Including TDS Receivable
- Less TDS Receivable
How to Pass TDS Receivable Entry
Go to:
- Bank Receipts OR
- Cash Receipts
You will now see a new column:
- TDS Receivable
Practical Example
Let’s assume:
- Total receivable: ₹12,000
- TDS deducted: ₹2,000
- Net received: ₹10,000
Case 1: Amount Column As “Including TDS Receivable”
Entry:
- Amount Column: ₹12,000
- TDS Receivable: ₹2,000
System Calculation:
- Bank Account Debit: ₹10,000
- TDS Receivable Debit: ₹2,000
- Customer Account Credit: ₹12,000
Result:
- Full receivable is cleared
- TDS tracked separately as asset
Case 2: Amount Column As “Less TDS Receivable”
Entry:
- Amount Column: ₹10,000
- TDS Receivable: ₹2,000
System Calculation:
- Bank Account Debit: ₹10,000
- TDS Receivable Debit: ₹2,000
- Customer Account Credit: ₹12,000
Result:
- Same accounting impact
- Different data entry approach
Verify Entry in Journal Report
After passing the entry:
- Go to Journal Report
- Check accounting impact:
Expected Output:
- Bank A/c → Debited (Net amount received)
- TDS Receivable A/c → Debited (TDS amount)
- Customer A/c → Credited (Total invoice amount)
This ensures:
- Accurate ledger posting
- Proper financial reporting
Key Benefits of TDS Receivable Feature in LOGIC ERP
Accurate Accounting
Automatically splits received amount and TDS component.
Simplified Data Entry
Direct entry through receipt vouchers—no manual journal needed.
Better Compliance
Maintains correct TDS records for tax filing.
Improved Reconciliation
Matches customer balances with actual receipts and deductions.
Audit-Ready Records
Clear tracking of TDS deductions across transactions.
Best Practices
- Always create a dedicated TDS Receivable ledger under Current Assets
- Verify TDS entries in journal reports regularly
- Use consistent Amount Column As configuration across users
- Cross-check with Form 26AS / AIS statements for reconciliation
Common Mistakes to Avoid
- Not creating TDS Receivable account correctly
- Entering full amount without capturing TDS separately
- Misconfiguring “Amount Column As” option
- Skipping verification in journal reports
Business Use Cases
Service Providers
Track TDS deductions from clients for professional services.
Contractors & Consultants
Maintain accurate receivables where TDS deduction is common.
Enterprises & SMEs
Ensure compliance and proper accounting across multiple customers.
Conclusion
The TDS Receivable entry feature in LOGIC ERP simplifies the process of recording tax deductions while ensuring accurate accounting and compliance. By configuring the system correctly and using the appropriate entry method, businesses can maintain clean financial records and avoid discrepancies during tax filing.
Whether you choose “Including TDS” or “Less TDS”, LOGIC ERP ensures the final accounting impact remains accurate and transparent.
Call at +91-73411-41176/75 or send us an email at sales@logicerp.com to book a free demo today!
FAQs
Q1. What is the correct account type for TDS Receivable?
It should be created under Current Assets.
Q2. Can I pass TDS entry without journal voucher?
Yes, LOGIC ERP allows direct entry through Cash/Bank Receipts.
Q3. What is the difference between both entry cases?
Only the data entry method differs; accounting impact remains the same.
Q4. How do I verify TDS entries?
Check the Journal Report after passing the entry.

Author
Gurbir Singh
Co-founder & Managing Director | LOGIC ERP Solutions Pvt. Ltd.
With 30+ years of experience in the tech industry, I took the helm of technology & product development, ensuring LOGIC ERP’s continuous innovation & leadership in the evolving tech landscape.